It’s another year of my favorite holiday appetizer! I’ll be making double or triple batches this season. Check it out below!
If you’re looking for an appetizer that’s sure to impress, you’re in the right place! This one’s creamy with a sweet heat and all the right holiday flavors. But I’m no food blogger so I’ll cut straight to the chase and give you the recipe… if you like a little story with your recipes, feel free to read the second half of this post for how this recipe came to be.

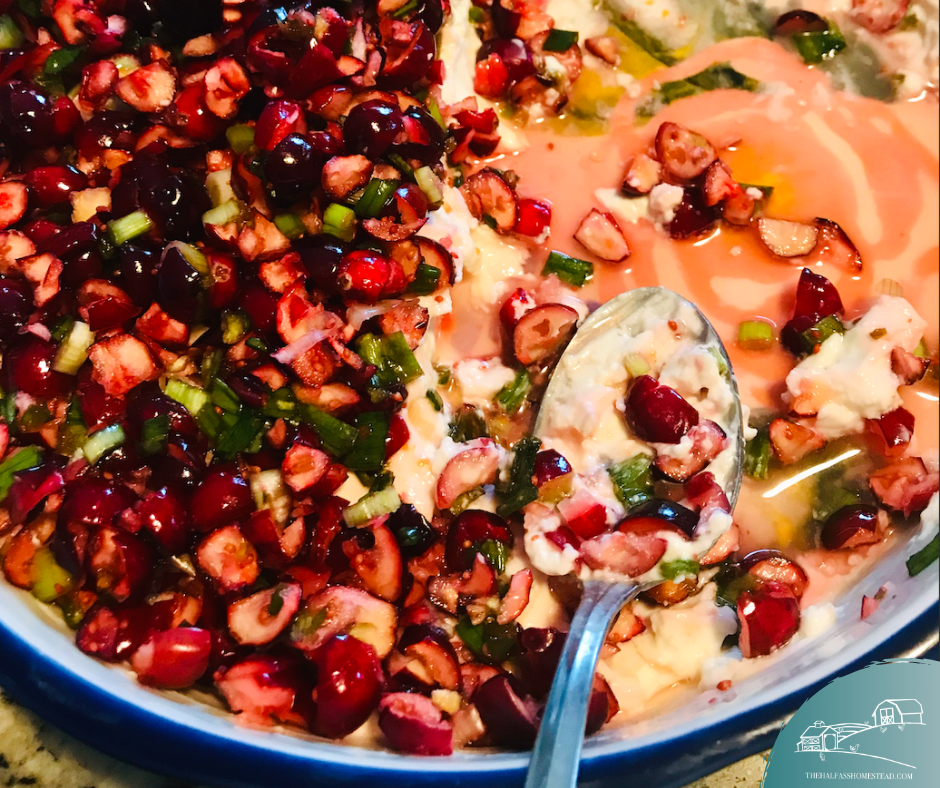
Cranberry Heat Dip
Prep Time: About 20 minutes
NOTES:
- This recipe requires that you let the ingredients rest in the refrigerator overnight for the best flavor.
- This recipe gets it heat from Serrano peppers, which are hotter than jalapeños (about 5xs hotter). Don’t worry, the citrus from the orange with the cream cheese cool it down. If you’re heat sensitive, you can try using less Serranos. If you’re a heat-weeny, you can sub them for jalapeños.
INGREDIENTS:
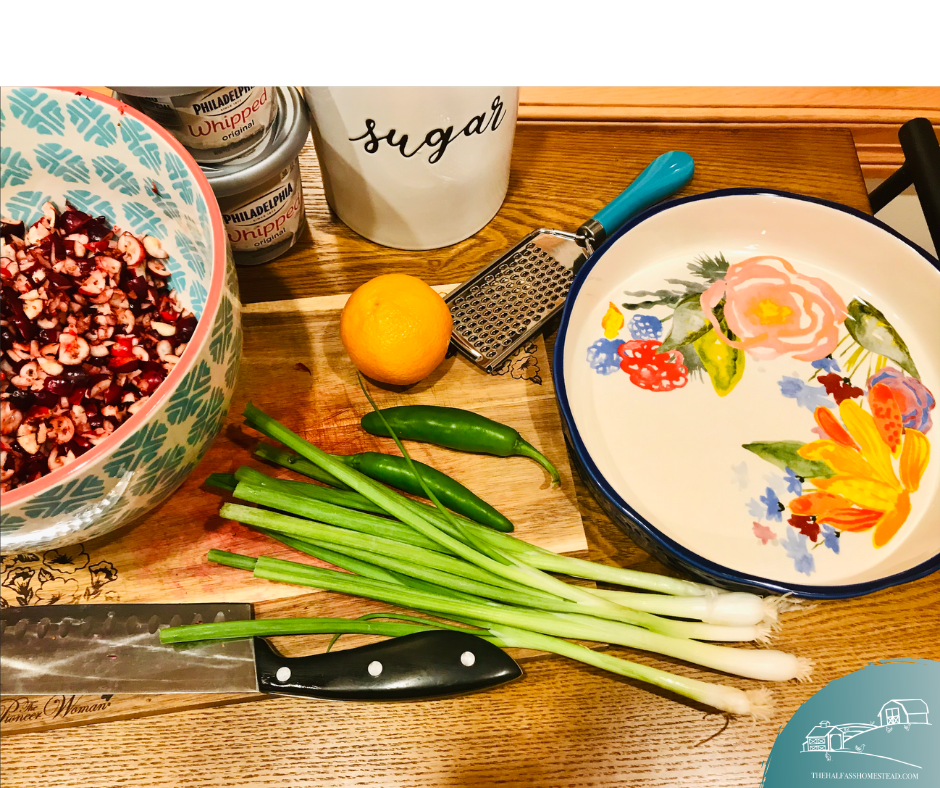
- 12 oz fresh cranberries, uncooked
- 2-3 Serrano peppers (depending on your heat preference)
- 1/4 cup green onions
- 1 cup sugar
- 1 orange
- Pinch of salt
- 16 oz whipped cream cheese
- Crackers (I like Triscuits or Ritz)
TOOLS:
- Knife
- A nice pie dish to serve your dip
- A medium bowl
- A spoon or rubber spatula
- A zester (or a fine cheese grate will work in a pinch)
- Colander
DIRECTIONS
- Chop your cranberries. If you have never chopped fresh cranberries before, you’ll find these boogers can be messy. You don’t need to chop them all individually but you want to avoid any whole cranberries.
- Dice the Serrano peppers and chop the green onions.
- In a medium bowl toss in the cranberries, peppers, and onions. Combine the mixture with the sugar and salt
- Zest your orange into the bowl then cut it in half and squeeze the juice into the bowl and stir well incorporated.
- Cover and place in the refrigerator overnight.
- The next day, remove the bowl from the fridge and give it another good stir.
- Spoon the whipped cream cheese into your serving dish.
- Pour the cranberry mixture into the colander to strain the excess juice.
- Pour the strained cranberry mixture over your whipped cream cheese. Cover and put back in the refrigerator if not serving immediately.
- Serve your dip with crackers and a spoon to help spread onto crackers.
- Enjoy!
The Story
As we all know, 2020 has been one giant shitstorm. The impact of COVID-19 has lasted much longer than we all anticipated and has overshadowed the winter holidays. Despite celebrating much smaller than usual and a day later, we still planned to have the traditional dinner at Thanksgiving with a few family members. A few days before Thanksgiving we were invited to celebrate over dinner with our good friends the Sickles. Having the main, sides, and desserts covered, Rachel asked if I could bring an appetizer. Well, turns out I’ve never made an appetizer for a holiday meal!
So I did what anyone does when searching for inspiration… I hit Pinterest. This Cranberry Jalapeño Dip caught my eye so I had Sr. pick up the ingredients during a last minute run to the grocer. Sr. couldn’t find jalapeño’s so he brought home Serranos. My friend Carlos once told me that Serranos we much better than jalapeño, with better heat and flavor. To be safe I only used 2 Serranos, since they can be significantly hotter than jalapeños.
Additionally, we’ve been binge-watching the Kids Ultimate Holiday Baking Championships. So with the inspirations of great flavor pairings and Grace’s desire to zest every orange she sees like the kids on t.v., we decided to replace the lemon in the original recipe with orange.
This dip was a HIT y’all! The creaminess of the soft cream cheese, the sweet tang of the sugared cranberries and orange, and the slow heat of the Serrano make it pure joy. It was so good I let the Sickles keep the rest and made another dish the next day for dinner at our house. Sr. mentioned that it could be a but hooter so the second time I used an extra pepper and will use 4 the next time.