


Nursery Reveal!
It’s been nearly three months since we’ve brought Bladen home and I’m excited to finally share my new favorite room in our home!
The nursery took me much longer to put together than nurseries in the past, in part due to lack of energy and in part due to putting together some special touches, like a gallery wall of art made by each family member ❤️. It has become the place we come for quiet snuggles and read-alouds– especially when the hot or cold weather keeps us from our other favorite space for this, the sunroom.
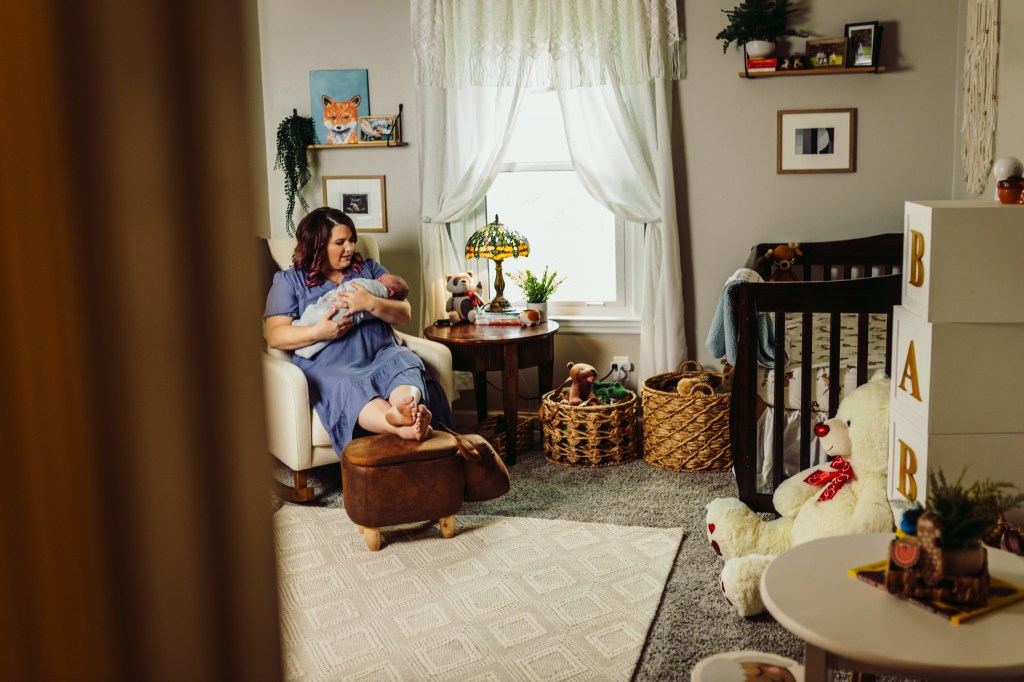
The nursery is located between our master bedroom and the girls’ shared room. Like the other bedrooms in this 1970’s home, there are no overhead lighting fixtures–just natural light and light from lamps. Despite that, it’s on the sunnier side of the house and gets great light throughout the day. Since we left the gender of this little one a surprise, I wanted to design a room that would be special, regardless of gender. Inspired by the beautiful outdoors we’ve cherished more since moving to Ohio, we decided on a woodland theme, complete with natural light, woods, and touches of greenery.
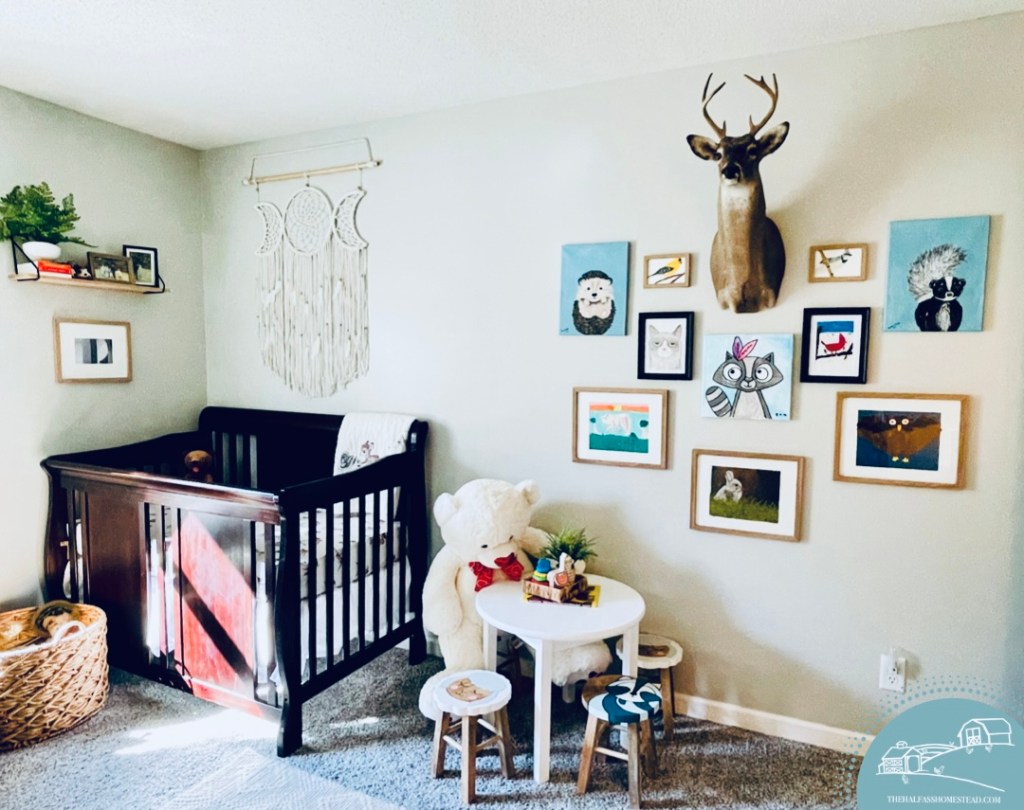
CRIB
Despite having rid our storage of ALL the baby things when we thought we were done growing our family, we held on to the crib we used with all 3 kids…until last year when our friends were surprised with the news of a fourth on the way, shortly after their third. When we shared the news of our pregnancy, the first thing they did was insist we take our crib back. The timing was perfect given that their third would be moving to a toddler bed and their fourth could move into his big sister’s crib. Now, while there isn’t anything particularly special about this crib we purchased 12-13 years ago from Target, its dark finish is marred with scratches and teeth marks– teeth marks made by each of our three children. Brian, Ella, and Grace spent nearly every night and nap of their first few years in this crib, so it’s pretty special that our last child gets the same experience.

DRESSER
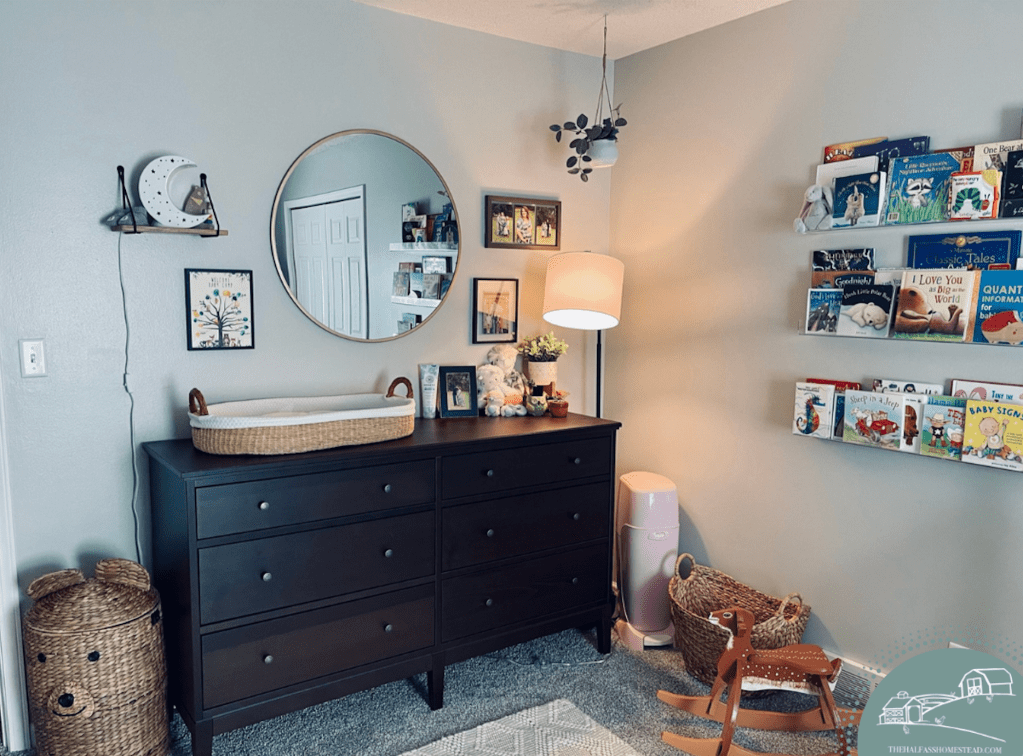
When looking for a dresser, I knew I wanted one that would grow with the space as the child does and serve as a space for diaper changing in these early years. I found this sleek, budget-friendly dresser at Ikea and I am pleased with how well the dark finish pairs with the crib. Even better, it has plenty of storage for all the little clothes, diapers, burp cloths, and baby linens. I don’t even use the closet for anything other than clothing he’s far from fitting into.

BASKETS, CHANGING BASKET, AND BASSINET
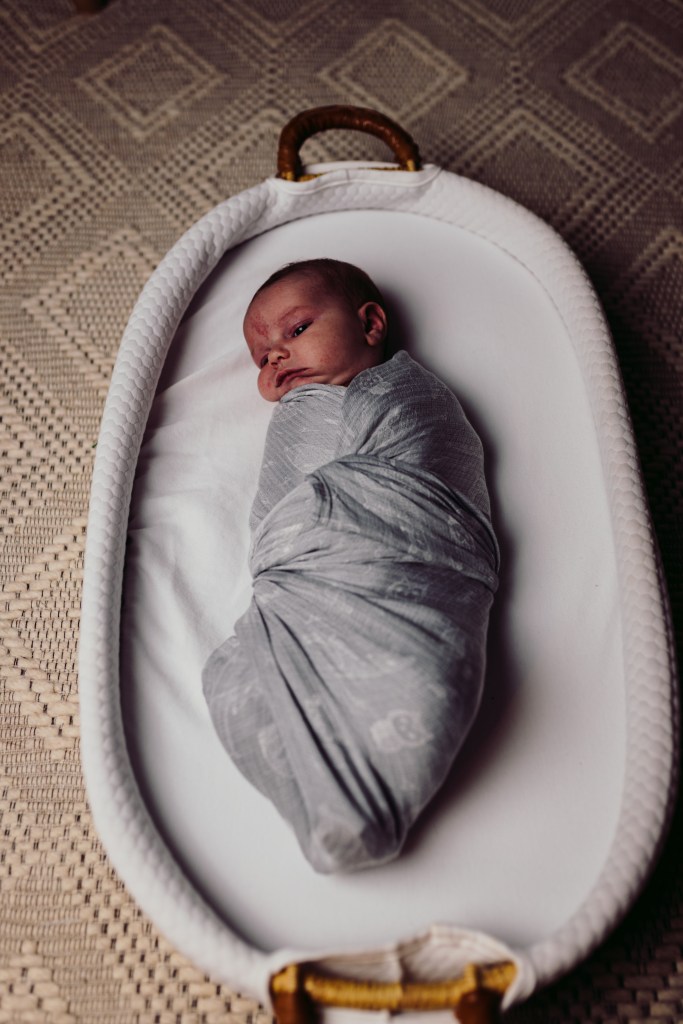
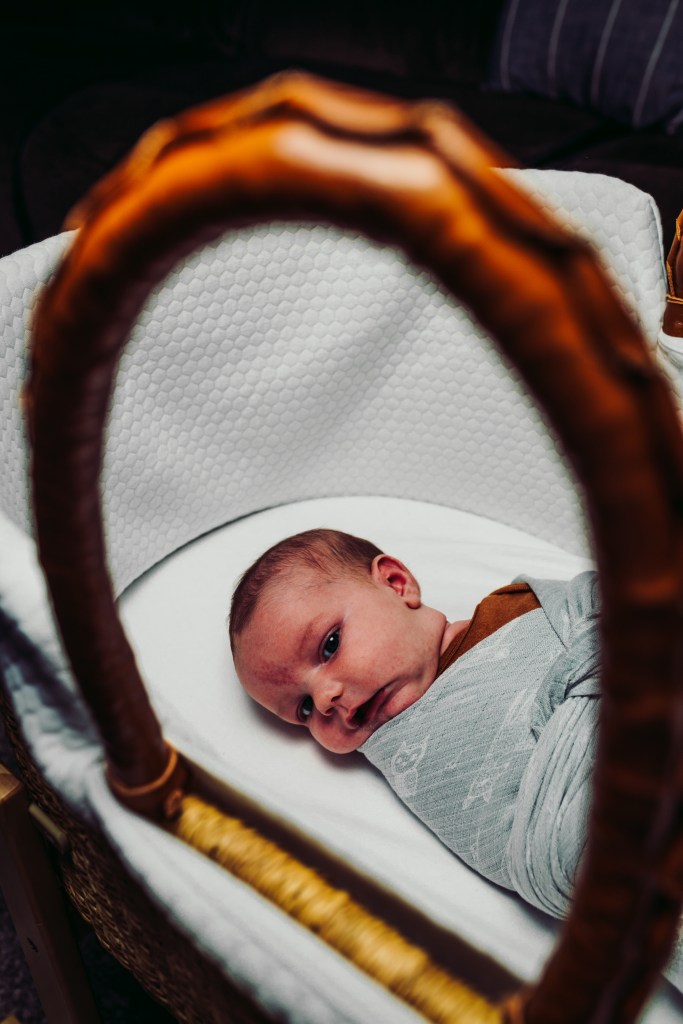
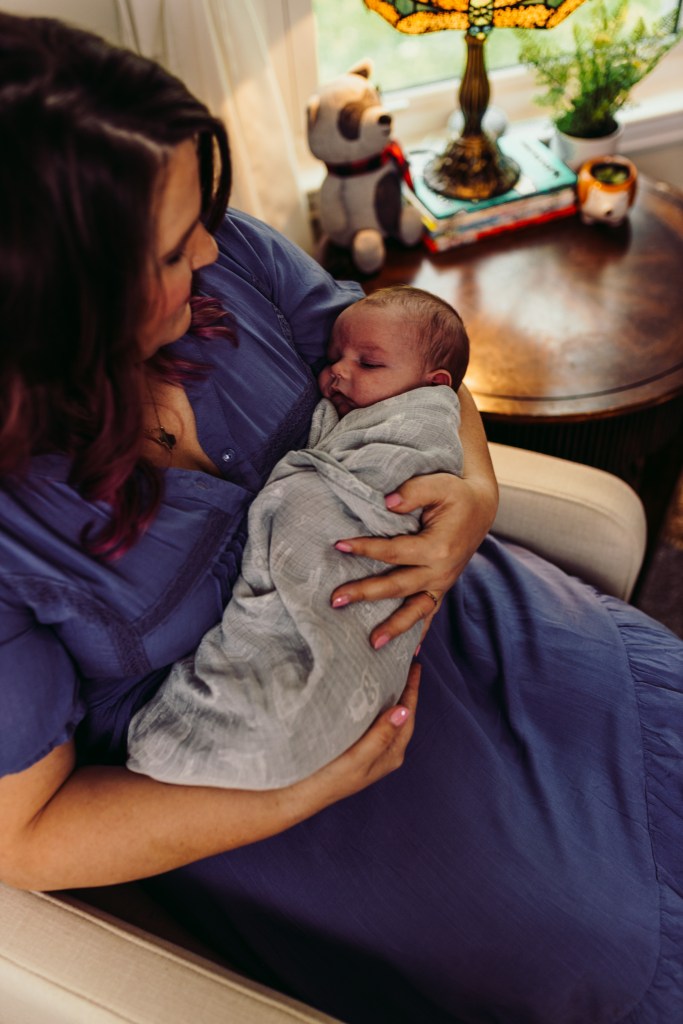
One thing that has really spoken to me lately is natural wood and woven baskets. I may be a little obsessed. Baskets are actually the first thing I purchased for the nursery when they showed up on shelves at our local TJ Maxx several months ago. You can see them scattered throughout the room. They serve as storage for playthings and hold essentials for nursing/feeding and changing. I also couldn’t resist this precious changing basket and bassinet combo from Design Dua. Since I had to have a c-section (due to a difficult and nearly tragic delivery of our firstborn) and we have a split level home, the bassinet lives in the living room and sometimes the dining room where I’ll work from time to time so naps can happen close by if needed. While Blade truly prefers his own crib for sleeping both the changing basket and the bassinet came in handy during our newborn shoot and made for some precious photos!


CHAIR
I’ve never had a nursery chair–well, not a real one anyway– so I decided to splurge a bit on this part of the nursery. I wanted something modern and comfortable; something I could see putting in another room in my house when it was no longer needed in this room. I wanted it to rock and have a high enough back that I could sleep in it if needed. I originally purchased a dark blue chair from Wayfair but was underwhelmed with it when it arrived, realizing it was more of a grandmother’s chair–old-fashioned and hard, perfect to wear a divet in the seat in while crocheting and watching wheel of fortune or soap operas, not one for nursing and rocking a newborn babe in. Luckily, the chair came with a missing rocking leg and the manufacturer couldn’t replace it so, I was reimbursed for the chair. (Wayfair customer service is fantastic by the way!) Instead, I purchased this adorable longhorn (at least that’s what this Texan is calling it) footstool, and a few other items for the house. My continued search brought me to this eco-friendly, cream rocker from West Elm Kids. This chair is perfect and will withstand stains for years to come. Blade has already tested it with some spit up a few times and it wipes right off. I have also found myself enjoying many naps in this chair in the few months I’ve had it. Alongside the chair is an old side table with a mid-century feel from my house in college and a Tiffany-style lamp gifted to me a few years ago by my Mom–dragonflies are her favorite– and I love the soft, warm ambiance it provides when the sun is down.


GALLERY WALL
For each of the kids, I’ve painted something to go along with the decor. When I began my paintings for this nursery, the kids asked if they could create something as well. ❤️ Each picked their own subject (staying with the theme) and inspiration for the process. For the girls, it was Eric Carl while Jr. chose a mentor image on Pinterest. It was Ella’s idea to put all the pieces together as a gallery. They liked it so much that they asked to add more so they created some drawings and paintings of our favorite birds. With one spot left, we challenged Sr. to create something for the wall. In true Sr. fashion, he took the challenge and did his own thing–if you knew him, you’d know the grumpy cat is his spirit animal 🤣 Read more about this project in my nursery sneak peek post. I can’t wait to add Bladen’s work on this wall as he grows.
FLOATING SHELVES
If you read my earlier post and sneak peek, you know what a pain it was for Sr. to install these shelves. The installation was rather easy, the pain just came from the fact that he hates putting holes in walls. 🙄 However, I LOVE how it turned out! I even made Sr. put up a few more shelves for some greenery and knickknacks. These wood and iron-look shelves came from Target’s Magnolia line (another little homage to our Texas roots).
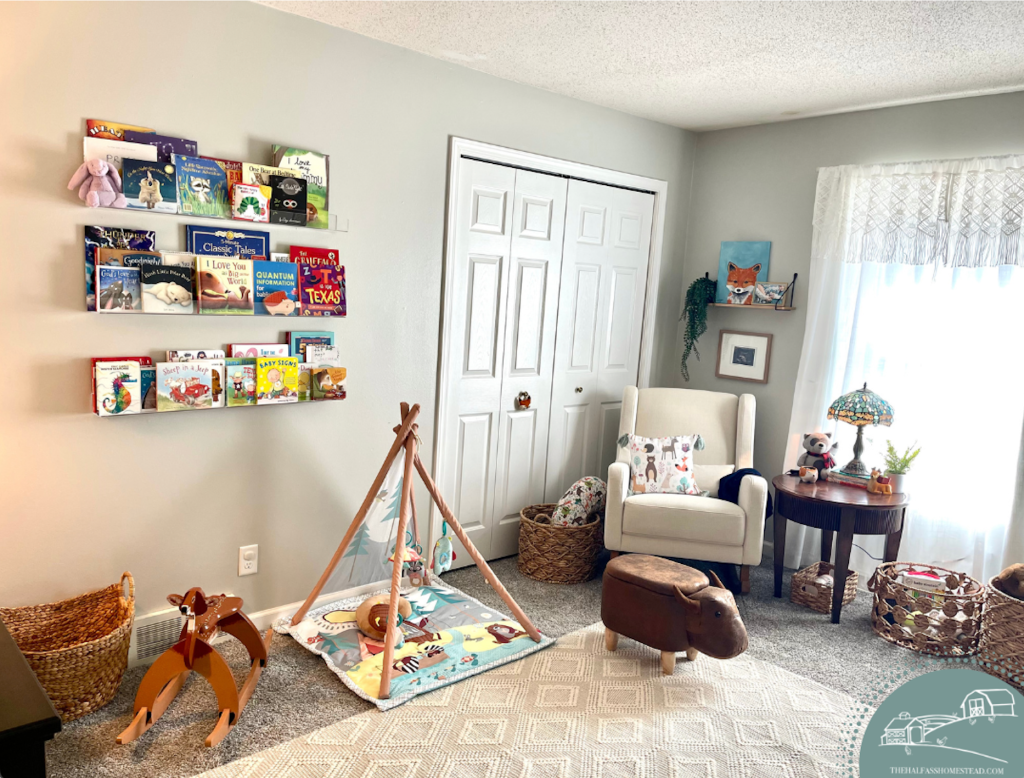
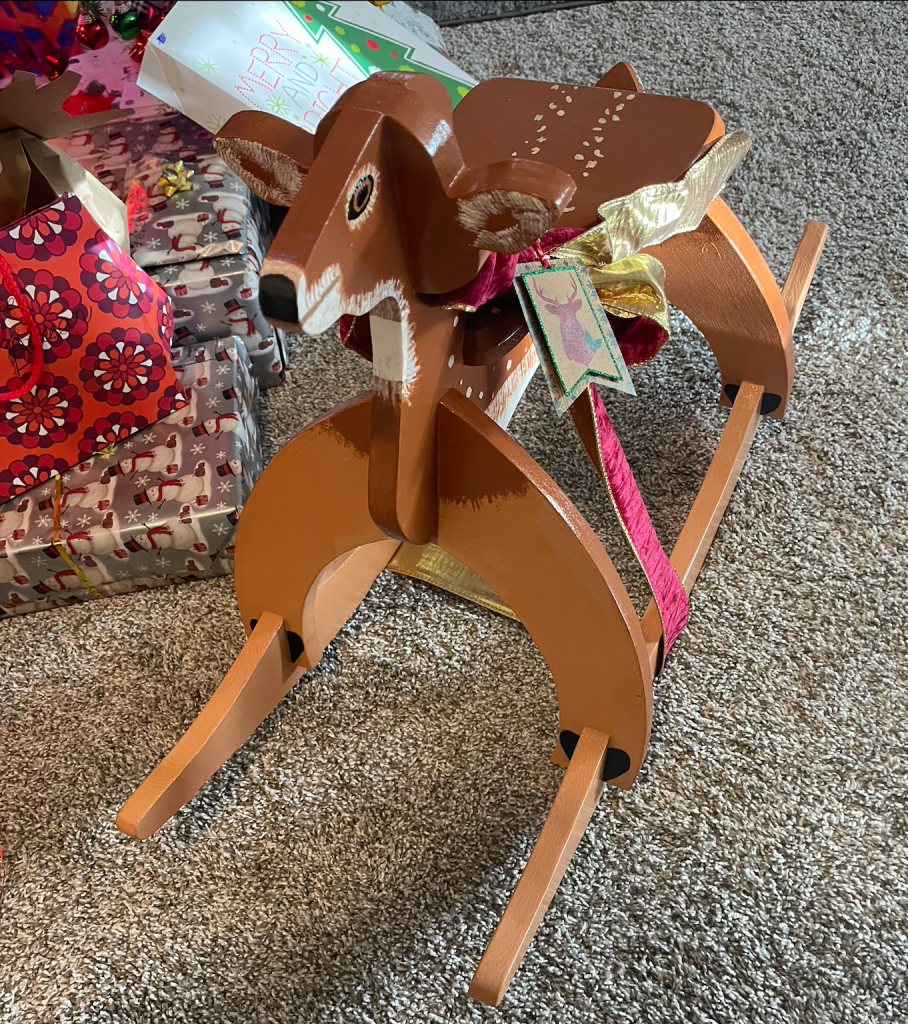
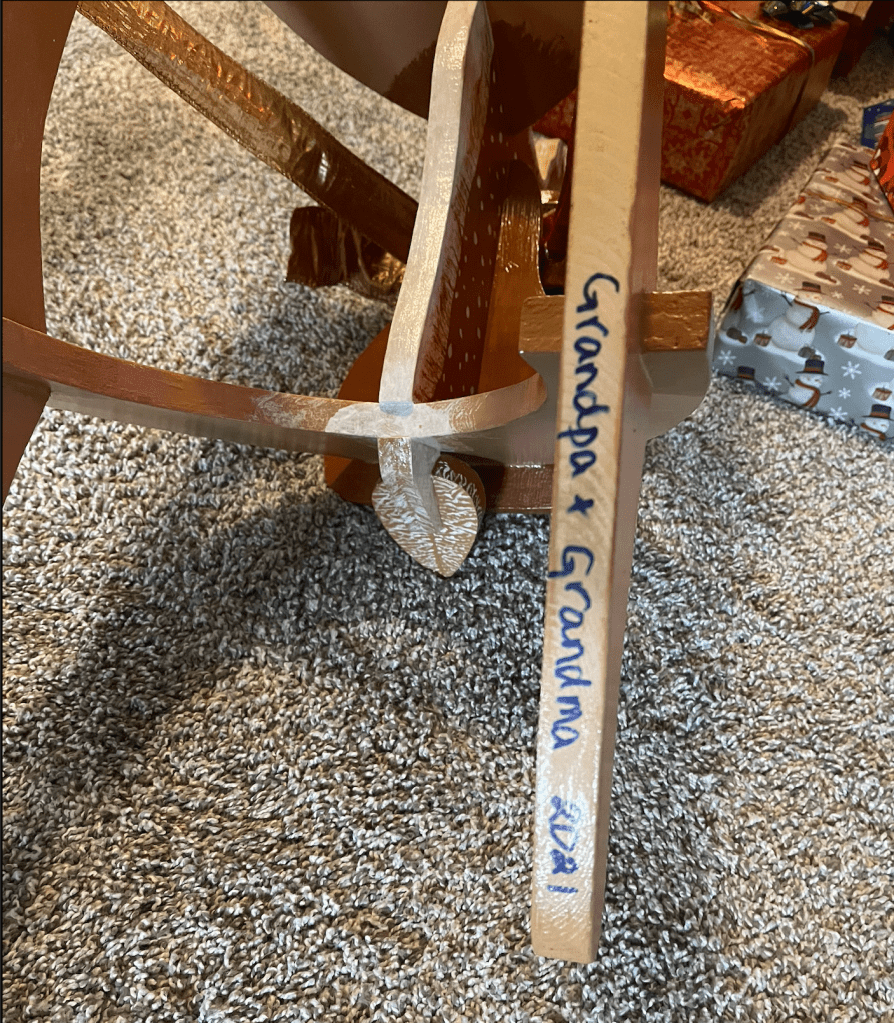
PLAYTABLE and ROCKING DEER
Lastly, and perhaps most special are the custom-made pieces from Papa Jeff. First is the darling rocking deer he surprised us with at Christmas. Handmade and painted by Papa himself. Jeff struggles with Parkinson’s, so to see such detailed woodworking and painting from him is amazing (you should see the moon-shaped gliding bassinet that he made for Brian’s sister, Mary). I also asked Jeff to make a small paytable to go with these cute raccoon stools I scored for $14.99 at the Home Goods store. A plain white table was a pretty boring project for Jeff, but it’s the girl’s favorite place to sit in the nursery.
So, that’s the nursery! I’d love to know your favorite par – there are too many for me to choose from!
Special thanks to Butcher & Co. Photography for the beautiful newborn photos of our family!


Nursery Sneak Peek
Y’all. This nursery has come along WAY slower than I would like. Partly because I either don’t have energy, can’t make a decision, or I’m waiting on someone or something. Anyway T-minus 23 days and it’s ALMOST done. Possibly the most exciting thing, these acrylic floating shelves for books.

I’ll tell y’all something, it KILLED Sr. to put those nine holes in the wall for these but I absolutely LOVE them.
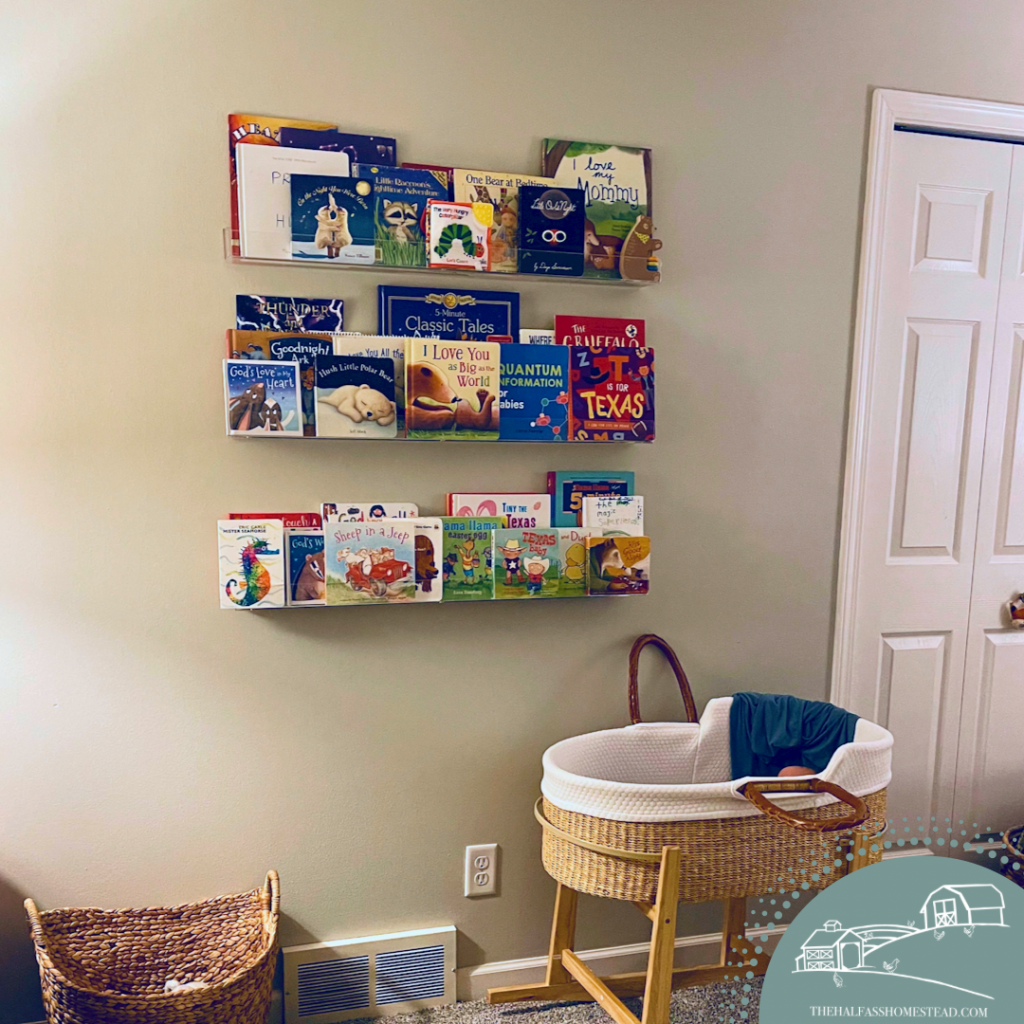
Now on to the rest of the walls and finishing touches. And I cannot promise there won’t be more holes 😜
Shared Girls Room Refresh
Last month we decided to do a BIG refresh to our home and replaced all the old blue carpet in our home. Y’all! There was a different kind of carpet (8 different shades of blue) in nearly every room and hallway in the house when we moved in. It was an eyesore–all stained from foot traffic and spills that had accumulated since it was put in some time in the 80s or 90s. It’s been a game-changer… and exhausting as we’ve packed away most of the house in 10 days, painted rooms and trim, and put it all back together after the install. One of the main reasons for the new carpet was so we could move the girls into a shared room and convert Grace’s old room into a nursery for our upcoming arrival.
Back in Texas, the girls–just 2 1/2 years apart in age–shared a room but when we moved to Ohio, each girl got their own room. Though they enjoyed their own spaces, they’ve often had sleepovers in each others’ rooms and occasionally discussed going back to a shared room.
When Grace was upgraded from a single twin to a twin bunkbed last Christmas, the sleepovers increased and so did the talk of “moving in” together. However, it wasn’t until we found out we were pregnant this summer, that the idea of moving them back in together was taken seriously.
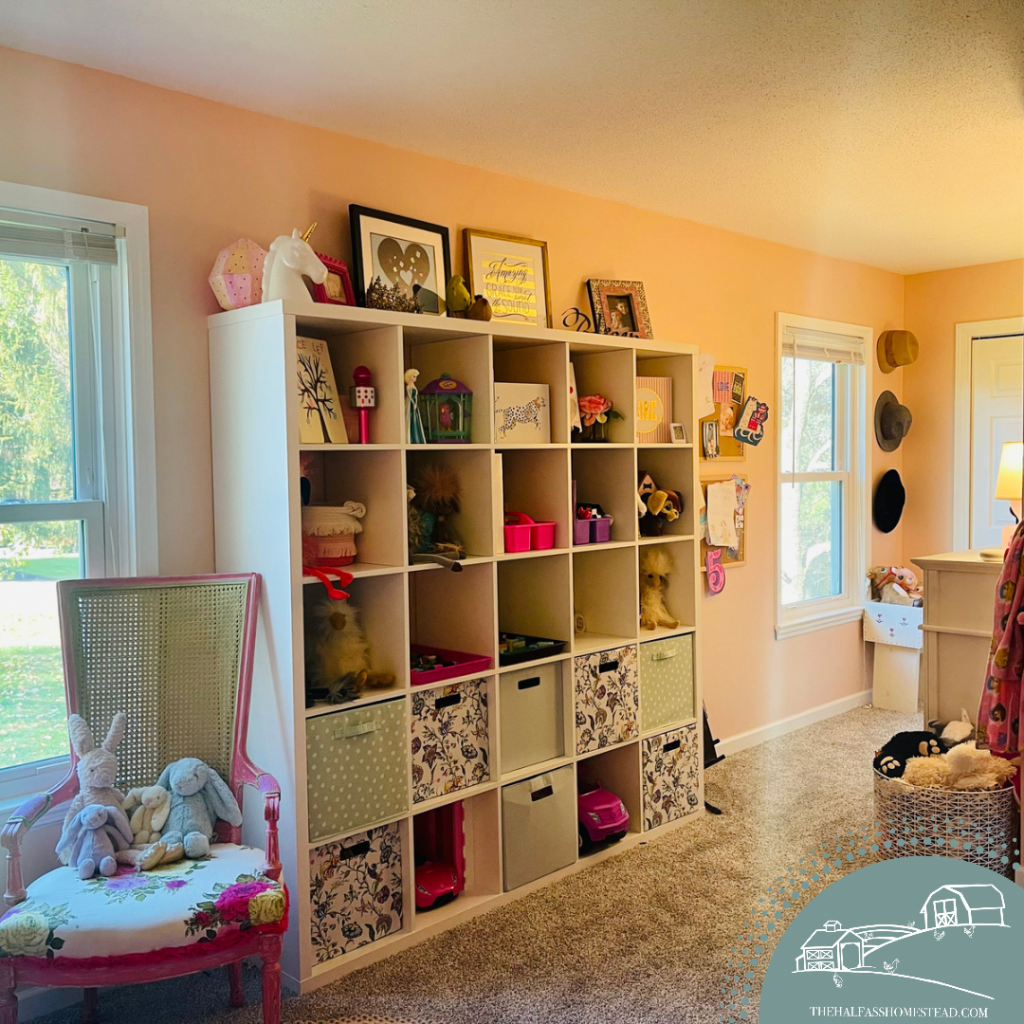
The girls immediately began planning, taking over my interest to look for inspiration. Their only must-have–a play kitchen. Mine, plenty of storage to keep their abundance of toys OFF the floor and out of sight. I also wanted to find a way to show off their collections of hats, books, and stuffed animals as well as provide each of them their own special spaces.
It’s been a few weeks since the carpet install and we still have a little more to do but we’ve finally gotten to a place where we have something to show y’all!
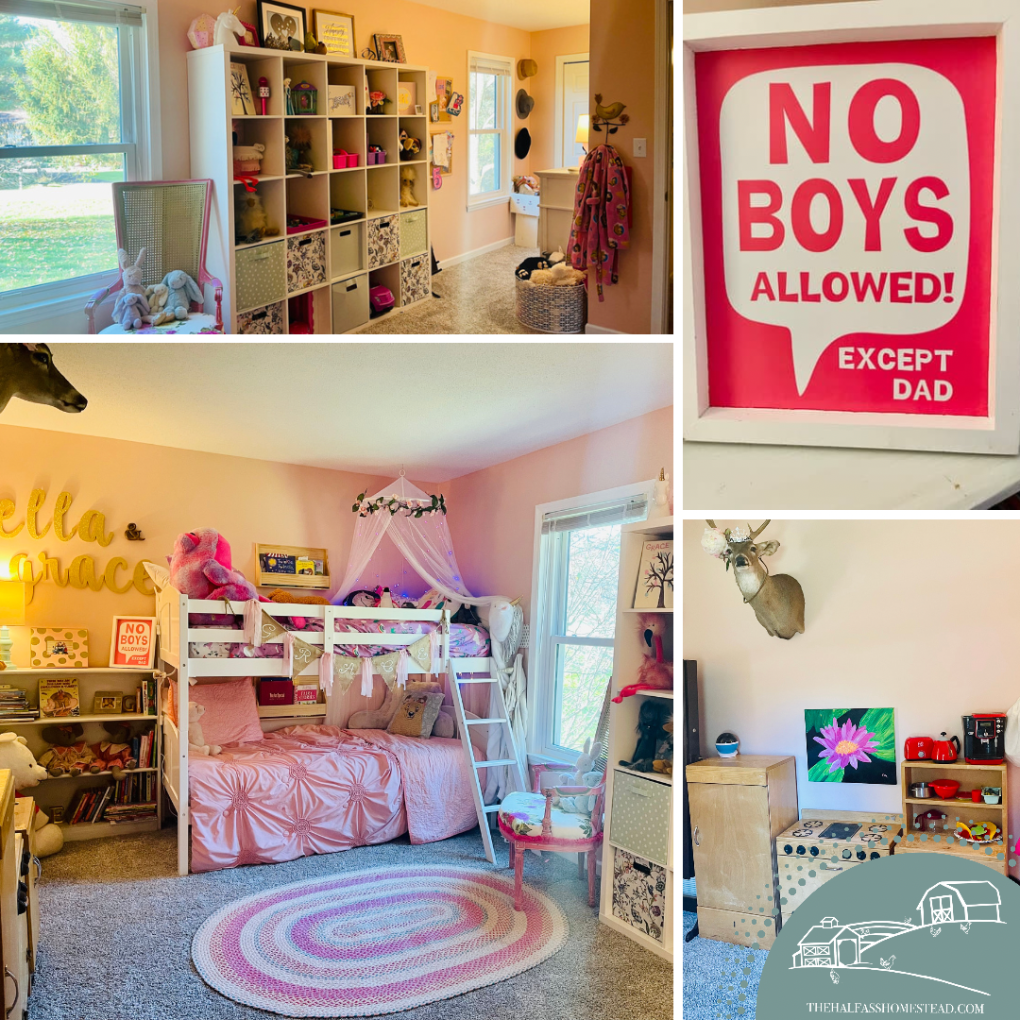
We’ll start with my favorite part: this wall storage system from IKEA.

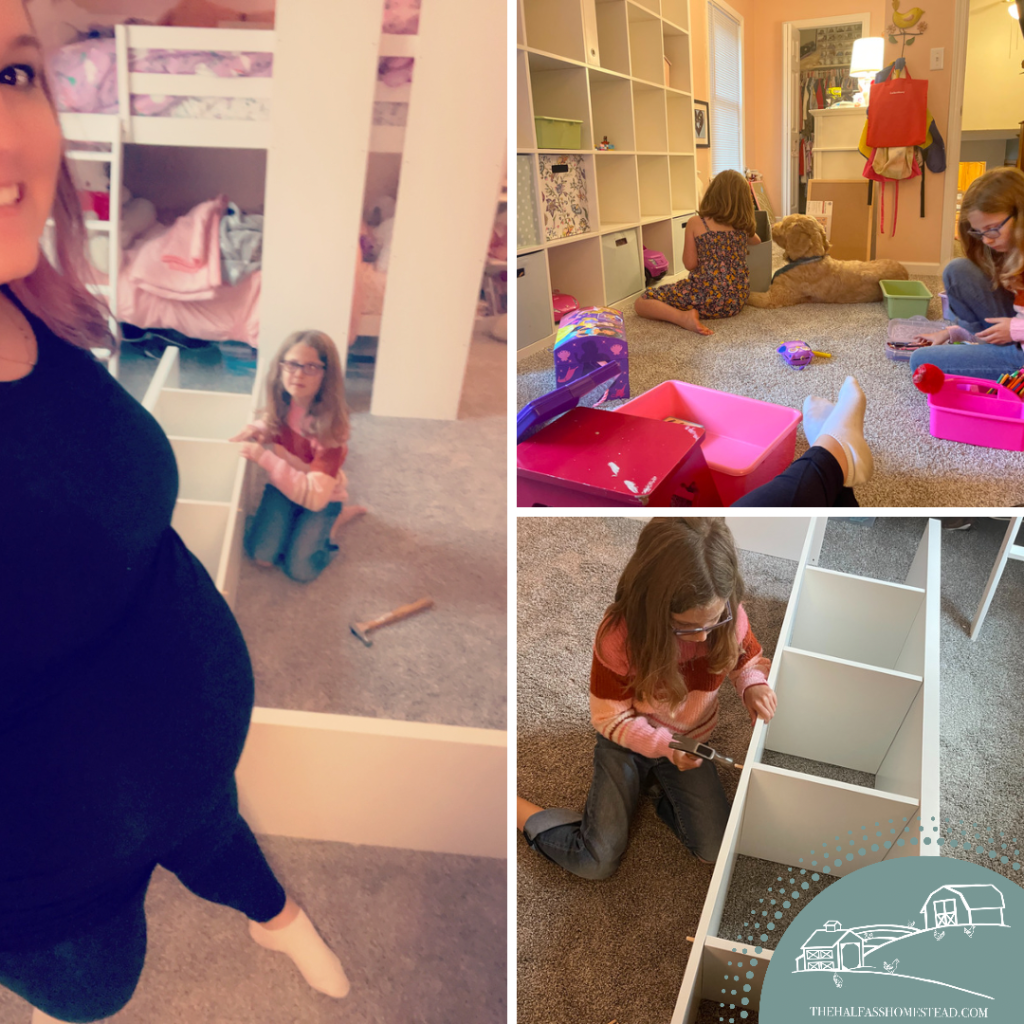
There are several different sizes and configurations of the Kallax systems. I actually went a size up from what I planned and I am so glad I did! It was also super easy to put together. Ella and I did it all ourselves and only needed Sr. to secure it to the wall.
New carpet was a GREAT motivation to go through toys and clothes but we still had lots to find practical solutions for. What I love about this unit is I can use bins to hide, I mean “store”, toys but we can also display special things at the same time. The bins also help the girls keep things sorted and easier to find. And the BEST part? The girls can easily move the bins to wherever they are playing and put them back all on their own. The toys have stayed OFF the floor since we set up the unit, so I call that a #MomWin!
Next up: the library and bunkbed. The girls both LOVE to read and had stacks of books everywhere in their old rooms–bed, floor, shelves… so it was important to make sure their bookshelf was easy to access and that they had a dedicated space for their current reads by their beds as well as good lighting. Last year, I got this three shelf bookshelf off my local Buy Nothing Facebook group and whitewashed it. By some miracle, it fits perfectly in the space next to the bunkbed.

The girls call it their “library” and Ella loves to sit right by the shelves and read. They also enjoy sitting in this beautiful, refinished vintage chair by the window. Truth be told, I tried to get rid of this a week ago, thinking there wasn’t room for it in their room. I finally got tired of it being in our dining room waiting for a buyer and put it here temporarily but it works out perfectly, so it’ll be staying!

Since the girls like to do a lot of nighttime reading, I found them their own little wall bookshelves for their bunks at Target.
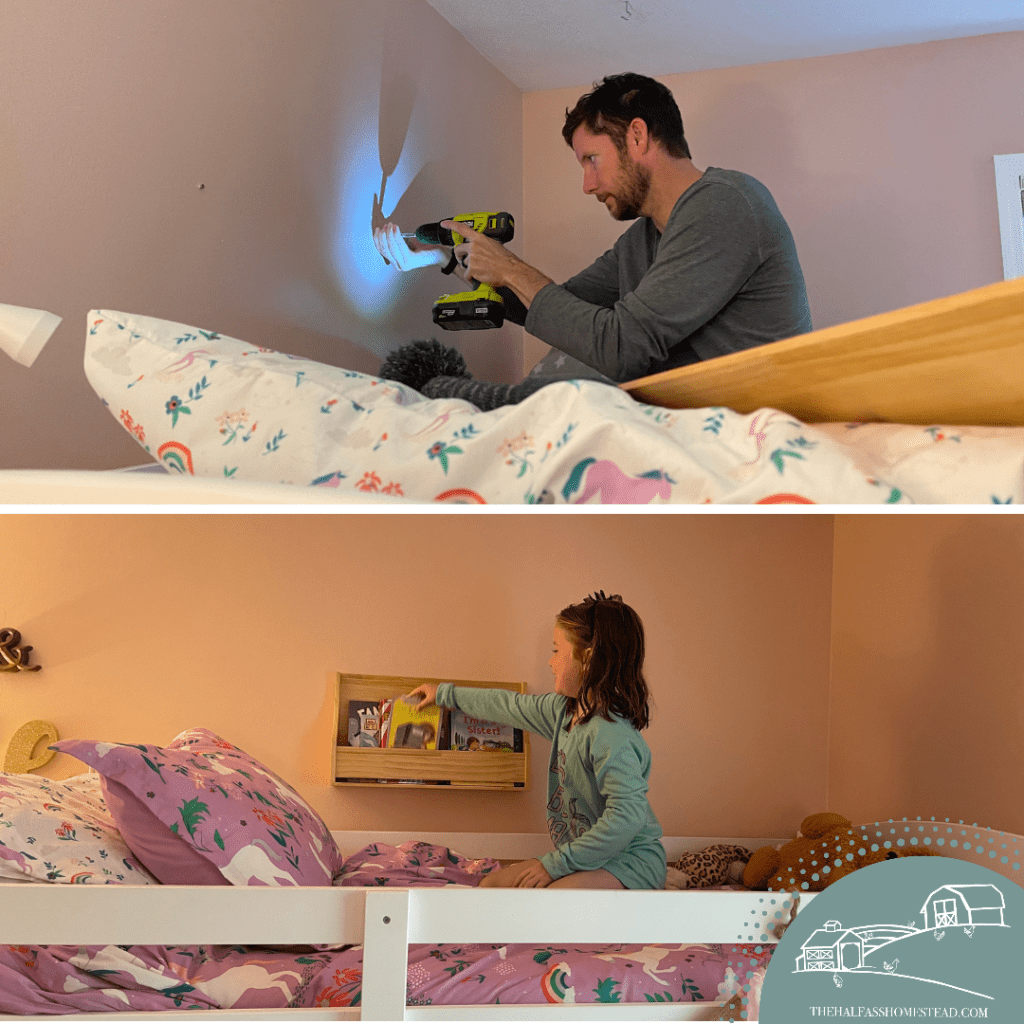
I also found these great little reading lights at Ikea to clip onto their headboards. The bunks are also each girls’ little piece of private real estate in the room so we added some special lighting and comfy pillows at the foot of the beds to add another space to sit for daytime reading. We reused the mosquito net canopy from Ella’s old room and Grace tszujed it up with a strand of floral garland we had in the basement. Each girl picked out their own lights while at Hobby Lobby the other day–llamas for Ella and an ombre curtain for Grace that looks so great with her canopy. These were around $12 each and are battery-powered.


Now that the days are colder and shorter, I foresee many hours spent on these bunks, with the lights aglow, reading. ❤️
Next up, the girls’ kitchen! As I mentioned, this was a must-have for the girls. They had many grand ideas for a custom build that Papaw and Sr. would have been obligated to create. Thankfully, we scored a well-built wood kitchen from the children’s room in our church when they decide to upgrade. I used Murphy’s Oil to give it a good cleaning but the plan is to paint it (when I have the energy).

I may also have Sr. build a simple base for it to make it a bit taller for my tall girls. The girls have their “fridge and pantry” stocked–mostly with homemade felt food, and a bin of larger cooking and baking playthings in the wall unit. They often play house and restaurant. The service is great, but a little pricey 😉
Lastly, Ella has quite the collection of vintage and straw hats–thanks to GiGi and Papa–and Grace isn’t far behind. For a few years, they’ve been stashed in the closet but we found some fun ways to display a few. the rest are in the dress-up bin in the wall unit. The hats on the wall are just hung with a simple push pin but I’d love to find some cool hat racks for a neat display with the rest of the vintage hats above their dresser.

All-in-all, aside from the cost of the new carpet the wall unit, two wall bookshelves, and bunk lighting, we didn’t have to buy anything else for this refresh–just some cleaning, combining, organizing, and moving!
Still to come for this room: window treatments– I personally LOVE these but Ella turned it down quickly–, bunk curtains for Ella to give her some requested privacy, possibly a new rug, and the painting of the play kitchen.
Stay tuned!
– Cory
Finishing touches!
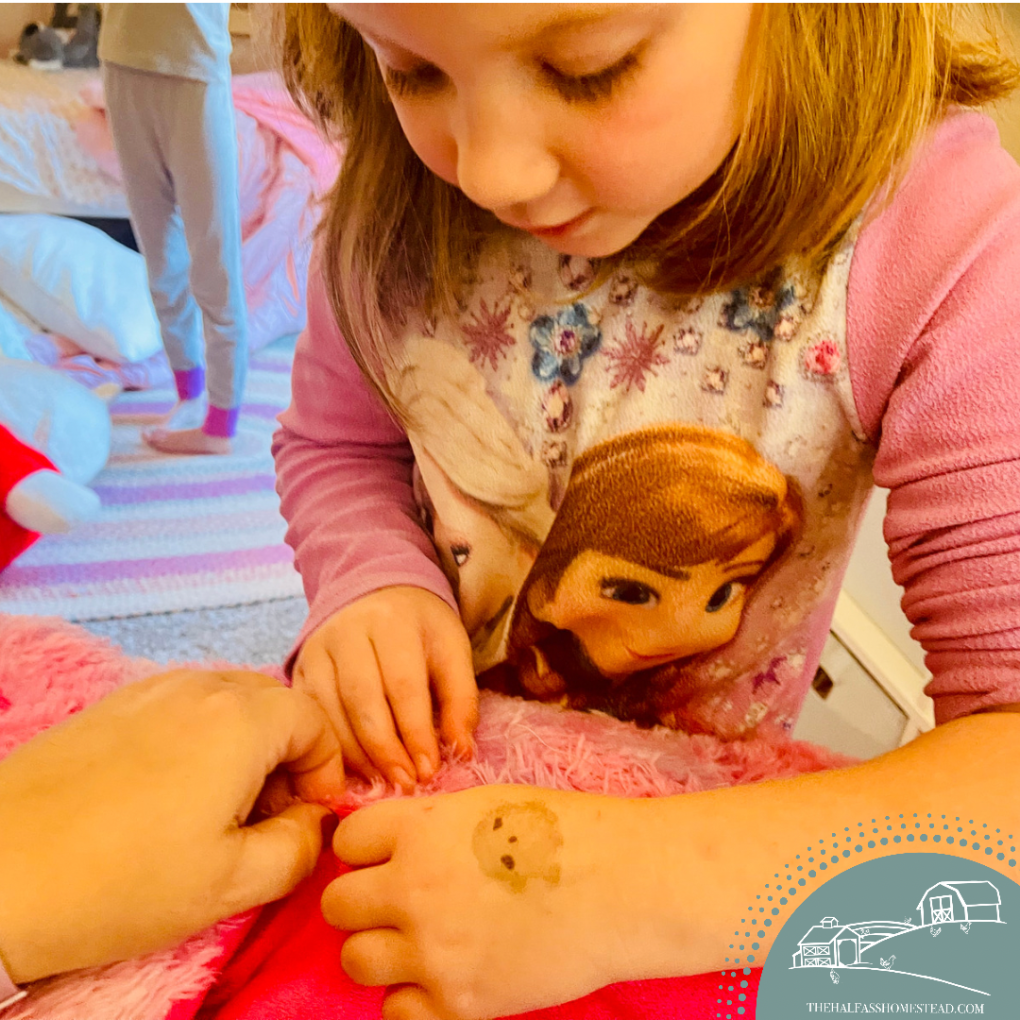
Today we worked to put the final touches (for now) on the girls new shared room. Including putting some life back into some favorite oversized animals. Grace learned to do some simple sewing. We’ll be sharing more on the blog tomorrow!


The Green Dream

Meet my latest antique beauty, The Green Dream.
Seriously, y’all, not only is this chair gorgeous, it’s comfortable enough to sit in for a little reading, working, and napping.
I found this beaut on the local Facebook selling wall a few days before Christmas and begged Sr. to let me get it. Merry Christmas to me! (I have such a wonderful husband.)
Photo Credit: Simple Homme, LLC
This vintage textured chair and ottoman by Bernhardt/Hibriten is in perfect condition; the wood has the perfect amount of wear and patina which gives it so much character. I’ll admit, I never imagined finding so much fondness for a piece with textured green upholstery. Maybe a deep jewel-toned green, but not this green – it’s kind of a vibrant olive green meets chartreuse.
Once we picked it up, I knew exactly where I wanted to put it – in the sunroom, snug in a sunny corner in the backdrop of my zoom calls. The color is the perfect compliment to the greens and yellows in the floral motif on my darling mid-century sofa. This also gave me perfect inspiration to rearrange and the sunroom, which is an ongoing work in progress fro me. *Updated pictures coming soon*.
It seems to hug you into its lap as you descend into it – similar to the way that first sip of coffee tastes oh-so-good – you just melt right into it. I can spend the whole day in this chair. Really the only thing keeping me from doing so is the cold temps. The sunroom is not an all season room, though I wish it was, and lately poor heater cannot keep up with this year’s low temps long enough for me to get more than a few hours in there.
I cannot wait for spring and sunny days, sipping sweet tea, lemonade, or a frozen ‘rita. Until then it’s a few hours with a heavy blanket and hot beverage.
Falling for Silver
As I shared in another post, I’ve come to love finding beautiful pieces to add to our home. From furniture to stemware, these vintage pieces are adding a bit of character, comfort, and even class to our home. In addition to furniture, I’m becoming quite fond of crystal and silver pieces. Silver is something I’ve always had but never really cared for until recently. I just didn’t have much use for it and it didn’t go with anything else we owned. When I was a teenager my Mother and I ventured into an antique store while visiting family in Washington state. She found a silver-plated tea set that she insisted on buying and having shipped home to Texas. She was so excited and said it would be given to me when I got married. I didn’t understand her enthusiasm but weeks later a large white box was delivered to our door and sent straight to the attic with all the other new and old treasures Mother was storing away for when she had grandchildren.
After Sr. and I married, Mom brought me my silver set the first time she came to visit our first home (a rental then). I had no idea what to do with it. Over the past 13 years, that ray and tea set has been either hidden away in a cabinet or on a shelf as a poor attempt to decorate; only to be dusted once in a while and polished even less. I even acquired a silver urn/bucket somewhere along the way.
While I’ve found some function for the tray from time to time – only when I want to feel fancy – I’ve been hesitant to use any of the teapots given they have some tarnish and I have no idea how to properly clean them for serving drinks and not killing someone.
Maybe I needed to become a little more “refined”, my first few silver hairs, or just the right inspiration but this Christmas I finally found a purpose for that beautiful old silver.
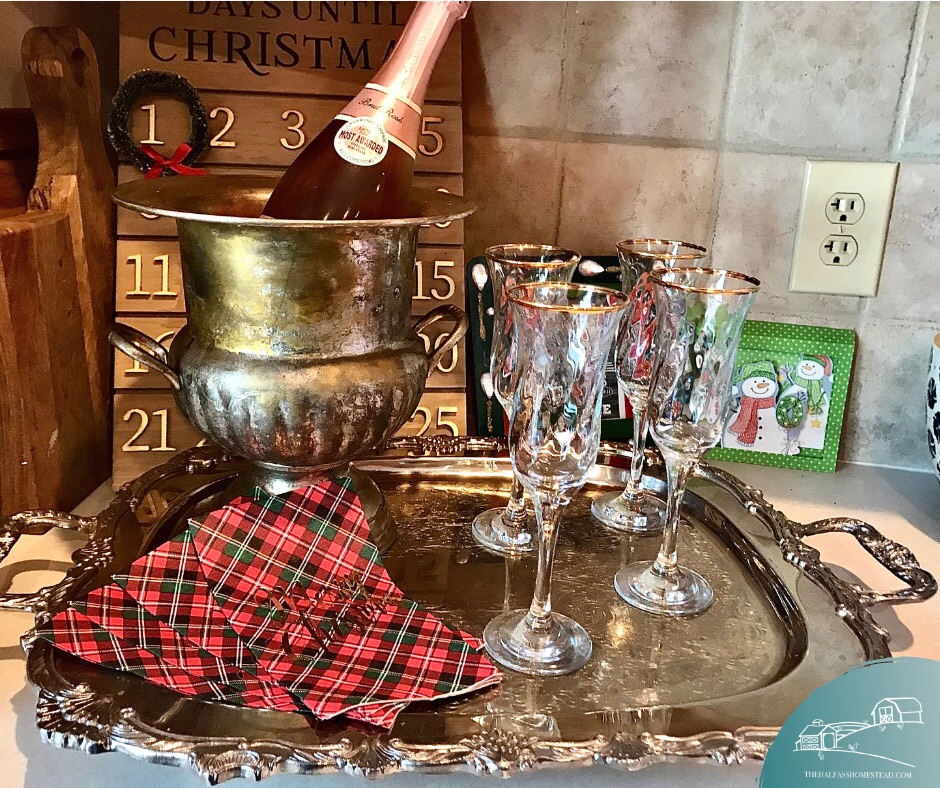
As I was setting everything out for mimosas for a small Christmas brunch we hosted last month figured I could use the silver urn as an ice bucket. This decision was then followed by searching if this was actually what this urn was for and how to clean the tarnish FAST without polish.
I just loved how the Mimosa station turned out with the silver tray and urn.
The mimosas were pretty delicious too!

Since then my Pinterest has been flooded with pins like “Ideas for Decorating with Silver” providing me with new ideas and ways to clean and care for my old silver.
Oh, and I finally found a great way to display at least one of my pieces, the tray. It adds some vintage interest to the collection of cutting boards and serving trays on my counter. How do you display/use your silver?

Oh! And if you have any tips for me on caring for silver/silver-plated service ware, put them in the comments! I am all ears!
Vintage Drawer to Ottoman Project
I’ve been working on my glass porch/sunroom makeover since late Fall. It all started with a darling mid-century sofa with an eccentric floral print. I recently got a gorgeous vintage chair that paired beautifully with the sofa and really made the room feel like it was coming together. The only issue was the coffee table, a Marshalls find from October, was too heavy for the room and didn’t seem to fit. Besides, we used it more for propping our feet on than holding items. I moved the coffee table to Grace’s room and swapped it for a great side table with mid-century vibes that I’ve had since my college years.
Of course, this still left us with nothing to put our feet on – and with my new chair’s comfortable matching ottoman the sofa seemed the less desirable seat in the room. I really felt we needed a light colored ottoman, preferably with storage for blankets. Then I remembered the drawer I had in the basement. It had been sitting on the floor for two years now, since last Christmas when we removed it from the vintage vanity we got Ella for Christmas. Both girls were dying for a vanity, like Fancy Nancy. I found a beautiful vintage vanity about an hour away.
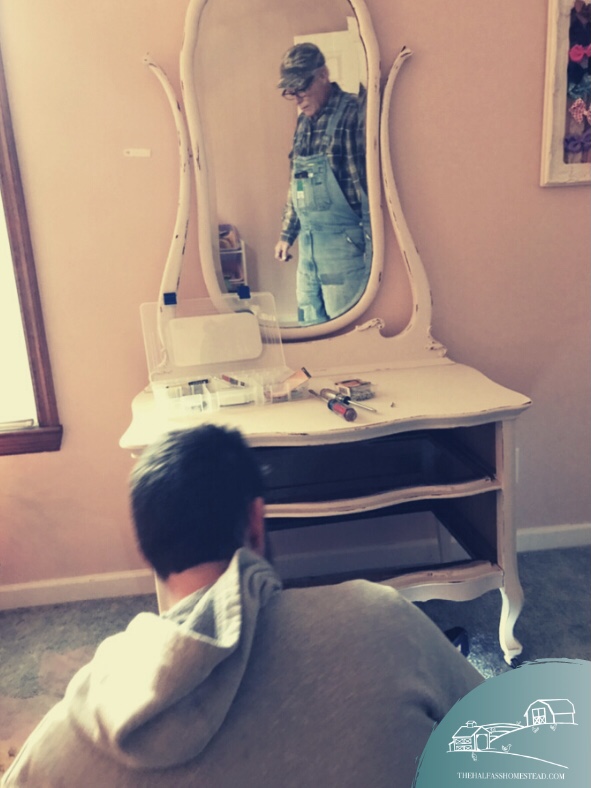

When we got it to Ella’s room Christmas afternoon, the bottom drawer had almost no more stability left and was barely functional so my father-in-law, Jeff, recommended we just remove the bottom drawer and leave the top on. My Mother-in-law, Becky, told me to keep the drawer and do some kind of up-cycle project with it, like a shelf or something. I didn’t see the vision she had at the time but I kept the drawer and bottom molding anyway. It’s been tucked away in a dark corner of the basement ever since–holding my favorite cowboy hat of Sr.’s and a few old frames. I actually only remembered it because I stubbed my toe on it while trying to hide gift for Christmas.
Anyway, I thought this might be the perfect base for an ottoman. Originally I considered a tufted look like this ottoman I found on Pinterest, but quickly pulled myself back into reality. I mean, it was a few days before Christmas! Who was I kidding? I was giving no more than a half-ass effort at best. Also, I had no idea what I was doing when it came to upholstery and tufting seemed a little too advanced.
The next day, I took my brother Josh (Josh was here for Christmas!) to the hardware and fabric store. I spent more on the one yard of “high density” 3″ foam than I did anything else.
For this project I used:

- 24 x 32 inch precut plywood
- metal brackets and hardware
- chalky finish spray paint in Antique white
- 1 yard 3″ high density foam
- 2 yard upholstery fabric (more than I needed but it was on sale for $9.99!
- Cotton batting
- spray adhesive
- 4 4″ table legs
- rotary saw
- bread knife
- power drill
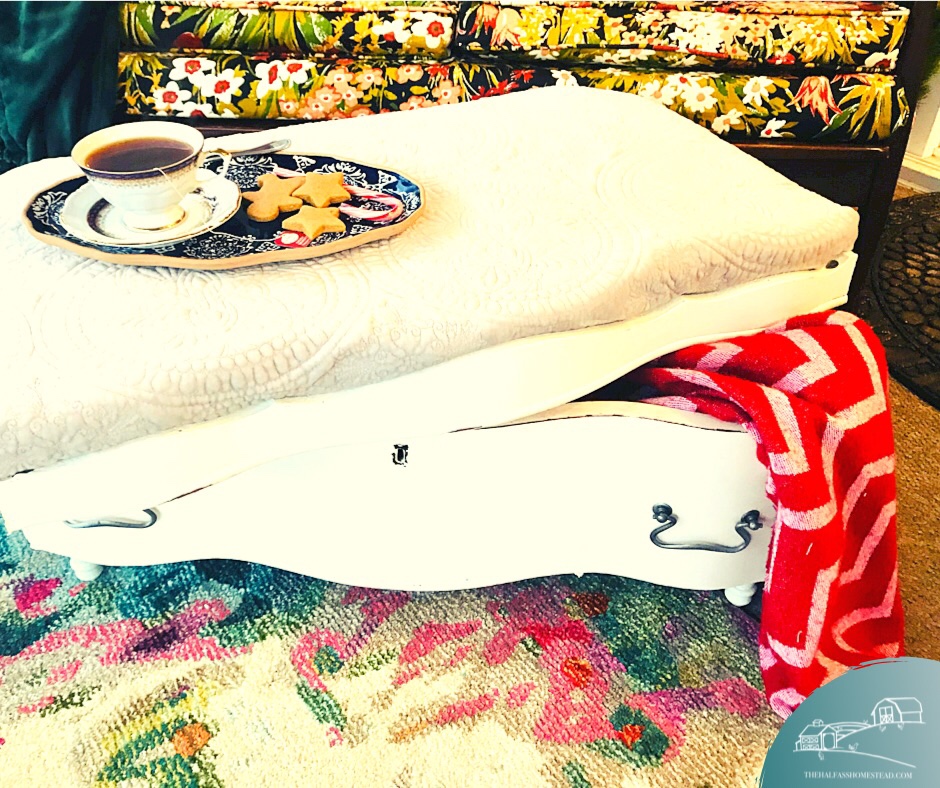
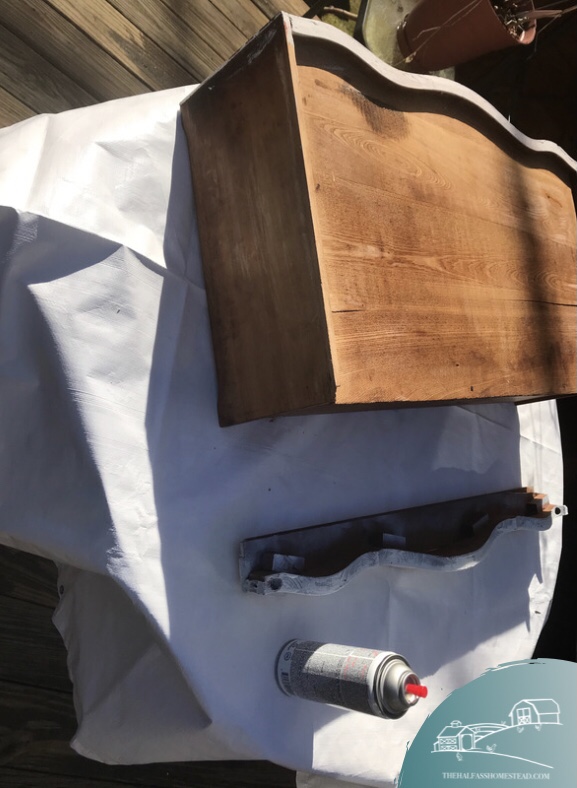
First, I measured and cut the plywood down. This would butt up against the back of the moulding and serve as the lid. Then I used the spray paint to paint the bottom of the board, the legs and the other 3 sides of the drawer, the front was already painted. It was the perfect mild, sunny December day for sippin’ whiskey and watchin’ paint dry.


Once everything dried I traced the lid on the foam and used a bread knife to cut the foam into shape. There with blocks supporting the lip on the molding I needed to cut out as well.

Next was measuring my fabric and batting. I had been thinking about how I’d attache the cushion to the lid all day and still hadn’t decided but felt like I could try to attach it with the spray adhesive first. Of course, this meant that I’d have no great way to stretch the fabric over the foam. I tried it anyway but ended up with more mess than success. My finger kept sticking to the spray trigger and ripping it off the bottle. I felt like Clark Griswold trying to read the magazine after handling the Christmas tree.

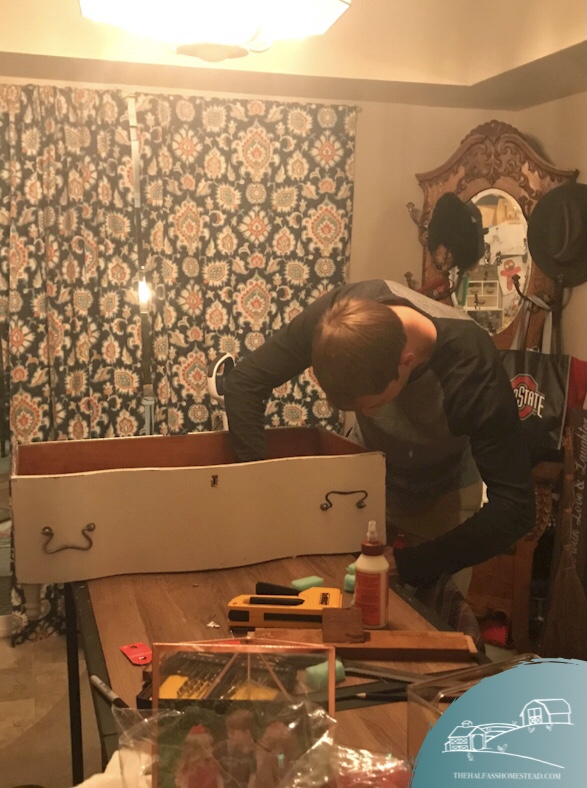
Not only that but the velvet fabric was too bulky for the adhesive, or my patience. I quickly changed tactics and found the staple gun. This was much more satisfying. Unfortunately, at least as mush as I have figured it out so far, wrapping the cloth round the lid base means I wont be able to add the hinges I planned for. Never the less, the fabric looks much better and the top is light enough to just lift or shift out of the way to grab a blanket from the drawer.
Josh helped me add the legs by extending the thread posts so they could be attached to the bottom.
And voilà!!

I couldn’t be more please with the project, though I’ll likely do a little adjusting–to my corner seams for example or adding a little trim detail. It’s just the right height and the perfect size for the space.

My Latest Obsession
Earlier this fall, Tarin told me about this great estate sale in the village that she found and asked if I would mind taking our truck up to pick up the chair and other things she purchased. As pulled up to the sale I noticed wicker furniture in the drive along with mismatched chairs of all occasions. We loaded Tarin’s finds into the truck and she encouraged me to walk around as she took a second glance.
As I walked into the screened sunroom, there were more chairs. And there it was–this darling mid-century sofa with eccentric floral cushions. I fell in love.
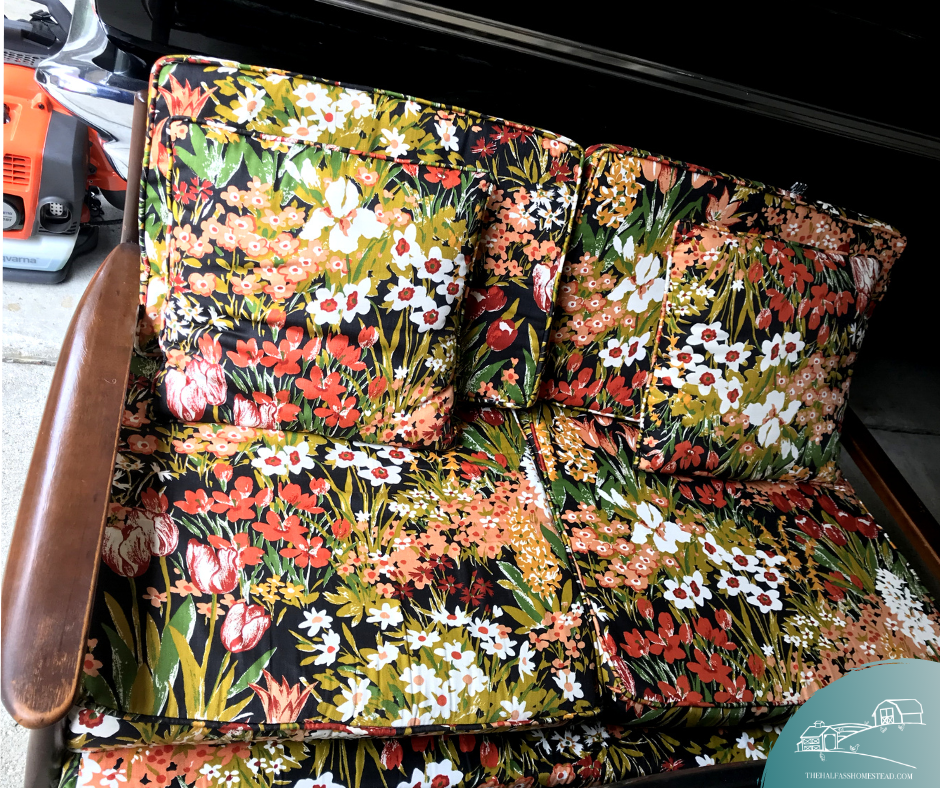
Of course, the price tag was in love with the sofa as well. The hefty price almost had me walking away but Tarin recommended I ask if they’d come down. A little negotiation and the sofa was mine and in the truck.
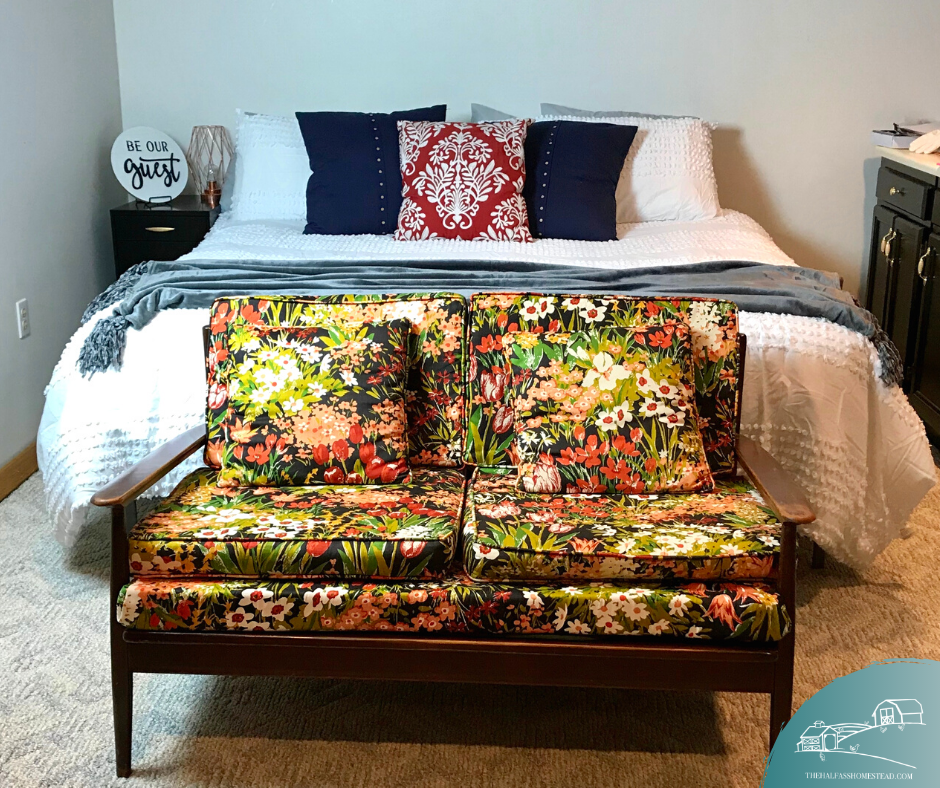
Originally, I planned to put it in the basement guest room but decided that I liked it too much to have it stuffed away in the basement. I mean look at this print! I screams for a spot with a view.
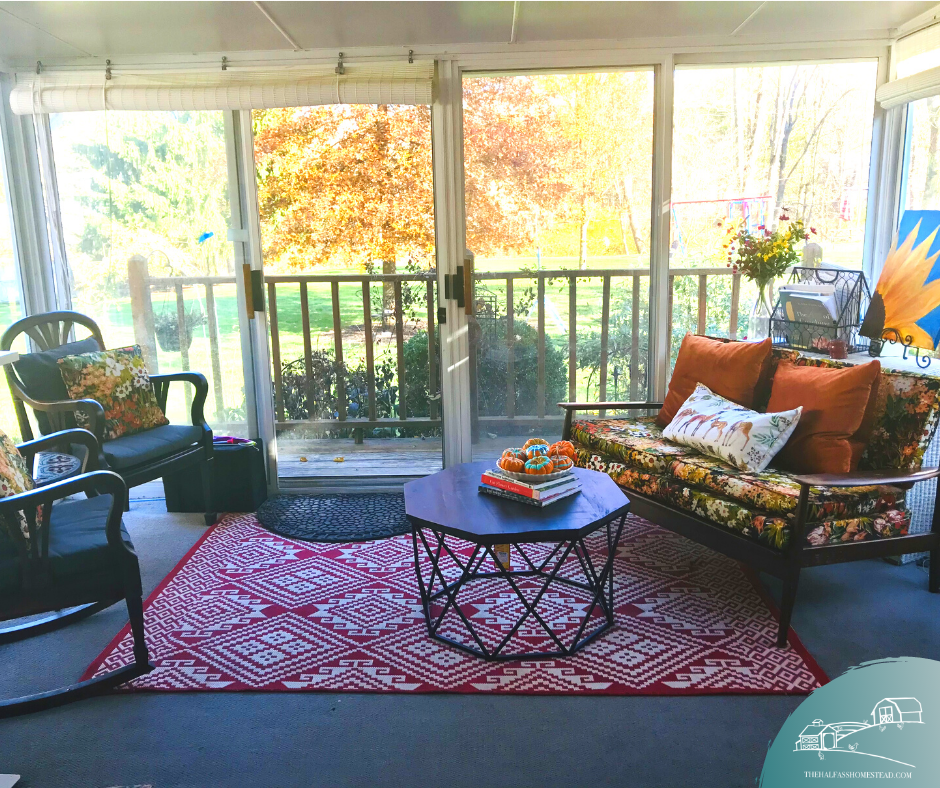
The glass porch/office/studio came with white wicker furniture–the only furniture the previous homeowners left in the house. We were so thankful for the furniture too, as our moving truck took two weeks to deliver our furniture from Texas, it was the only thing we had to sit on those first few weeks here. Wicker has a bit of southern charm in my mind and it was in great shape. I updated the cushions and added a bright rug and the sunroom was now my favorite room in the house, for more than just the views. It serves as the perfect back drop to my Zoom feed at work with many compliments from folks remarking how they’d like to have tea with me here, and the natural light and scenery make it the perfect place to paint (on the few occasions I pick up a brush).

This was the perfect place to put the sofa. Of course this called for a complete redecoration of the room.
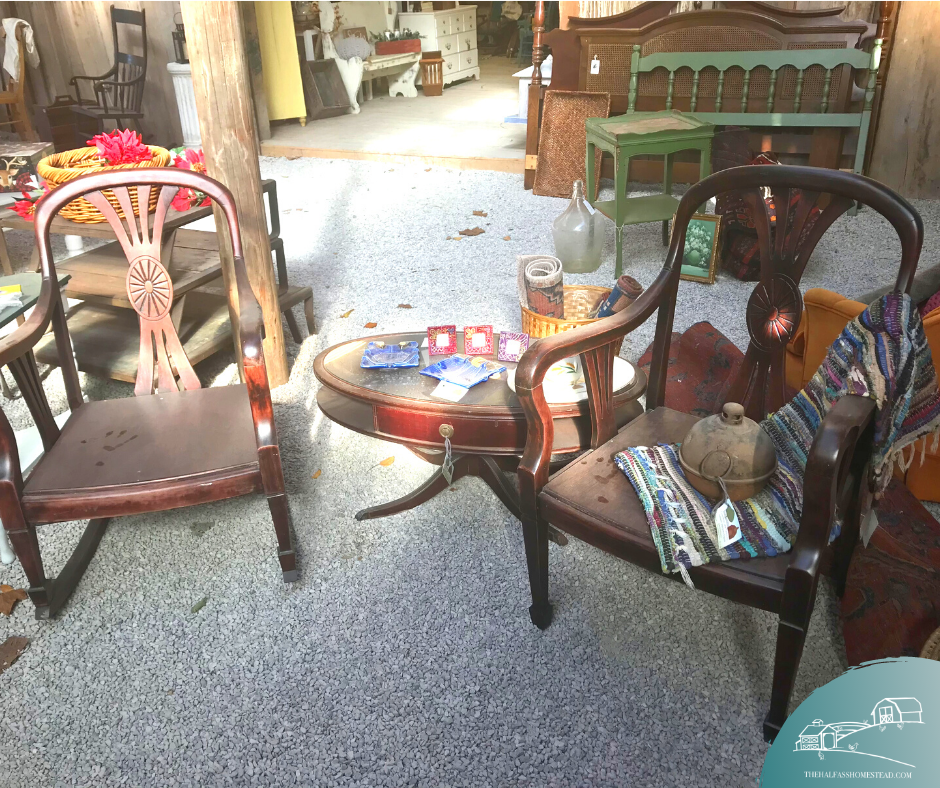
I decided to wait until I had two chairs to go in the room with the sofa, just as our current set up is. I scoured the local Facebook market place, I wanted a rocker, but every rocker was more of a standard rocking chair you’d find in grandma’s sewing room. I searched Wayfair top to bottom, saving a few mid-century style chair but found nothing I loved. Besides, Wayfair just seemed like cheating. I wanted another great find–something well made, with history and character. I searched the local antique barns for a month before I found anything close to my liking.
These two antique chairs were in an antique barn just a few miles from the Camp Farm.
My friend, Rachel, came over one evening to help me switch out the furniture. It’s an excellent start but I’m still working on refining the feel of the room. I also need to fine the right rug. I got one on Wayfair but it clashed with the print so I’m still searching.
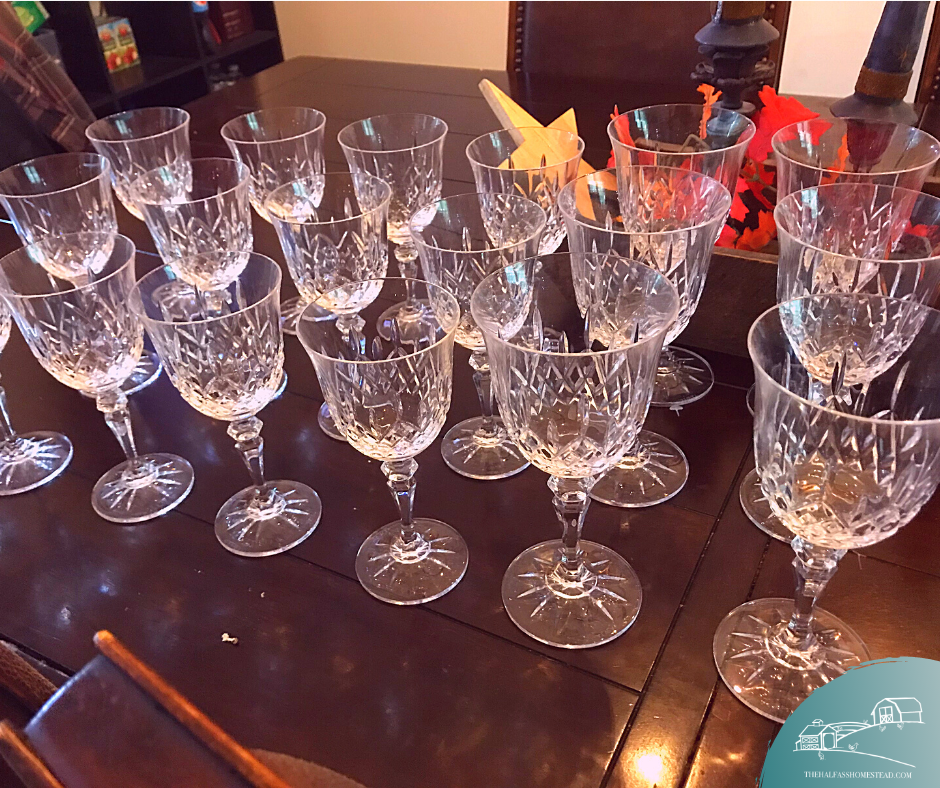
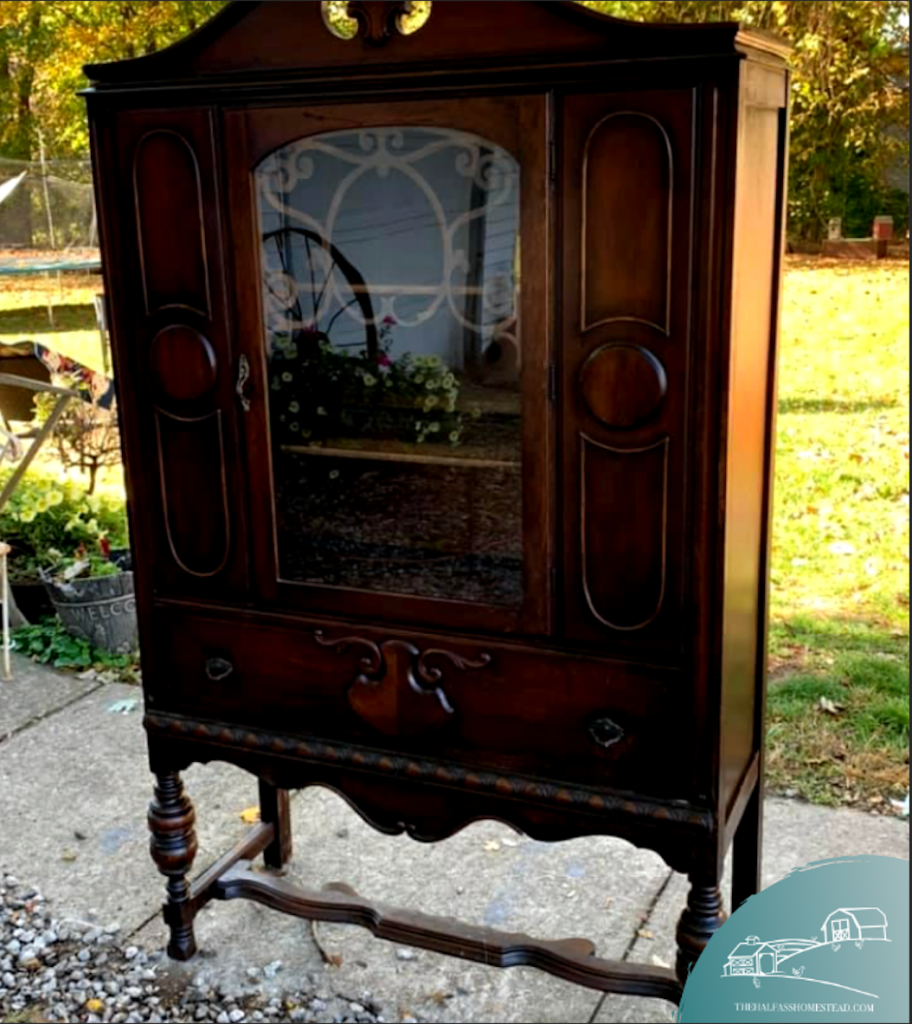
Oh! And I also found some amazing crystal stemware at the estate sale which demanded to be showcased. This lead to the search for a cabinet worthy of storing such sophistication.
With the 4th piece of vintage furniture bought in just three months, I’d say my obsession is in full swing! I’m always looking for a bargain and not afraid of a little dust.
As the cold keeps me indoors and the gardens dormant, I’m now focusing more on finding the voice of this home; after 3 years here I feel like I can hear it. It’s a combination of farmhouse, vintage comfort with a touch of retro accented with splashes of fancy. I’ll be sharing a little about the pieces I find and how I’m transforming rooms with them – and repurposing the existing furniture I keep. Also, I have a big remodel planned at the end of next year! Stay tuned, y’all!
