


Backyard Reno: Totally Functional – Help me decide how to finish it!
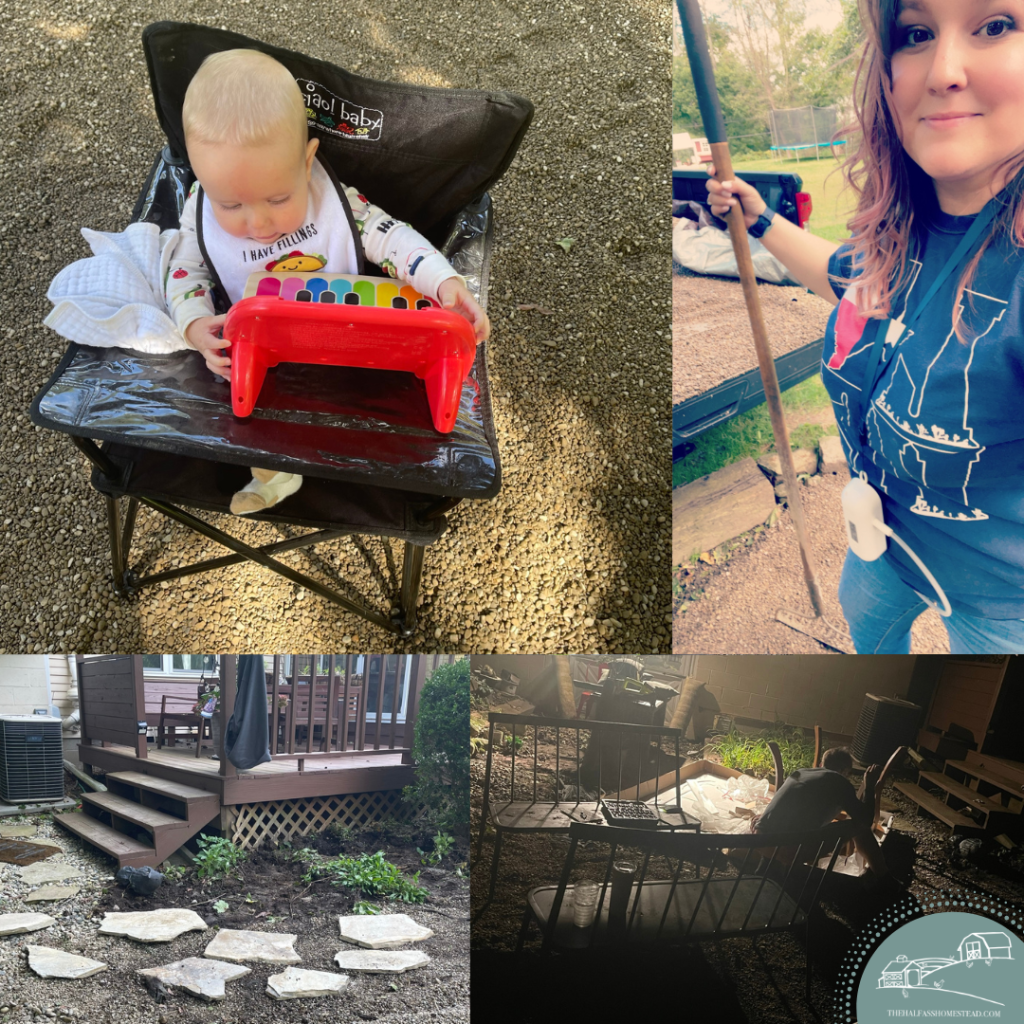
Last week, fall finally showed its beautiful temps here in central Ohio and I decided to make the most of it. Thursday afternoon I spent a few hours unloading pea gravel between meetings (since it was cool and breezy enough to do so without breaking much of a sweat). On Friday two of my calls were canceled so I took the day off to finish the job. One more day, another yard of pea gravel, 12 bags of cobblestone, 2 bunny statues, and 583 pounds of stepping stone later, and I have a beautiful, still not finished but fully functional backyard space right off the deck and living room patio.
I wasted no time, even pumping while I shoveled and raked. Bladen played in his outdoor high chair while I worked and my brother Josh made sure the floodlights stayed on for me and even helped me put my new table together that had been sitting in the garage since April.
One more day, another yard of pea gravel, 12 bags of cobblestone, 2 bunny statues, and 583 pounds of stepping stone later, and I have a beautiful, still not finished but fully functional backyard space right off the deck and living room patio.
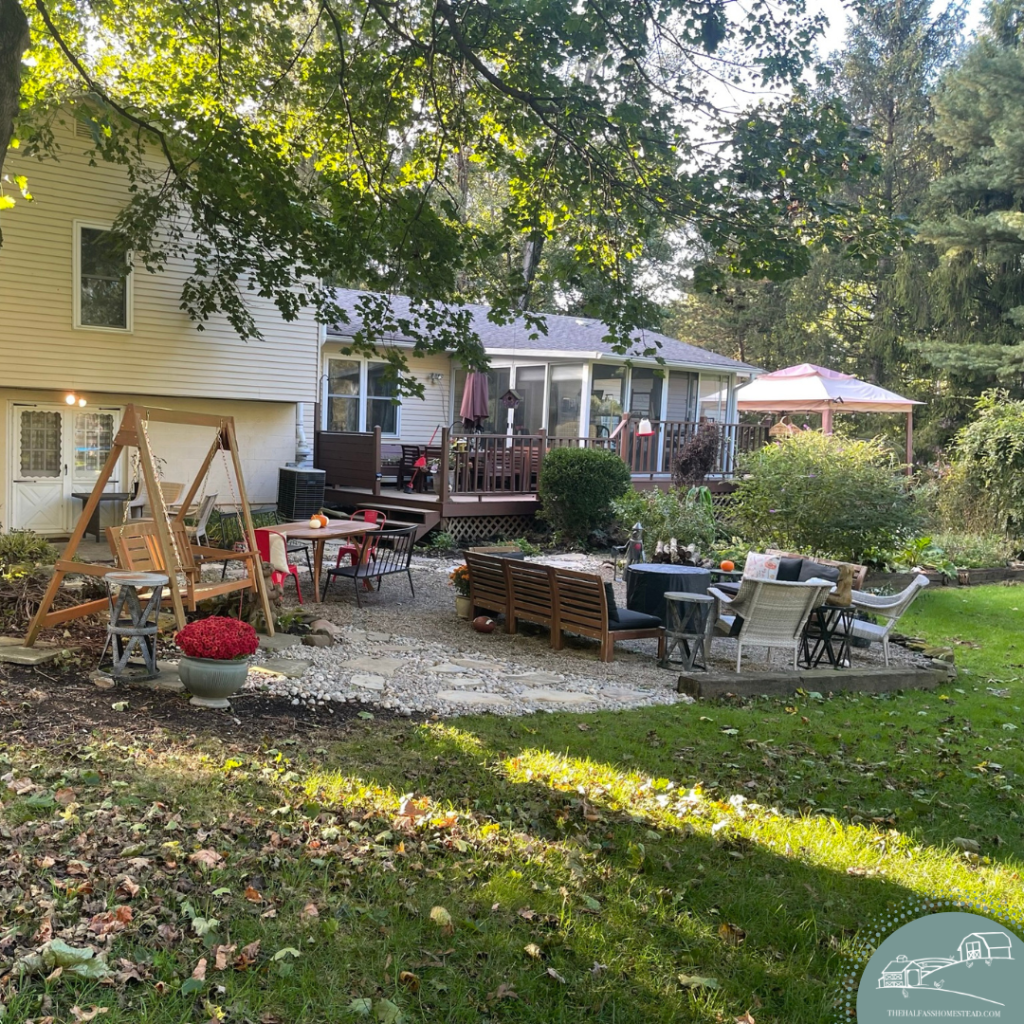
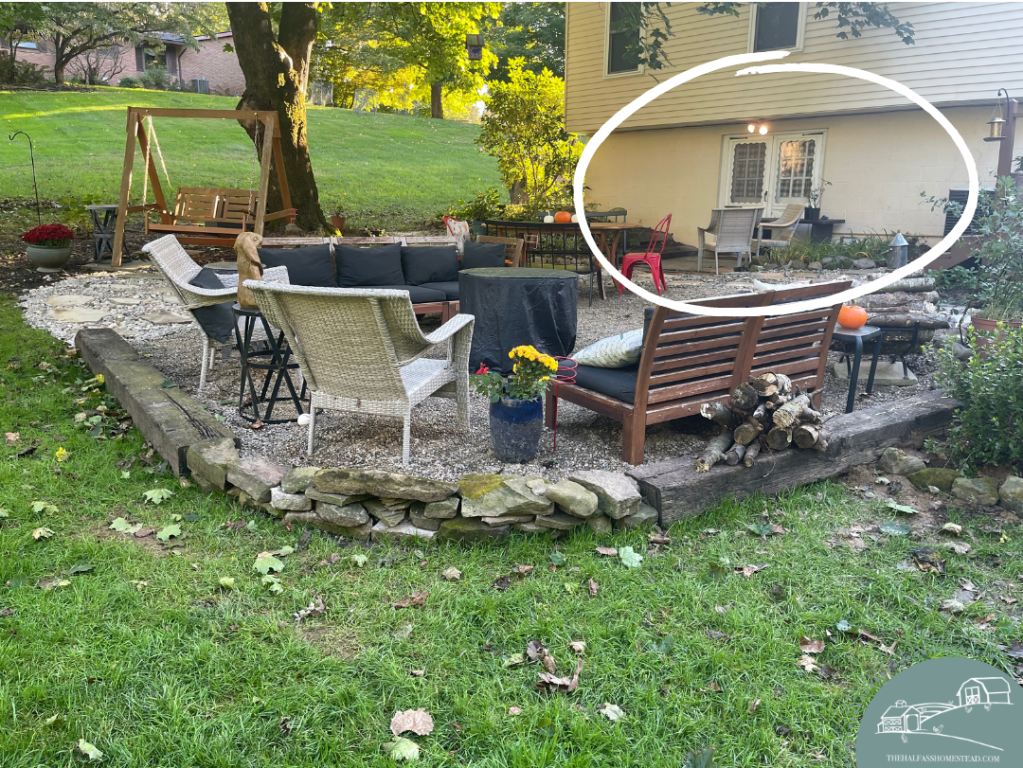
I present to you my new favorite spot in the backyard. I placed every 👏 single 👏 rock 👏 and 👏 stone 👏 here 👏 !


With only a few alterations to my original vision (see it here) and a few more final touches needed, I couldn’t ‘t love it more. Here’s why:
- Flow & Connection. The space flows nicely from the existing garden beds and walkways. I extended the stepping stone and cobblestone pathway from the soon-to-be wrap-around corner stairs off the deck to the concrete (soon-to-be covered) patio off the living room, to the pathway around the tree trunk, and out to the yard. This created continuity and a visual flow from one space to another, as well as a separation between the walkways and the outdoor “room”. On the deck overlooking this space is another outdoor dining table; I shared in my original post that this felt disconnected from the other side of the deck where the main outdoor eating space was. Now that I’ve got a table under the tree, our larger gatherings will stay connected–allowing people to see and talk to each other.

Easy, smokeless heat. Originally I planned on getting a bowl-shaped fire pit for the space but hadn’t purchased one yet and the kids were so excited to have a fire in the new space so I moved the old fire ring to the new space. But Sr. had other plans. He wasn’t a fan of a wood-burning fire under our beautiful tree. Plus we’ve (I) got an awful track record of wanting to have a fire right after a rain–when all our wood is wet. So he surprised me with a great little propane fire table. I love it! I can have fire any time I want AND we don’t all need to go wash off the smell of smoke when we come in.
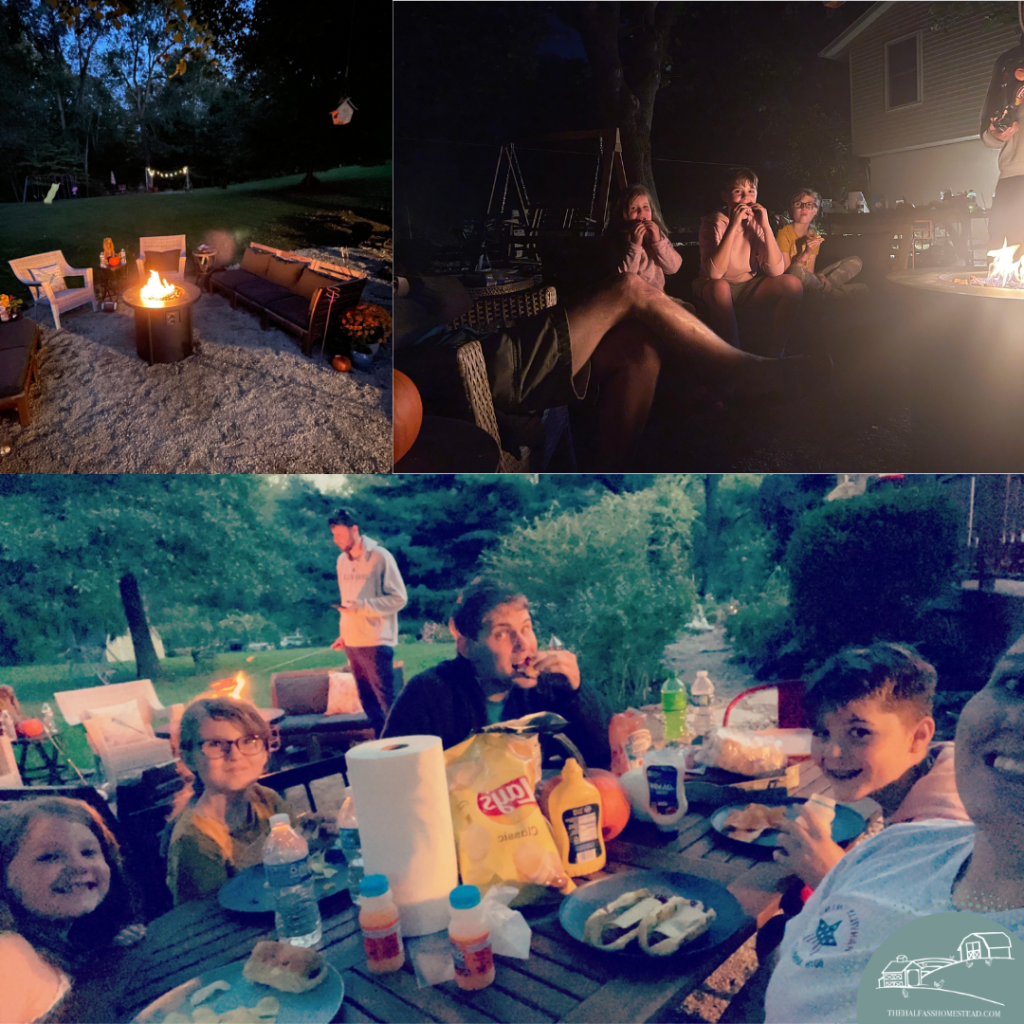
Room with a view. I think this is actually one of Sr.’s highlights–the t.v. in the living room is visible through the doors. We watched the Buckeye’s game the first night out there. The only thing missing was sound. Luckily, Jr. found out that our t.v. sound can hook up to Bluetooth so problem solved! Eventually, we’ll replace these doors and I think this idea will influence our decision on the design of those doors.
Shade. Not that this will matter the rest of this year with fall, and soon winter, but this tree provides the BEST shade and cool temps on hot, sunny days. Seriously, it feels 10-20 degrees cooler in the shade of that tree. The canopy is also mesmerizing to look up at as you relax with a nice beverage in the sitting area.
Bunnies. During my many trips to the outdoor and garden store for soil gravel and stone last week I fell in love with these two bunny statues. Of course, after just picking up a rooster statue for the new coop, my co-workers think I have a slight problem. They told me one more statue and they’re staging an intervention. 🤣 But you can’t tell me these bunnies don’t fit in the space perfectly.


So, what’s left? (Here is where you can help!)
Stairs
My brother Josh, who has been staying with us for a few months and helped me excavate the area this spring, had the idea to create more flow with stairs that wrap around the corner of the deck. He’s actually suggested many ways for us to open the deck up more since he started staying with us–I think the fact that when you come out of the sunroom, you have to go either right or left to get off the deck drives him nuts. Anyway, this is the first of his ideas that I’ve liked, and felt it was a manageable change. Of course, it means that the deck railing bar I envisioned won’t work since this is the rail where I would have put that, but I think it really would make a statement.
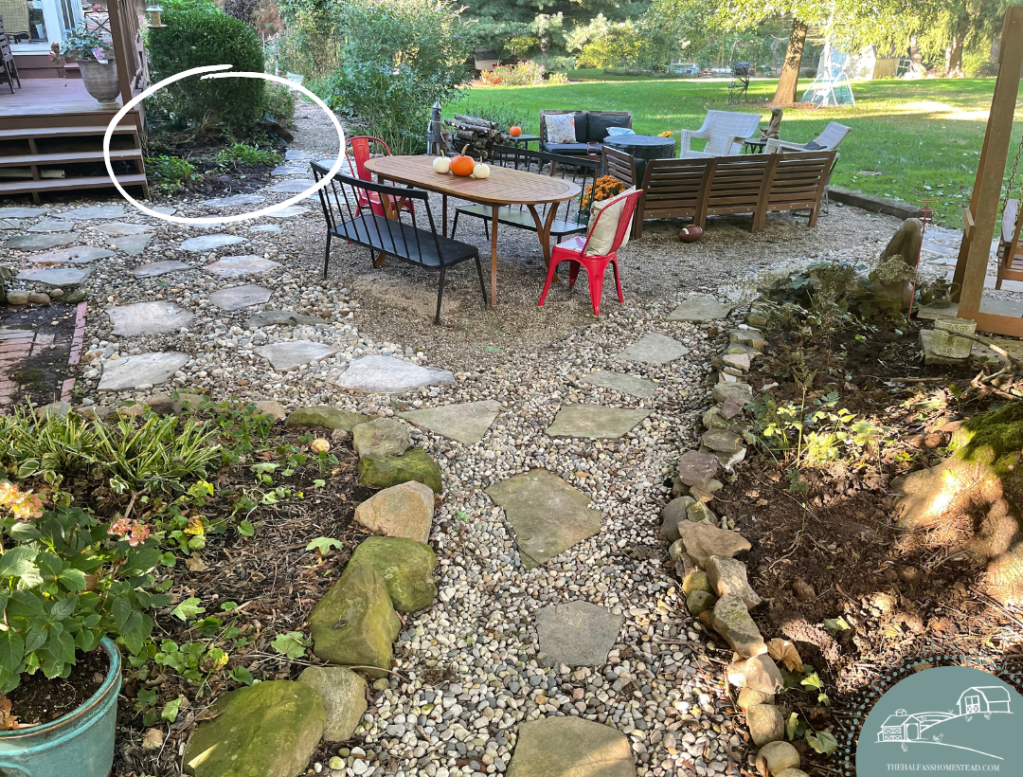
So, while I was tossing stepping stones and cobblestone around, I went ahead and placed them as if the stairs were there to match the stepping stone landing of the existing stairs. I also dug up the part of the garden bed where the steps would go. This actually worked out GREAT because I relocated the soil and plants to the small retaining wall I built up around the trunk of the tree.
Patio
Another change I plan to make is to cover the existing concrete patio off the living room door. It’s list pretty blah and, where the bricks were added to extend the pad, water still sits, though not as much. I just can’t decide if I was to put decking material there or stone. 🤔 I’d love to know what you think.

Inspiration:


Lighting
Currently, we’ve used the floodlights above the doors to light the space but this is obviously temporary. I have several boxes of my favorite outdoor solar-powered string lights sitting in the garage, waiting for me to figure out what configuration I want to hang them in. It’s going to be gorgeous BUT I’m having trouble identifying the best placement for maximum solar powering–remember the great shade I was boasting about?
Mural
Lastly, there is the matter of the boring brick wall on either side of the door. It’s just missing something. It looks like there used to be some kind of ivy growing on the wall which is long gone now. I’ve considered a few different things to break up the wall space but the most appealing is the idea of painting a mural here (another one of Josh’s ideas!). When we moved into our childhood home, our mother drew a fun mural on the backside of the garage where the pool patio was. The whimsical frogs swimming in a pond and diving off lily pads. She had us help her paint it which was super fun and a memory I hold to this day.
I’m thinking of something floral and colorful and of course, getting the kids into the action. Currently, I’m just trying to decide if I want a more realistic or playful, more abstract look. To me, the realistic would feel like a giant painting as opposed to an abstract pattern that would have more of a wallpaper feel. Let’s do another poll! What do you think?
Inspiration:


On the homestead today
It’s cool and cloudy here so I’m in the gardens getting dirty—planting new plants and taming old ones.
4 years ago there were just 3 poppies on this plant, look how many this year! It’s my favorite plant and blooms around Memorial Day each year.


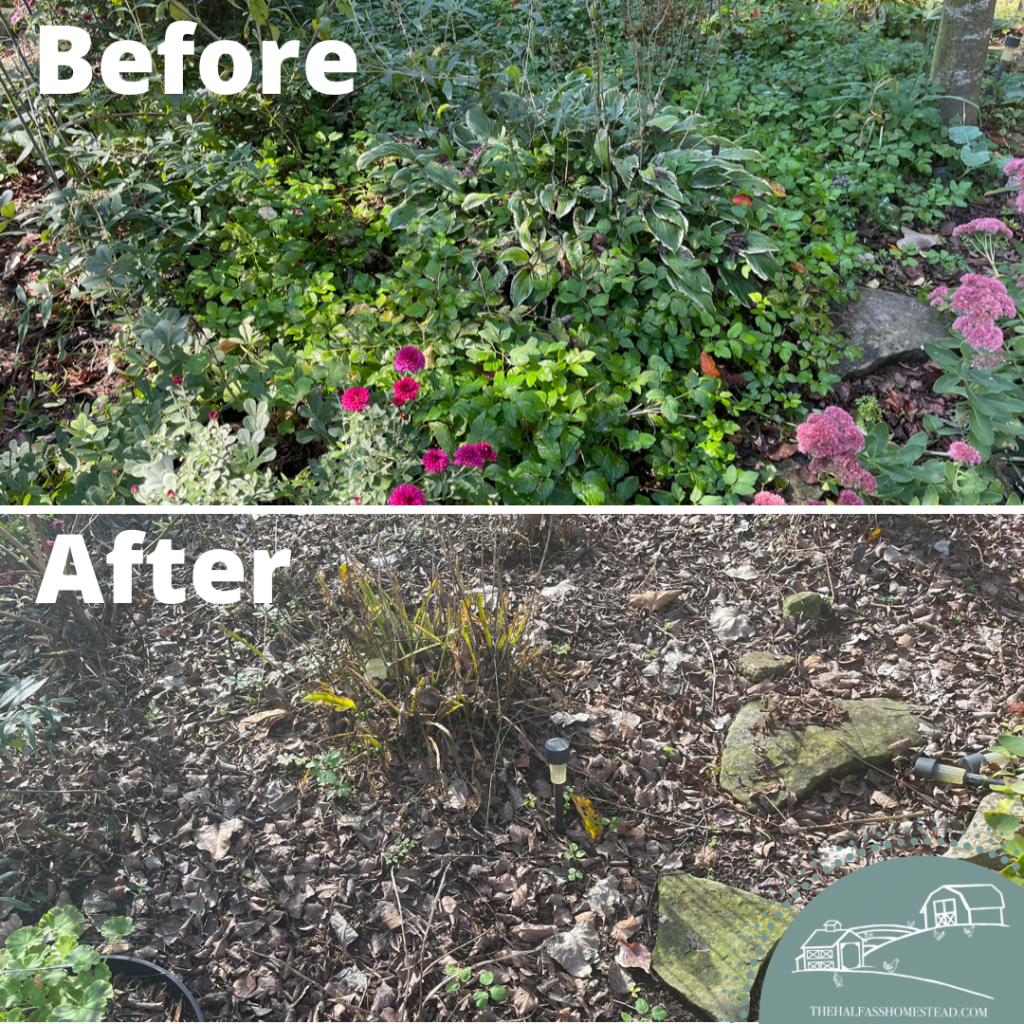
At War with Mother-in-Law’s Revenge
When we first moved in, Kay, the previous homeowner, came to pick up some mail and offered some gardening tips on how to care for all the beautiful perennials she planted in her 40 years in the home. One of the first things she said was that I needed to pull the “mother-in-law’s revenge” early and often.
What’s mother-in-law’s revenge, you ask? Well, Kay didn’t really know what it was but she named this formidable garden invader after her mother-in-law gifted Kay a few seedlings for her garden claiming they’d be the perfect filler and ground cover for her beautiful front gardens. Kay’s mother-in-law passed shortly after she planted them and said they’ve been haunting her gardens ever since. The seedlings quickly multiplied and choked out many of her strongest plants. She’s been pulling them from her garden–and cursing her mother-in-law–every year since.
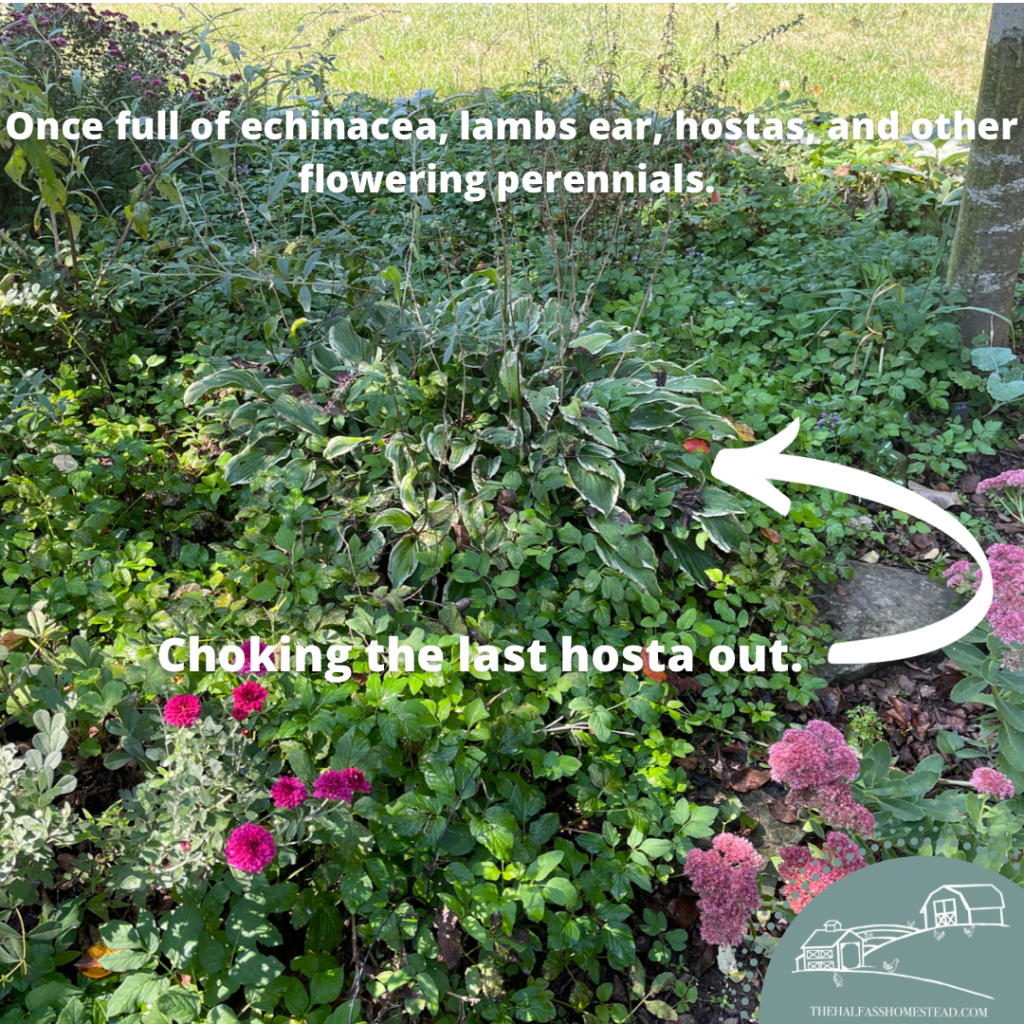
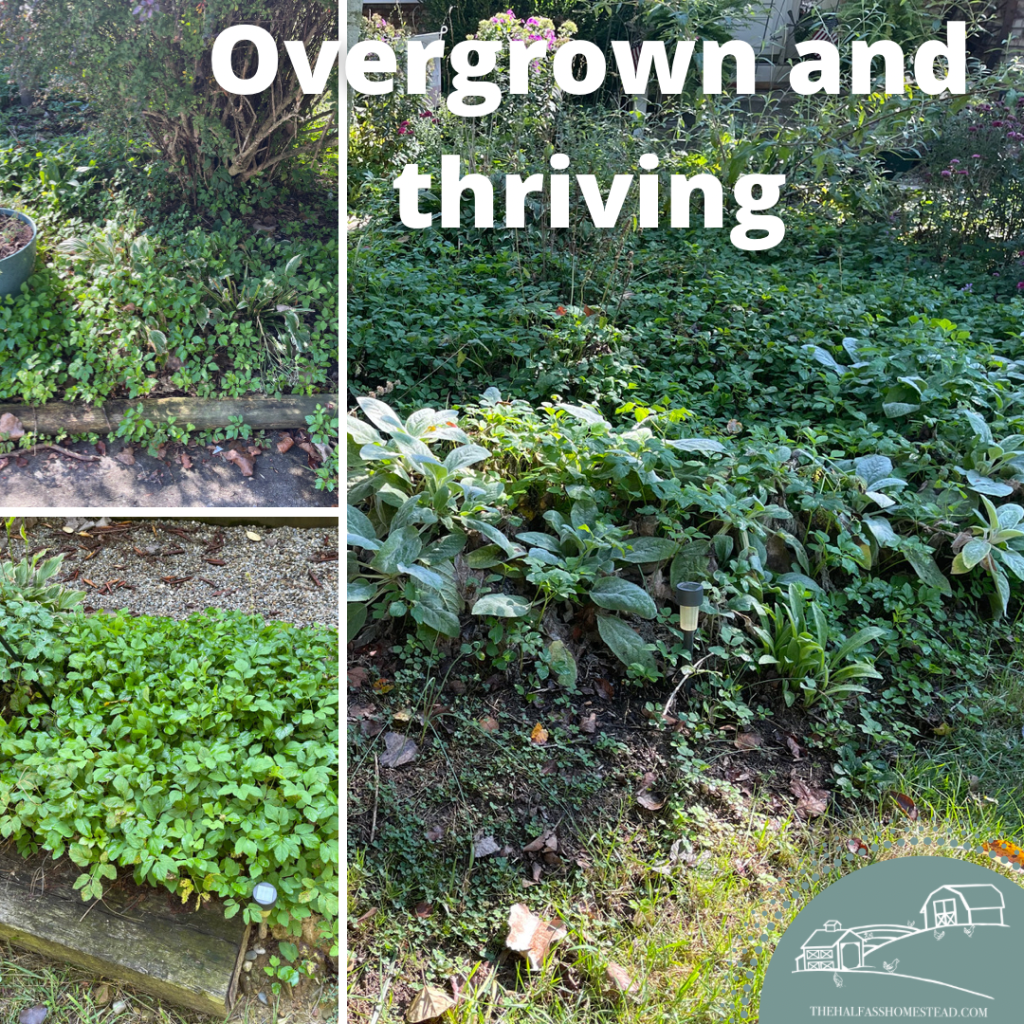
Since making this our home and taking over the gardens, I too now curse Kay’s mother-in-law every time I have to weed it out of the gardens. It doesn’t just cover the open, available real estate on the ground, it likes to hide in the middle of other plants–like my hostas, chrysanthemums, and russian sage–making finding them early and pulling a bitch. And despite my best back-breaking, weed-pulling efforts, it seems to come back with more vehemence each time. I’m telling y’all this stuff could flourish in a vat of bleach with no light.
Finally, I did some research last year and discovered the real name of this pest–goutweed. Goutweed is an extremely aggressive, invasive perennial. Savvy Gardening calls it the “cockroach of the botanical world” and “a beast to eradicate”. While on the prohibited or restricted plant list in some states, goutweed can be found in some garden centers under the name of “bishop’s-weed” or even “snow-on-the-mountian”.
Turns out, Kay’s approach of pulling the plant, which often comes up fairly easily, is one of the worst things you can do! Goutweed stems from a web of rhizomes which branch far and wide underground. You see, rhizomes have a nasty habit of multiplying from broken or left behind roots in the ground–like when you pluck gray a hair and five more emerge, thriving and taunting you.
So how do you get rid of it? It’s a painstaking process. Many sites recommend fully covering it with plastic, essentially “cooking” the devil which can take anywhere from 8 weeks to 2 whole seasons. You can also smother it by cutting it down and covering it with cardboard and mulch – 2-3 feet beyond the menace’s prersence. Another option is spraying it down with a vinegar solution or even chemical-based weed killer like Round-up.
My initial plan was to try the smother and cover method. I figured I could cover around some existing plants and add good soil above, building up the gardens and planting new perennials which would look better in the front of the house than black plastic. Besides, I had PLENTY of cardboard thanks to Amazon and Christmas time which I stored for several months. Unfortunately, when we prepared for hosting my sister-in-law’s engagement party in May, Sr. wanted the garage clean and recycled all my cardboard. To be fair, I caved and gave him permission.
June is always a busy month at work and difficult for me to get in the gardens and then I was out of comission for several months with nausea in my first trimester. By the time I got back to life–and the gardens–in September, mother-in-law’s revenge had ravaged the front gardens.
Exhausted and over it, I’m not ashamed to say I finally caved and turned to the chemicals. After all, this was war. I came to terms with the fact that there’d be some casualties, like my russian sage, mums, and a few other perennials. After the first careful spray, I was disappointed that the beast didn’t begin to wither within hours. I had totally imagined a scene out of The Wizard of Oz when Dorothy douses the Wicked Witch with water and finally ends her reign of terror.
No such luck. However, after a few weeks a difference could be seen. AND my chrysanthemums didn’t die! Two more rounds of spraying and I’ve made a serious dent in the rein of Kay’s Mother-in-law’s revenge.


Unfortunately, the arrival of the cold weather has stalled my progress because the chemical sprays are recommended for using weather above 60 degrees. Looks like there will be more work in the spring. I’m thinking I may need to srpay again a time or two and then will likely cover with cardboard and fresh soil so I can plant a few new beauties. This will allow the new plants to thrive while the chemicals dissipate under the decomposing cardboard barrier.
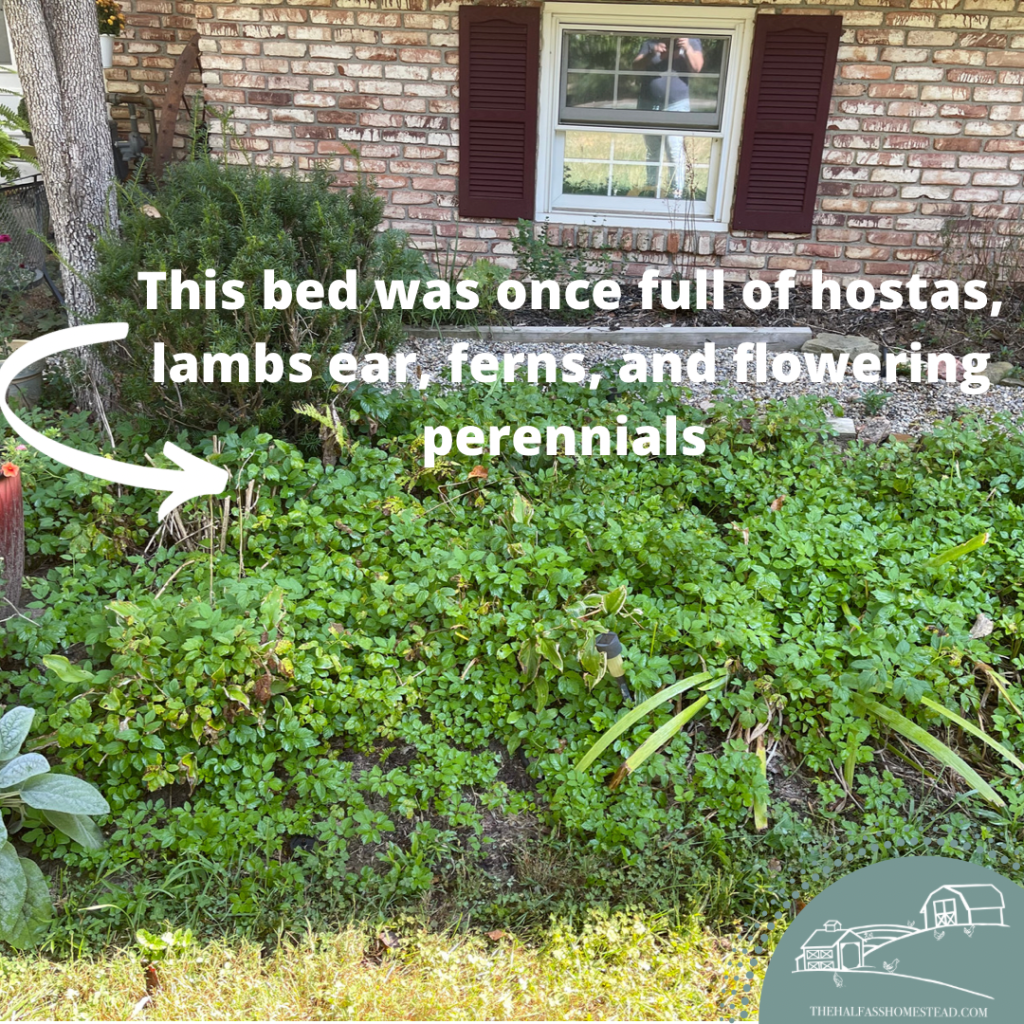
I also haven’t touched the bed of hostas in front of the kitchen bay window yet but I plan to smother and cover that small bed. With my Japanese Maple in that bed, I don’t want to use any chemicals. Besides, the hostas are overgrown and can’t be divided because they’re infested with goutweed so removal or covering is the best option. I’ll cover it this winter and it’ll be fun to design a new perennial bed there in the spring–something that doesn’t have hostas maybe?
It’s been a while
So much to catch y’all up on!!
It’s been a few weeks since the constant nausea of my first trimester subsided–praise the Lord! Since then, I’ve been trying to catch back up to life and all the things around the house and gardens.
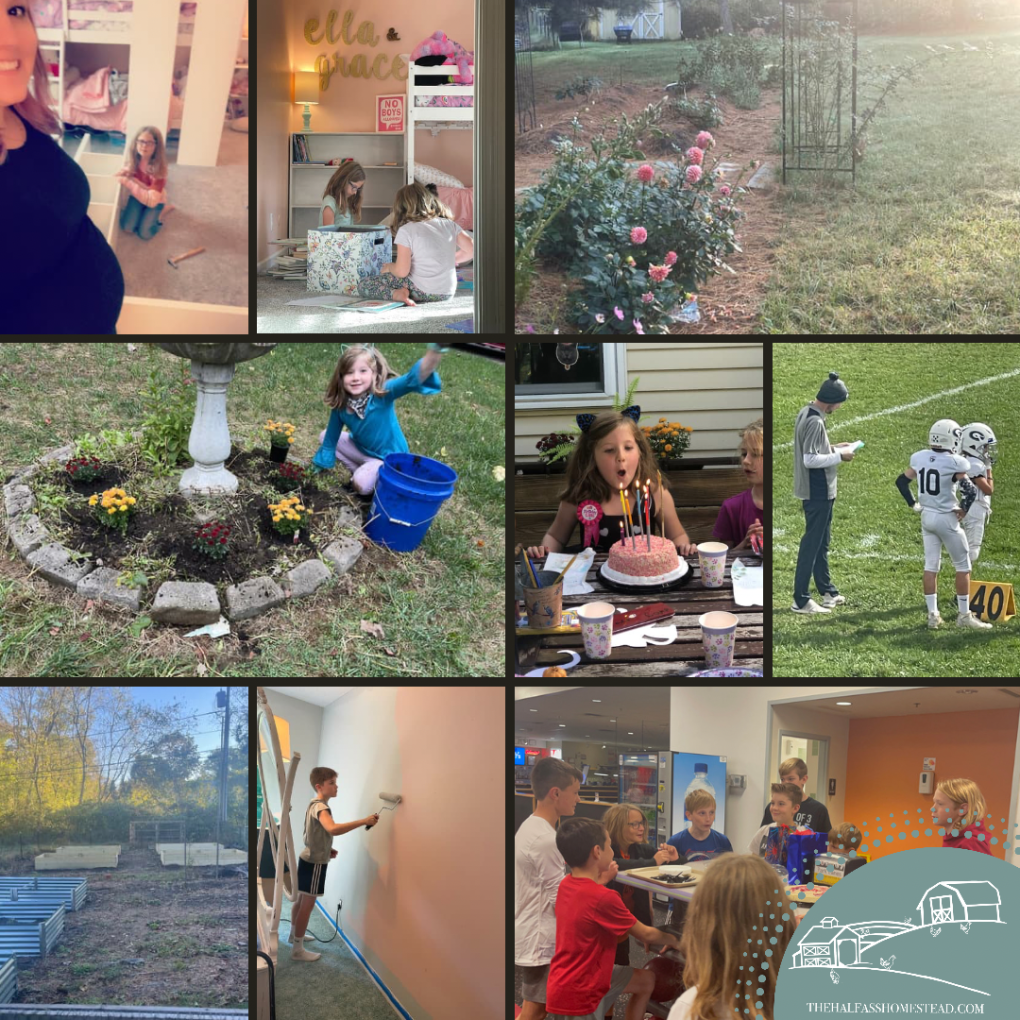
In the past month, we’ve waged war on the “mother-in-law’s revenge”–aka goutweed–in the front gardens, planted fall mums, orchestrated a near-whole house refresh with new carpet and paint in the majority of the house, revived the dahlias in the cut flower garden, celebrated 2 birthdays and an anniversary, finished the football season, and moved the girls into a shared room to free up a room for the nursery.

The big garden also got A TON of care and attention from Clint who built raised and installed garden boxes and used old pallets to build a new compost bin. I’m serious y’all, it’s impressive!
As the cool weather rolls in, we have much more to do–like prep the coop and gardens for winter.
I’ll be posting something about each of our updates and adventures moving forward. In the meantime, what winter prep tips do you have to share with me?!
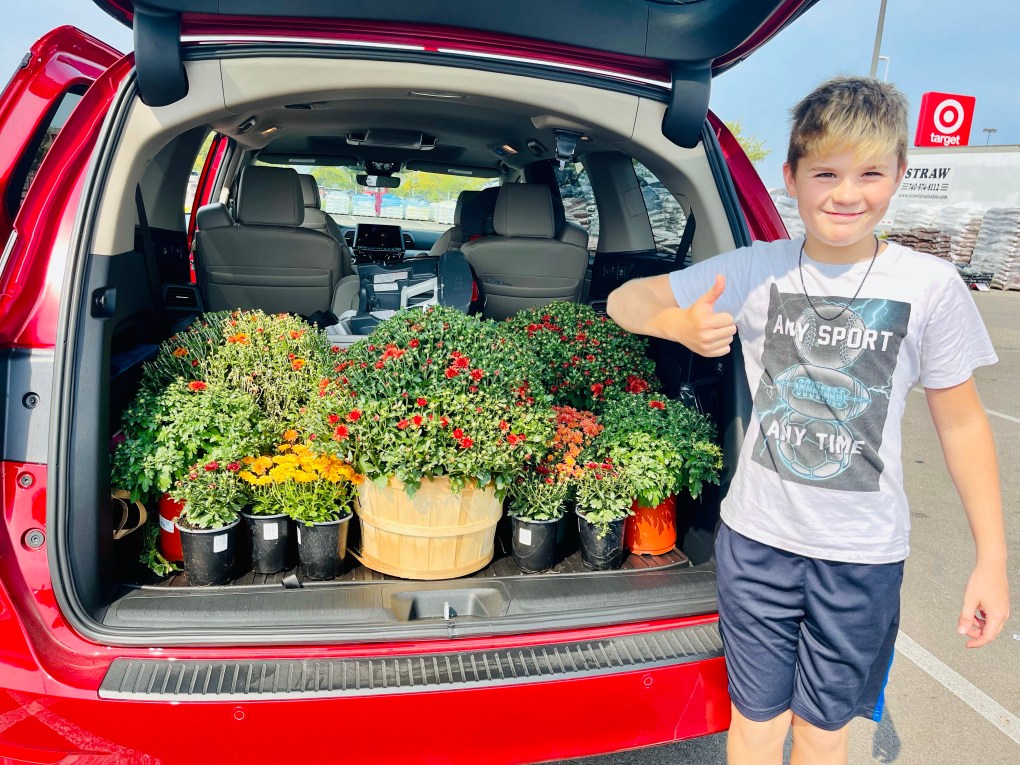
Fall!
Is a cool 50 degrees and feeling like fall! Also, I’m convinced you can never have enough mums!
What’s your favorite fall plant for the garden??


Check out what we’ve been growing!
Has it really been 3 months since we’ve posted?! Let’s just say life got pretty busy this summer.
June had us going in every direction for baseball. Work was also crazy as we added two new hires and put on our 2nd annual summer conference for educators. I didn’t have much time to get out in the gardens though there wasn’t much happening in the gardens. Surprisingly, my bee balm didn’t return this year. I’ll need to research why this happened though I think it may be overcrowding by lemon balm and the cleome spider flowers.
But as the summer heat began to roll in come July, we got some exciting news about a surprise that has prolonged my absence form the gardens, and almost everything else.
We’re expecting Camp baby #4! Baby Camp is expected to arrive in mid/early March!


Though this pregnancy has been the roughest, with 3 months of queasy nausea–something I never really had with pervious pregnancies–we’re all so excited. Grace is beyond excited, praying for a girl and constantly giving belly kisses. Jr. is praying for a boy and no longer being outnumbered by girls, and Ella is the only one that has said she’ll help change diapers 🤣.
With all the nausea, I really haven’t been outside much as the heat makes me feel awful, so does reading, driving, the smell of just about everything–poor Sr. has about 7 new deodorants he can’t wear because I can’t stand them and he’s running our of options 🤣🤷🏻♀️.
I’ve been so thankful to the Norris family for taking care of the big garden and bringing us harvests as they get them. Clint has gotten so into it all, he’s taking over the design and early prep for the garden for next year, more on that in another blog.
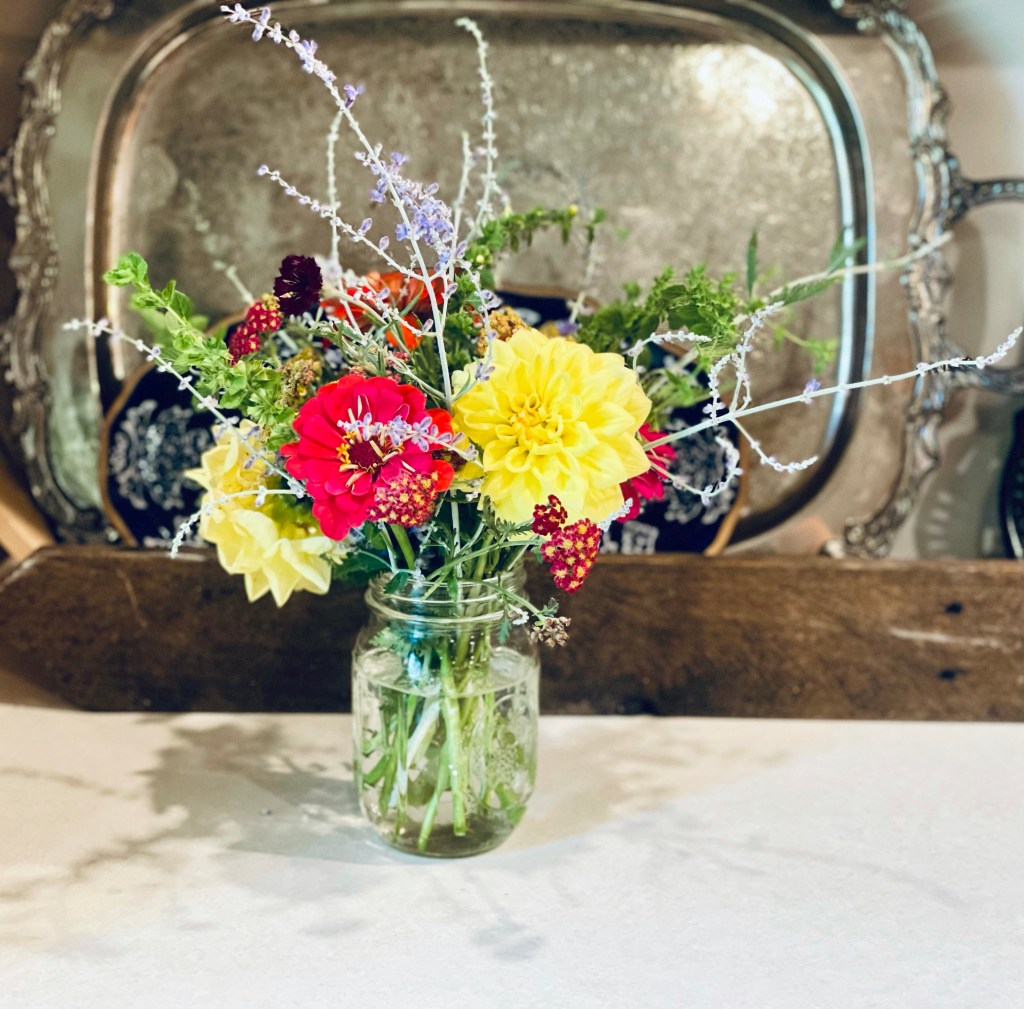
My MIL Becky has also been helpful and either pulls weeds or clips blooms for a vase every time she comes over. Check out this bouquet she took home a few weeks ago:

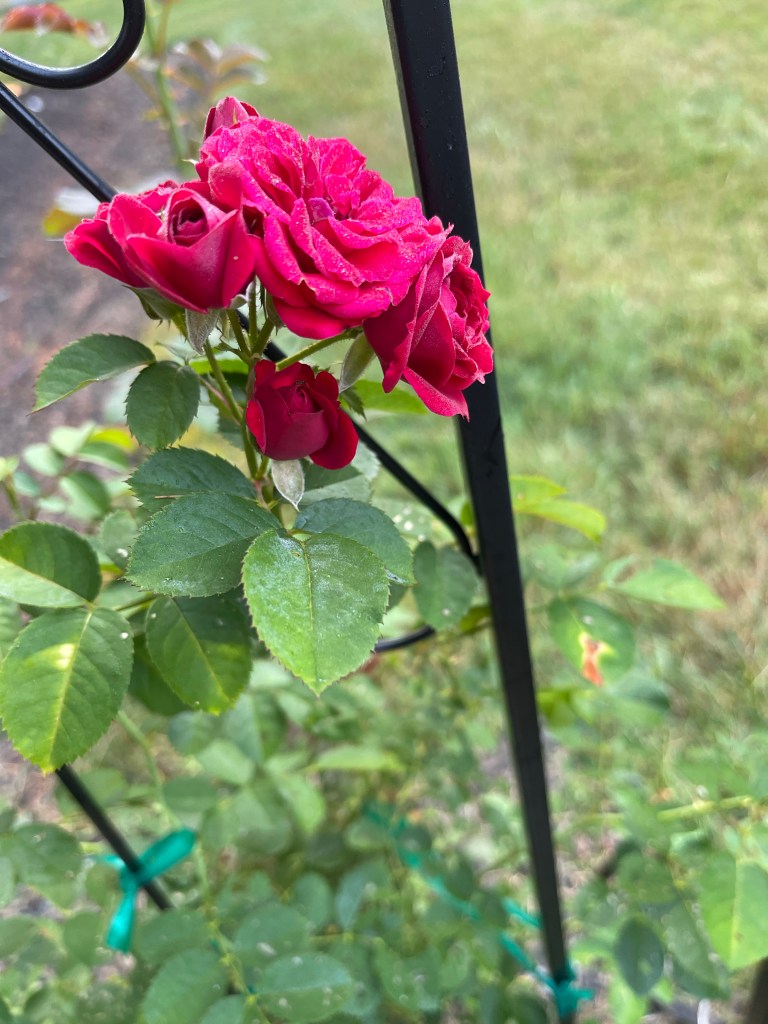
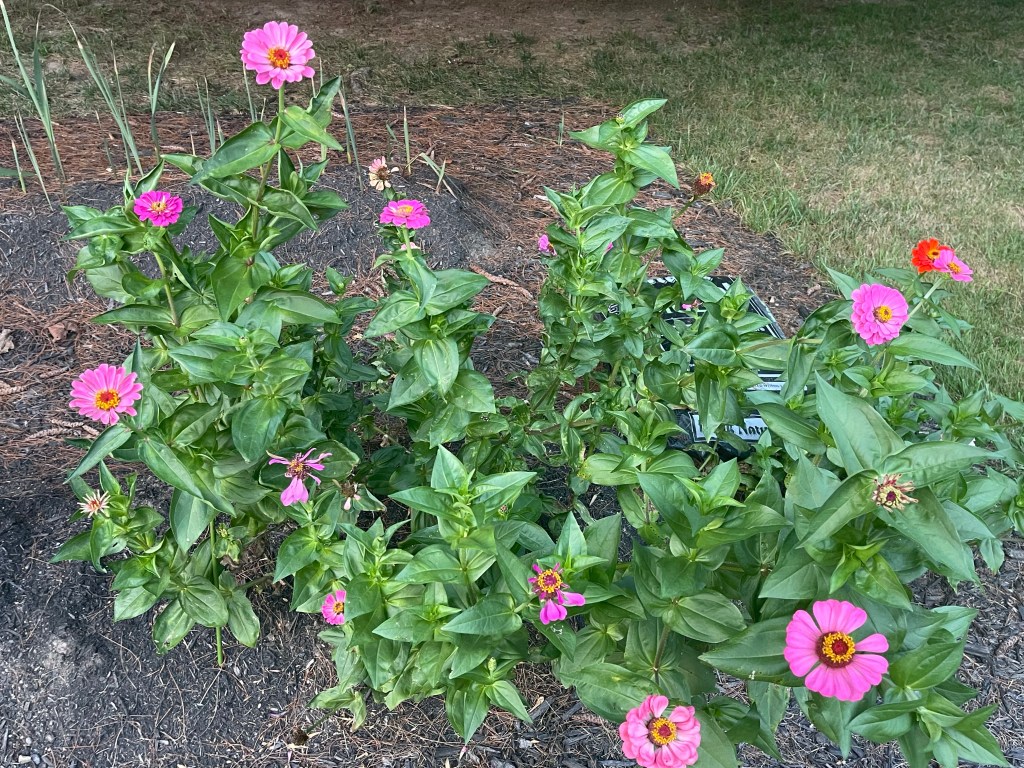
This week, I enter the 2nd trimester and hopefully the nausea subsides and I can get back outside. I’m itching to work on the house gardens and fill the porches with mums–my favorite. I’ve taken a few pictures the few times I’ve been outside this summer of some of the blooms I’ve found. The Cherry-frost climbing roses are about as tall and me and the zinnias are blooming away in the cut flower garden. My gladiolus bulbs must not have been planed deep enough because they shot out leaves but no floral stems and the wildlife has enjoyed my sunflowers (they new got higher than a foot), most of the cosmos… and eventually the dahlias. I did manage to make a few bouquets in early August and have plenty of zinnias to make more. Next year I’ll have to create either a greater barrier or pick more animal resistant varieties.


So excited to continue to share our journey with y’all!