Watermelon Lemonade: The Perfect Drink for this Summer!

Y’all! There seriously couldn’t be a better summertime lemonade!

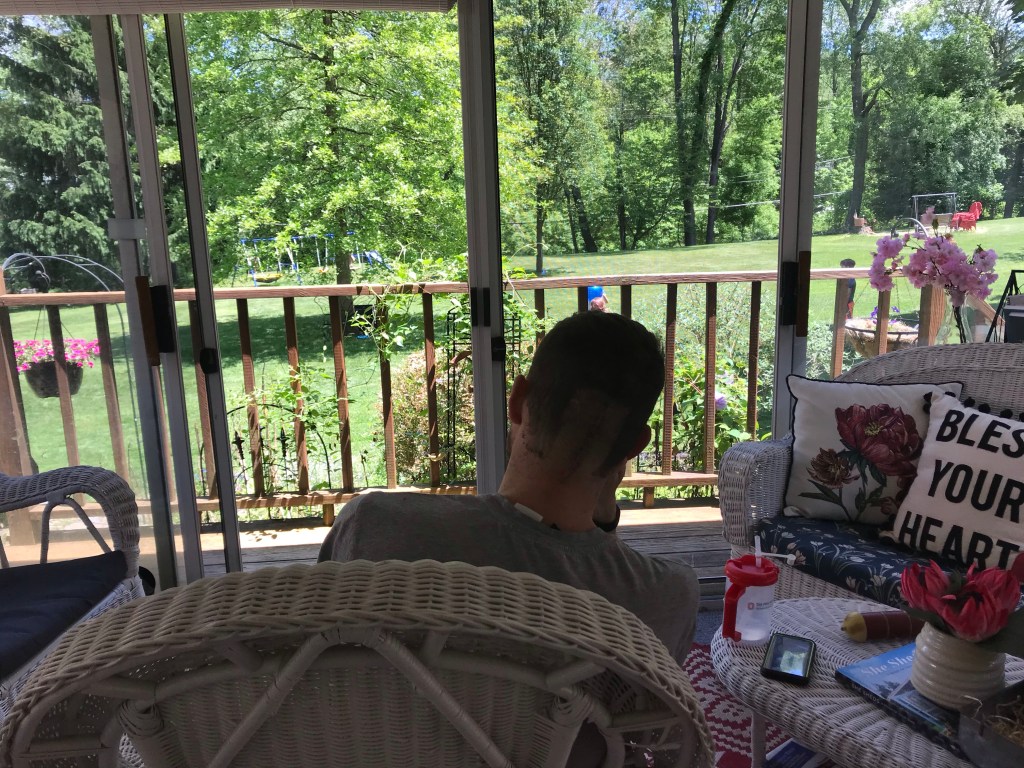
We have been so blessed these past few weeks after Brian Sr.’s brain surgery with dinners and treats from friends, neighbors, and family. The food has been delicious. One of our favorites was a taco dinner Bridgette made for us, complete with a cold pitcher of watermelon lemonade.

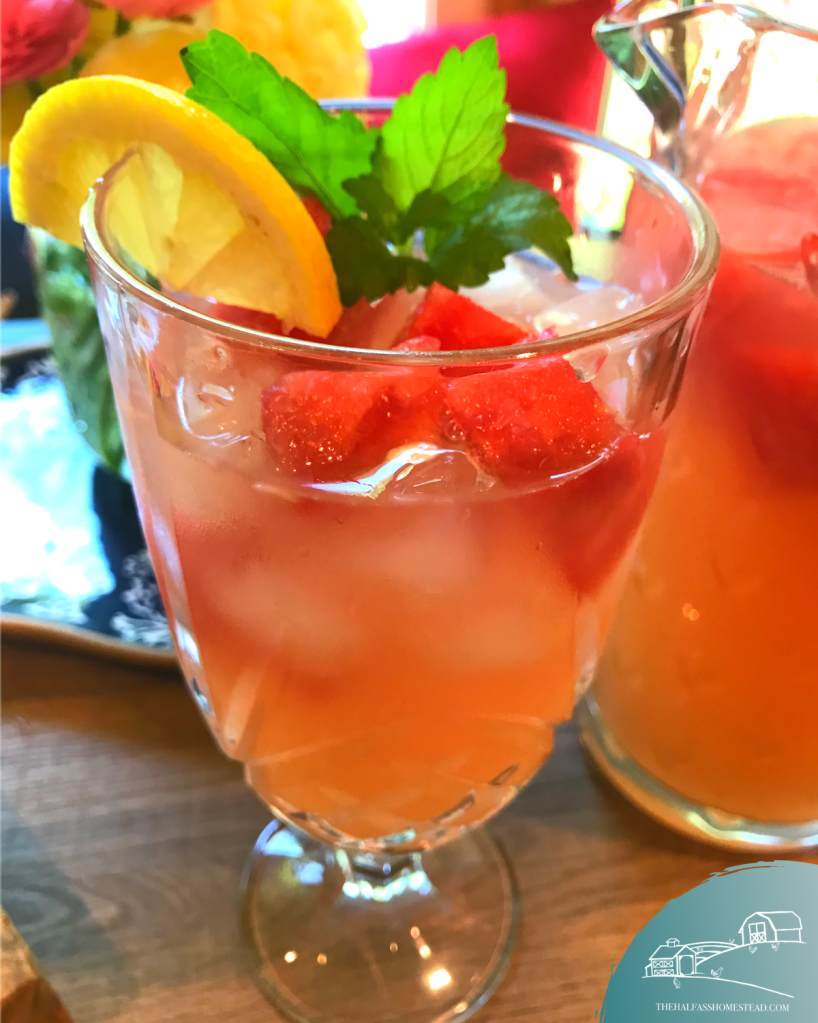
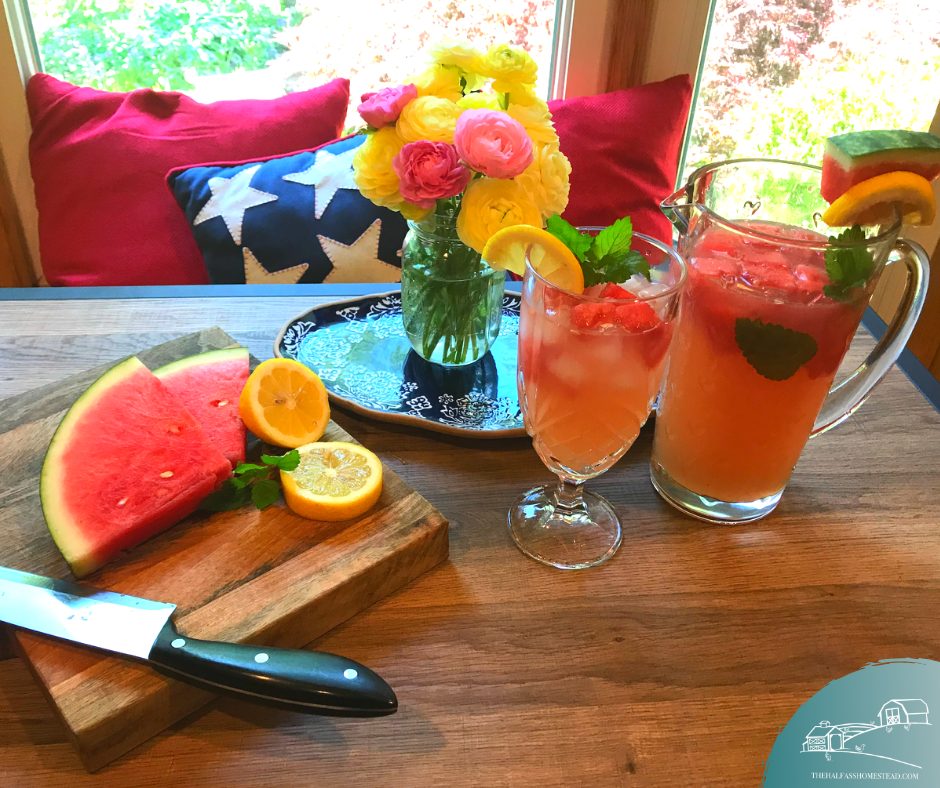
This lemonade was everything y’all! It was pretty–a sunset pink with little slices of lemon and chunks of watermelon. It was also simply delicious. We sucked it down before the day was over.

Sr. was still in the ICU and didn’t get to enjoy the lemonade with us so this weekend I decided to try and recreate it. I texted Bridgette for the recipe but there wasn’t one. She totally winged it! Bridgette did share what she could remember of how she made it so the girls and I took that and ran with it.

Now I have to be honest, Bridgette’s recipe included fresh squeezed lemons and organic cane sugar… I didn’t have enough lemons to make lemonade so I just used good ole Country Time lemonade mix–a pantry staple in our house when the weather is warm. We also added a garnish of lemon balm from the garden!

Watermelon Lemonade Recipe

Prep Time: 10 – 15 minutes

This recipe uses 3 parts lemonade, one part watermelon juice. You can use whatever lemonade recipe you prefer–whether fresh squeezed or premixed.

INGREDIENTS

  • 1 ripe watermelon
  • 3+ cups of your favorite lemonade
  • Lemon slices (optional)
  • A few leaves of lemon balm (optional)

DIRECTIONS

  1. Make your lemonade. You’ll need at least 3 cups.
  2. Cut and juice the watermelon. You’ll need at least on cup of watermelon juice and a few cubes for garnishing your lemonade. To juice you can take what pools form cutting the watermelon, or you can make juice by placing watermelon in a cup or bowl and mashing it with a fork. Strain the watermelon juice into a measuring cup.
  3. Mix lemonade and watermelon juice in a pitcher – 3 parts lemonade and 1 part watermelon.
  4. Garnish with lemon slices, cubes of watermelon, and lemon balm leaves.

Voila! Serve chilled or over ice.


Peaches

by Grace, age 5

Peaches are the best thing in my life!

My garden’s 🍑s will be so sweet. when we eat then we will get the seeds and replant them so we can have more and more. We have a 🍑 tree 🌳 we planted it for my Opie, he died. I really wish we could have showed him, but we can’t. Mom say’s Opie would be proud.

Me nest tot he peach tree holding our first strawberry

I can’t wait to eat the the peaches from our tree. I want to make peach smoothies, peach pie, peach juice, eat them frozen and eat them fresh, maybe even in a salad! We also have strawberries and blueberries, which will be yummy with peaches. Peaches are good no matter how you eat them. But maybe not with onions and carrots 🤮

My Dad loves peach cobbler! I’m sure all my people love peaches too–Grandma, Papa, Opa, Gigi, Papa David, Aunt Rosey, Mr. Paul and Rachel….

Thats all about peaches.

Okay, bye!


This week on the Half-ass Homestead | May 31-June 1, 2020

The week Brian Sr. came home from his brain surgery and we were blessed with so much help on the Camp Farm from mowing the yard to delicious dinners. Honestly, I haven’t had to think about dinner all week. It’s been glorious, and super helpful as I pick up Sr.’s activities. So. much. laundry. We are so thankful for the continued support. Check out these awesome cookies my friend and colleague, Kyle made and sent to us from Houston!

As for Sr., it’s been pretty rough with severe nausea and pain. Mornings are the worst for him and walking is still pretty taxing as his neck is regaining strength and balance is still off. He’s supposed to work up to walking 5 miles a day. The first day he could gather strength to get out side and walk, he only made it across the street and back. We have a long way to go but each day he makes it a little further down the neighborhood and this weekend, he was able to walk with out his walking stick.

Ella and Grace have been playing entrepreneur all week, with an “Amazon delivery” adventure and having lots of meetings. It’s quite the business of the future. I don’t even have to order the items, the just show up in bags with “invoices”. And they are things I love, like my favorite books or high heels from my closet. 🤣

Little Miss Grace has gotten quite good on a bike and earned herself a shiny new one! And Jr. finally earned enough to get his new bike–thanks to his cat sitting job and helping in the yard and garden.

The hens continue to grow and have proven themselves capable of being able to roam free in the back yard mostly un supervised… I guess this means they’re now free range!

In the gardens, plants have been loving the sunshine this week. We’ve seen tons of growth in both the house gardens and big garden. My favorite peonies came into bloom and Ella and Grace helped me make a trellis for the peas and to support the green beans.

With all the extra sun, the soil in our growing rows was starting to dry out and crack. We hadn’t gotten around to adding mulch to the rows, or even deciding what kind of mulch we’d use, so I added grass clippings from our last mow. I’m hopeful this will be a good, free, solution.

Grace found our first strawberry and the girls helped me pull seeds out of a few melons and cucumbers for later planting since our first round of them didn’t take after all the heavy rains a few weeks ago. My sweet friend, neighbor, and fellow gardener, Amiée, brought us a few of her extra cucumber plants as well as a few extra goodies! I mean, I couldn’t be more excited about this book, y’all!


Our First Strawberry!

by Grace, age 5

Yesterday I was in the big garden with my Mom and I found a strawberry! It was not attached to the plant anymore, I guess maybe Vinny picked it. I don’t know how it could have grown not on the plant.

Our first strawberry!

The strawberry was a little bit tiny and red. We took it inside and washed it off. Mom said it was a little too ripe and we shouldn’t eat it. I’m so excited for more strawberries to come! And for the peaches and blueberries to come too! The blueberry bushes have lots of flowers that are almost going to grow to blueberries. We don’t have peaches yet but Momma bought some at the store.

Me by our peach tree with my strawberry

When we get more strawberries we will wash them and eat them. We can make strawberry pie, strawberry cake… I had strawberry cake for my graduation. Did you know I graduated pre-school?! I’m going to Kindergarten next year! I’ll get to ride the bus with Ella and Brian. I’m so excited!

Okay, bye!

*This post was dictated with an app by Grace and edited for spelling and punctuation (and a little bit of clarity) by Mom.


My Mom and Breakfast

By Grace Camp, age 5

*Posts edited by Mom for clarity, spelling, and punctuation.

My Mommy makes breakfast every morning. But not on Mother’s Day. I love cereal. She always adds fruit to my cereal. Yum! Sometimes she makes me eat eggs, I do not like eggs very much but I do like eggs with salsa and cheese. This Mothers Day, Daddy cooked and made eggs. They were SO good. He put spicy cheese on them.

Sometimes I help Mommy make french toast or waffles. She lets me pour and mix ingredients. I like to use maple syrup with mine, but Mom won’t let me pour that anymore.

My FAVORITE breakfast is rhubarb pie! I love helping Mommy make that. Daddy likes it too.

When we cook, Mommy likes to play music on the Google. We both like listening to Lauren Daigel radio. Sometimes we dance.

Maybe we should make some cooking videos for you? But my Mom would need her coffee first. I never make her coffee but sometimes Brian does.

After breakfast we check on the chicks then wash out hands and brush and floss our teeth. We also make our beds and clean our rooms. [Editor’s Note: While beds made and rooms tidy is always the plan, it’s more of a pipe dream in the Camp House, y’all. It has happened before but not often. )


Strawberry- Rhubarb Pie

Last week the girls and I baked our first strawberry-rhubarb pies of the season. If you’ve been reading the blog from the start you know how much I love this pie. I’ve been perfecting my recipe since we moved here and I first discovered we had rhubarb growing in the house-gardens. This of course was the start of our “cooking show” videos. We shared the first video with you earlier this week on how to make my favorite pie crust. Before we jump to the video let me tell you how to make this pie… and why I make it the way I do.

The first time I made this pie, it came out all watery and soupy, a little too tart and not very pretty. I played around with strawberry to rhubarb ratios which made it a little sweeter and prettier–I have green rhubarb so it looks like strawberry-celery pie; more strawberries adds more color. However, I still had a messy, soup of a pie. The additional strawberries actually made this problem worse. I mean, call me crazy, but I think you should be able to use your pie spatula and not a spoon to serve your pie. My search continued.

Many recipes that addressed the soupy issue called for plain gelatin, something I’ve never carried min my pantry. Finally, last year I came across this recipe which called for corn starch (something I always have in my pantry) to battle the watery juices from the strawberries. This recipe also had two big differences to the previous recipes I tried–half the sugar is brown sugar and the use of orange juice.

The brown sugar adds a richer sweetness, due to the molasses, and actually retains moisture so it helps make a more dense pie filling. I actually prefer dark brown sugar over the light brown sugar the original recipe calls for and use the dark in my pies. I also add a little more vanilla for some more depth.

I also LOVE the citrus notes the orange juice adds to the pie. The orange pairs so nicely with the strawberries. I like it so much I incorporate more OJ in my own recipe. I’m also pretty picky when it comes to orange juice, I like Simply Orange’s High Pulp. It makes a difference, I promise!

Cory’s Strawberry-Rhubarb Pie

Ingredients

  • 2 homemade pie crusts
    • 1 egg, beaten
    • sugar, coarse or granulated
  • 3 cups cut strawberries
  • 2 1/2 to 3 cups chopped rhubarb (chopped in 1/2 inch or smaller pieces)
  • 1/3 cup granulated sugar
  • 1/3 cup dark brown sugar
  • 1/4 cup cornstarch (use up to 1 Tbs more if needed)
  • 2 Tbs orange juice
  • 2 Tbs butter
  • A pinch of salt

Tools and Equipment

  • Large bowl
  • Spoon for stirring
  • Measuring cups and spoons
  • Knife
  • Pie dish
  • Basting or pastry brush
  • Cookie/baking sheet
  • Cooling rack

Instructions

  1. Pre-heat oven to 400 degrees.
  2. Prepare filling. In a large bowl, mix together strawberries, rhubarb, sugars, salt, orange juice, and corn starch.
  3. Prepare pie dish. While the filling settles, roll out your crusts. (If you don’t have your crust made yet, no worries, the longer that filling mixture sits they more those flavors blend.) Place bottom crust in the dish.
  1. Fill the pie. Give your filling mixture one more stir (add more corn starch if it’s really juicy, however, you’ll have some juice that you’ll leave in the bowl). Add a few pieces of butter on top o the filling.
  2. Close the pie. Cover the filling with your top pie crust. Get creative with this! You can use cookie cutters to add a design, do a classic lattice, or fun edging. Take your beaten egg and brush it on the crust. Sprinkle with sugar.
  3. Bake. Place the pie on the cookie sheet and bake the pie for 20 minutes. Then reduce the oven temperature to 350, keeping the pie in the oven, and continue to bake for 20-25 minutes.
  4. Cool. Allow the pie to cool for 2-3 hours – place on a cooling rack to help it cool faster.
  5. Enjoy! Our favorite ways to eat the pie warm with vanilla ice cream or cold for breakfast but there’s really no wrong way to do it!

Now for the video. I feel like I should add some context first. This video features several high-speed clips as the girls were kind of over the whole baking and recording thing after a one-hour intermission between the pie crust video and pie filling video to make more crust (I forgot we were making more than one pie so had to whip up a double batch of crust before moving to the filling). Therefore, the filling video took WAY longer than it should have (even with kids) but includes some silly song and dance action for your entertainment.


The Littlest “Pool” on the Block

The redneck pool, aka redneck hot tub, is a bit of a tradition in my family and brings up fond memories of hot summers and water fun.

Summer is HOT, especially down in Texas. Growing up, whether on a hunting lease or our own ranch, we always managed to find an old livestock trough/stock tank to turn into our own mini water park. My mom would make me a swim suit, usually out of those red shop rags, and me, my brothers and my cousins would spend all day crammed in that game and playing with the hose to keep cool. Eventually we had a house with an in-ground pool but the old stock tanks were just as fun!

Me and my big brother, Sheldon

This spring, when the chicks started getting too cramped in our storage bin turned chicken brooder, I found a great deal on a 110 gallon tank at Tractor Supply. Initially I thought once it finished it’s purpose as a brooder, we’d put it in the garden as a container for potatoes and onions. However, when I got it home I discovered a spicket at the bottom for easy draining.

This discovery meant the tank would be perfect for a redneck pool like I had growing up. We’ve been wanting a small pool for the summers but Brian Sr. Says it’ll bring mosquitoes. I think he just doesn’t want to get shafted with cleaning duties (I don’t blame him).

We first filled the tanks a few weeks ago, when it was admittedly too cold to swim. Despite my warnings the kids insisted. They splashed around with blue lips and jaws chattering 90 miles an hour. They had a blast!

Now that it’s feeling like summer, this has been the perfect distraction for the kids—especially on days like today when Brian Sr. and I are away for Sr.’s brain surgery. The kids had a blast in the pool and even coaxed Jack to hop in!

The best part is, the kids work together to keep it clean and filled. Sr. and I do nothing… well except tell Grace to stop yelling and shrieking every time she splashed. I sweat the whole neighborhood hears her, and then hears us yelling her name! 🤣🤷🏻‍♀️

Once the days get even hotter, I’m picturing a little redneck hot tub in in the evenings… because, why not?!


Cory’s Favorite Pie Crust Recipe

It’s light, it’s flaky, and it’s super simple!

Last week, we made the first pies of the spring/summer season.

I love any season with pie, but summer fruit and berry pies are some of my favorites. Strawberry-Rhubarb pie is at the TOP of the list.

When we started this blog and I told the girls we could share recipes on it, they instantly went to wanting to make cooking videos. When I agreed to this, I assumed they meant the hand cooking videos that are so popular with Pinterest and social media these days.

But, of course not, they wanted a full on cooking SHOW type of video. Cue visions of me bringing out my inner Julia Child!

So, I bought myself a great little island for Mother’s Day (I’d been wanting one a few years now anyway) and set up the camera equipment…. on a Monday…. after me working and the kids learning from home ALL day…. not my best idea.

Despite being extra tired, and saying things wrong, like 3/4 cup instead of 1/3 cup (I was tired), it turned out pretty cute (the girls make that part easy). Long, but cute. I’ve posted the video below but let me give you the recipe first.

Cory’s Favorite Flaky Pie Crust

This recipe makes enough crust for one pie with crust on the top and bottom or two pies with crust on the bottom only.

Ingredients

  • 2 Cups flour, sifted
  • 2/3 Cup PLUS 2 Tbs shortening, chilled if you’ve got your shit together but don’t sweat it if you forget
  • 1 tsp salt
  • 6-8 Tbs cold water
  • 1 egg

Cooking tools and equipment

  • 1 medium bowl for mixing
  • Measuring cups and spoons
  • 1-2 pie dishes (one if you are using crust on the top and bottom of the pie.)
  • Flour sifter
  • Pastry cutter (aka pastry blender) or a fork works too
  • Fork
  • Rolling pin
  • Wax paper or a rolling mat (optional)

Preparation

Start by sifting your flour into your bowl. Add salt and mix gently. Measure out half of the required shortening and use the pastry blender to cut it into the flour mixture until you have pea-size clumps. Next, cut the remaining shortening to the dough until it resembles cornmeal. Once the shortening is fully incorporated, add cold water one tablespoon at a time and stir. You’ll add cold water until the dough is moist.

Once the dough is ready, use your hands to grab the dough from the bowl and roll into two flattened rounds. This is where Betty Crocker would say to chill the dough… I say press on my friends!

On a piece of wax paper, or a rolling mat, rollout your dough to to correct size (about one inch wider than your pie dish). Transfer to your pie dish, fill and bake according to your pie recipe. You can also transfer it to a flat surface and place in the fridge if you don’t have your filling prepared. You can also leave it on the wax paper, roll loosely, and place in the freezer if you’re wanting to have some crust ready for a rainy day.

You’ll use the egg once you’ve got your pie ready for the oven. Just mix up the egg with a fork then brush it on top of the crust and sprinkle with sugar to give it a nice brown finish.

If any of this is unclear, it’s probably because I am not a food blogger and never follow any recipe to a T. You can check out this article for a similar, more official recipe.


And now, for the video:


This week on the Half-ass Homestead

May 17-24, 2020

Despite being stuck inside most the week, this week was an eventful one; full of hard work, celebrating the birthdays and mourning the loss of those we love. We celebrated Brian Sr’s birthday as well as one my best friend, Rachel’s birthday. We attended the funeral of my Opa virtually and spent time telling stories of his life.

Last Sunday was a busy day! Ella Rose helped me use some old lumber we found under the pine trees to build a raised bed for our new cut flower garden and then fill it with a combination of dirt from an old compost pile on our property and cheap topsoil from Tractor Supply. I also made a small bed around the mailbox for a little curb appeal and filled it with a few new plants and the tall marigold variety we started by seed a few weeks ago. It rained like a monsoon most of the week but weather cleared up for the weekend. Ella Rose and Grace helped sow seeds in the new cut flower garden more on that later.

We also made our first “cooking videos” as we made our rhubarb pie for us and a few friends. 🤣 Tune into tomorrow for the first.

After all the rain, the coop was starting to smell. The chickens are getting to big! Our coop “for 4-6 chickens” is getting a little tight. Jr. helped me clean the coop on Friday while the girls and a few neighborhood kids kept an eye on the chicks as they roamed the yard (maintaining a social distance of course).

This weekend we FINALLY added a gate to the garden, it’s the epitome of half-ass but it gets the job done for now.

We also planted the last of the new plants including two new strawberry plants, two blueberry bushes, eggplant and our special peach tree.

Grace’s take on Saturday’s planting.

Brian Sr. was also busy getting the lawn on the Camp Farm in tiptop shape and working on the “super Chevy”. Look at that pretty green lawn!

Looking ahead to next week we hope to build (or buy) more space for the chicken to run and get mulch in the growing rows.


Grace takes us to the Big Garden

Last week, Grace couldn’t get enough of the big garden. From taking the chicks out, to seeing the seeds we planted a few weeks ago sprout from the ground, to stomping all over the growing rows when she was thought no one was looking 🙄 . She also decided hats were essential attire.

We’ve made a LOT of progress in the 4 days since we recorded this, can’t wait to show you all this week!