


Cut Flower Garden plan: Year 1
It’s almost here! Sun’s out, buds out y’all! Yes, sad attempt at a little gardening humor. Real sad.
Regardless, it’s warming up here and we’re only a handful of weeks from the danger of the last frost! I’ve got my bulbs waiting and little seedlings thriving indoors. A few weekends ago I spent the morning laying out the garden plan for the new cut garden.
I decided that since I want my cut flower patch to not only produce beautiful bouquets for the house but also look beautiful in the yard–think cottage garden– I needed to think about what I put where.
Inspiration:

This is where the teacher in me takes things a little far.
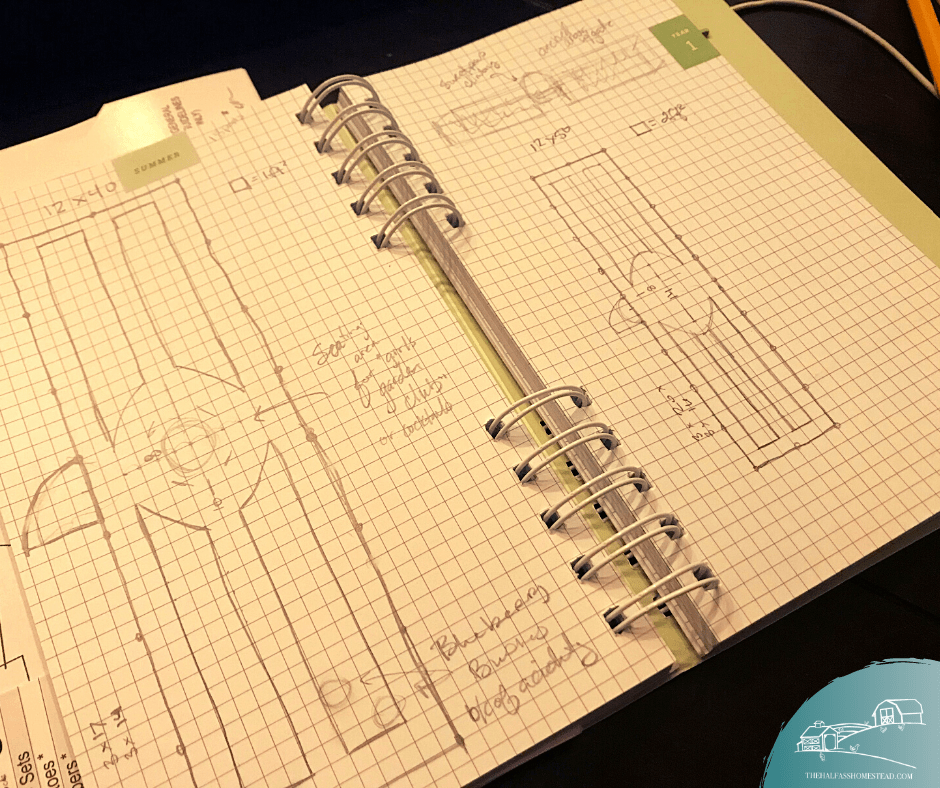
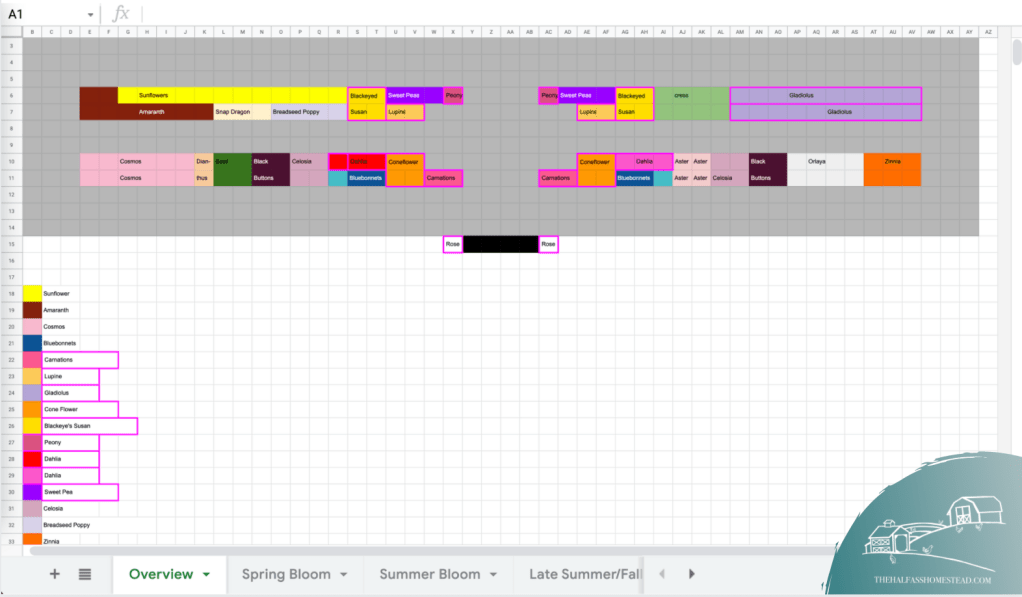
First, I decided I needed an info sheet for with all the basic information on each plant I’ve got for the garden, including planting/seed sowing preferences, bloom, height, and harvest time. This way I could determine where to place each plant so there’d be visual variety and plants wouldn’t overshadow their neighbors. I also added an image of each plant, so I could picture the adult plant and consider color.
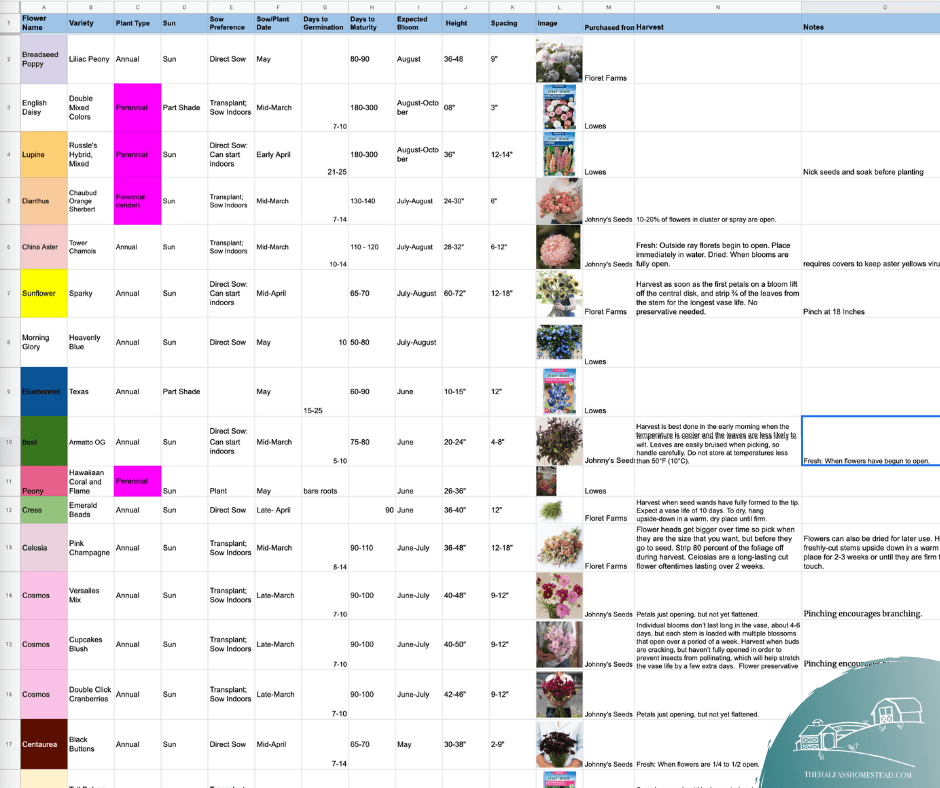
I then created another sheet with the layout, considering the height and spacing for each plant, and marked which plants were perennials–so I knew where plants would be coming back each year and where I’d need to replant. Finally, I created a layout with bloom times as I want to have something blooming in each part of the garden from spring to fall.
I know… overkill; but mentally I feel like this garden will be a piece of cake! I’ve thought of my plants from nearly every angle and will have no excuse for hesitation regarding which plant to put where. Now I just have to concern myself with the walkways and perimeter…. what type of fence posts will I invest in and will I do my walkways with mulch or pea gravel? 😱
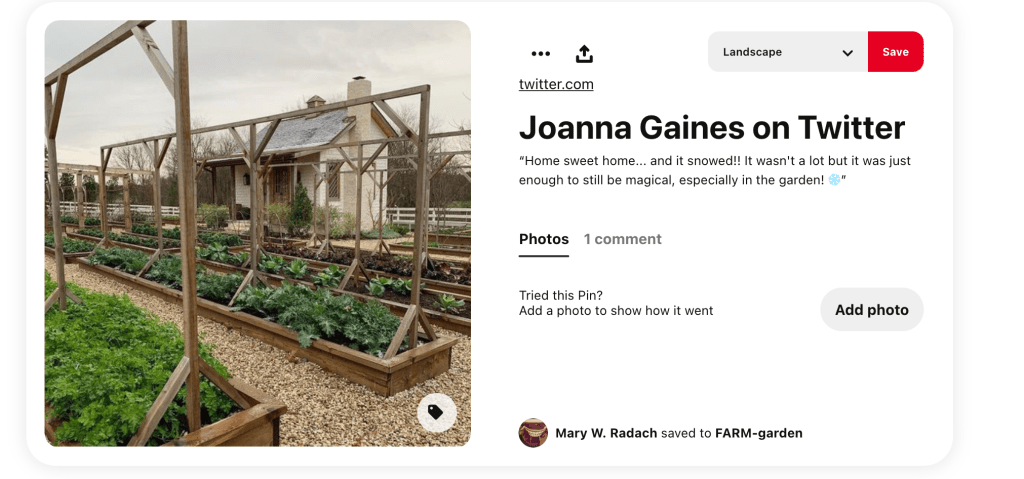
Here’s some inspiration I’ve been pulling from:


This Week on the Half-Ass Homestead: March 7-13, 2021
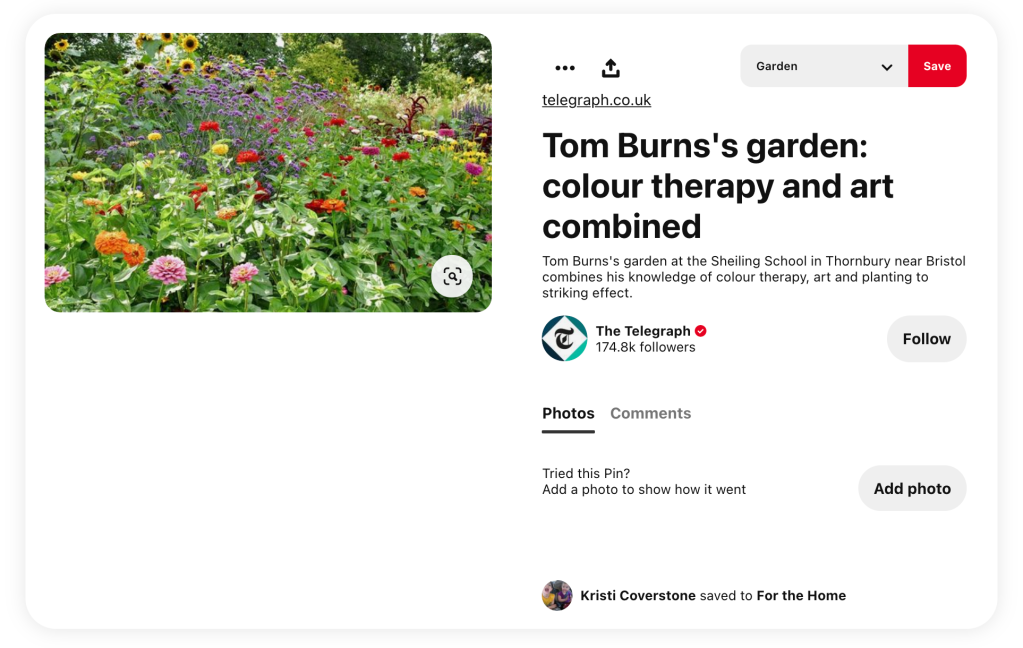
This week was a busy on for me at work but in the back of my mind I all could think about was how I needed to get seeds started. I spent evenings in my newest book, In Bloom: Growing, Harvesting, and Arranging Homegrown Flowers All Year Round, and to say I’m inspired is an understatement. The pictures are beautiful and have me dreaming or a cottage style cut flower patch.
Last week I put in my request with 811 and got news that the entire side yard is clear! Unfortunately they didn’t inspect the back yard as I asked so I had to put in another request. I think this was due to the comment I made on the request that made is sound like I just wanted the back left side of the yard. Despite not having the rest of the back surveyed yet, I’ve officially decided where I’m putting the garden!

As I shared before, some of the pain points of the current location are that it’s too far from the how, and a water source. After some thought, I’ve determined the side yard is the best place for the garden – it’s close to the house, and the water hose, so I’ll be more likely to get out there and watering will be easier. And even better, it’ll be right in my line of sight while I work and paint from the sunroom! I watched the sunlight on the plot throughout the day to ensure it receives plenty of sun.

So this morning I got right to planning. First with the vegetables using my handy-dandy Clyde’s Garden Planner to map out what, how and when I can plant. I found it easier for me to visualize everything by making a chart with each month and a list of what would need to be planted indoors, outdoors, and harvested.


I did this same thing with my flowers and added the tasks to one of my new 5 year planners. Both planners have places to log information about planting and harvesting but I like the open layout of the of the Royal Horticultural Society record book.
After I laid out the scope and sequence of planting and harvesting times, I took a break to get the the girls shoes for Roseanne and Cameron’s wedding next week . On the way home we stopped by Lowes… I mean, shut up and take my money, Lowes! I not only picked up the landscape fabric I went in for, but I also came home with tulips (because the girls had to have their own tulips ), gladiolus (because they remind me of my Mom), peonies (my favorite), dahlias, and some evergreen trees to add a screening around the fire pit area.

When we got home, I went out to see what I had to work with in regards to dimensions for the side garden. Because we need to maintain a passage large enough for us to drive a truck in the back–for when we have mulch and gravel– I’ve got a maximum width of 12 feet but have a lot to work with regarding length. Rather than doing the traditional raised rows of 18 inches, I’m opting for 3 ft wide rows for more surface area to plant in – like a hybrid raised bed/raised row.
As I was showing the girls, they requested a sitting space for their “Girls Club”. The Girls Club was just started this week between the girls and Ava. When they meet they “take notes on nature” and have even requested a guided tour of the emerging plants in the house gardens. ❤️ They also plan to have art on Wednesdays, picnics on Thursdays, and show-and-tell on Fridays. With this adorable request in mind, I’m thinking I’ll opt for 40 or 50 ft and have sketched out a few plans.
Tomorrow I’ll spend the day planting seeds, marking off the side garden with landscape fabric, and maybe even moving soil.

This week on the Half-Ass Homestead: February 28-March 6, 2021
Things are continuing to warm up on the Camp Farm. I cannot wait to get out to refresh the gardens!
I’ve spent evenings reading more about mini-farming and continuing to contemplate raised beds vs raised row. I finally opened up the book that started it all: Raised Row Gardening: Incredible Organic Produce with No Tilling and Minimal Weeding I’m still deciding but there were some really great reminders here – like the costs of raised beds and the effort in amending a raised bed vs raised row. Until I have to new spot picked out, I can delay my decision. And speaking of placement! I put in my request with 811 to have them come mark the utilities.
It’s still a little cool to clean up the gardens but it’s nearly prime time to start seeds! I ordered another germination kit so I’ve got two 72 cell trays. I had a few seeds for the flower garden from Floret Farms but Grace and I went a little crazy at Lowe’s Saturday 😬
I mean she kept tossing seed packets in the cart and I was too tired to sift through them much. I figured I’d return what we don’t decide to use.
Also, I’ve added two new books to my ever growing library of homesteading. I can’t wait to crack them open tonight!
In other news, Grace and Ella have adopted a stink bug as a pet… his name is Larry and apparently he likes oatmeal.

This week on the Half-Ass Homestead: February 21-27, 2021
It feels like the 2021 garden planning is officially underway! Well almost.
As the snow has begun to melt and we’re seeing the grass for the first time in weeks, I’m anxious to get an actual layout of the 2021 gardens mapped out so I can make a list of plants and supplies. I’m constantly thinking about it. However, there are a few things getting in my way.
We’ve decided to move the big garden, which is currently situated on the property line between the Camp Farm and the Norris Homestead. We’d like to build a legitimate fence around the garden and this is the only way I can convince Sr. to let me do so – he hasn’t been interested in investing so much into a fence not completely on our property should the Norris’ ever move. Not that the Norris’ are planing to move but they had discussed it a few years ago so Tarin and I discussed relocating the garden this year. Both families will still share the garden.
Having the garden on our property will not only allow me to get a proper fence but it will make it easier – I hope– for us to get in there and maintain it. The garden’s current placement is too far for us to easily reach with a hose which meant either several trips with a watering can or lengths and lengths of hose coiled up in the backyard. We can also consider redesigning the garden; something that’s been spinning in my mind as I read a new book on mini-farming which touts raised beds over row gardening for many valid reasons. Though the book doesn’t present an argument against raised row gardening which is different from traditional row gardening, it has me thinking differently about spacing and such.
Moving the garden, however, grants some challenges. First that’s a LOT of soil to move and we’ll want tot make sure to plant grass seed ASAP before the weeds roll in on the vacant turf. Also, WHERE will I put it? I know there are a few places I don’t want to put it given where and how the kids play in the backyard currently. I’m thinking side yard because the grass is patchier here given it get so much sun. The side yard is also closest to the Norris property which is important since it’s still a shared space. However, I wonder is this is too sunny, especially for crops that need less sun. Also, if I ever get my dream greenhouse/she-shed, I imagined placing it its also closer to the fire pit on the other side of the backyard. Placement also depends on what’s UNDER the space. Since we’ll have to place the fence posts, or raised bed corner posts if we go that route, below the frost line, I need to call 811 to get the entire backyard’s underground utilities marked –I’ve been waiting for the snow to melt to do so.
Once I figure out where the garden is going, I’ll have to land on how I want to redesign the garden: raised row or raised bed… any opinions??? This mini-farming book has me intrigued and I’m only in the “overview” chapter. Once good thing I’ve learned is that we really should be journaling EVERYTHING if we want to be serious about our gardens. With not one but TWO five-year journals I should be set up for success.
I’ll continue to share some of the interesting things I’m learning from this book as I go. This next week my goal is to schedule 811, begin a list of plants (in my journals!)and determine which and when I’ll start any from seed – since I now know how to start seeds! I also plan to get Jr. outside with me and start some grounds clean up for the house gardens… his not-so-favorite thing to do with me (see his January post “I Hate Gardening“. 🤣)
The Big Garden, Year One: Our Half-Ass Fence
This first year of raised row gardening is the most expensive, as you spend you money on not only plants, but dirt, mulch and other essentials supplies you may not have. Initially, we decided we’d try to avoid the need for building a fence during the first year since we didn’t have it in the budget. We made plans for using marigolds and Irish Spring soap to deter animals from our garden.

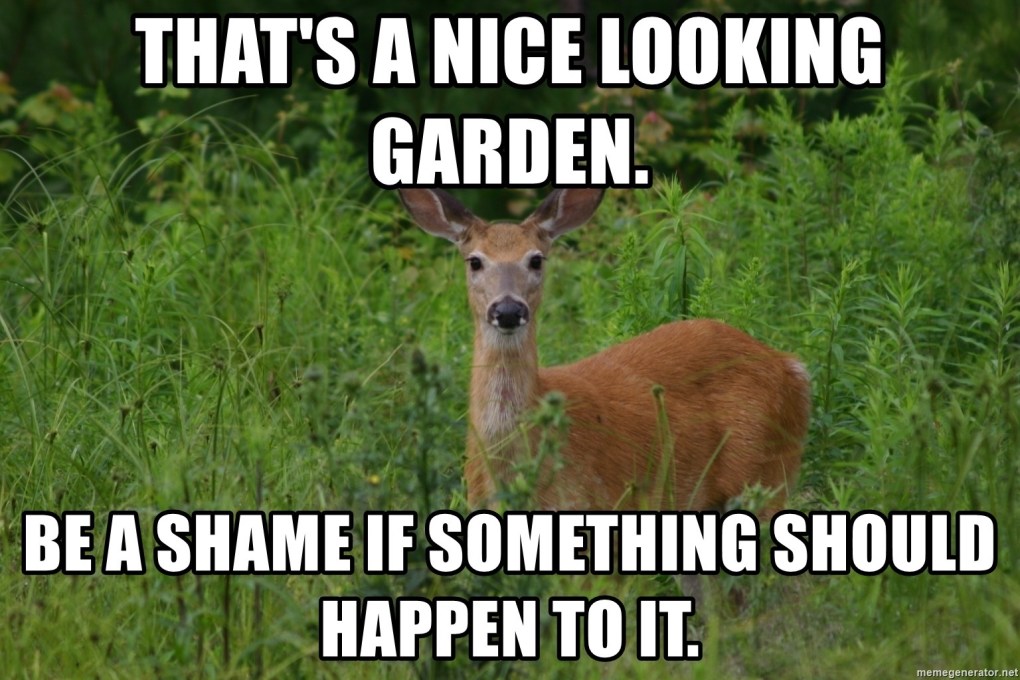
Before we got out plants in the garden, a groundhog helped itself to our tender crops like they were a buffet. Luckily, (for the groundhog) it stopped hanging around in the house shortly before planting time, However, once we got the plants in the ground, Tarin and I started feeling a little paranoid about all our plants just hangin out in the open. In addition to groundhogs, our beautiful neighborhood is full of wildlife, including and abundance of deer and rabbits. I felt like every time I looked out the window the deer were standing around the garden mocking me.
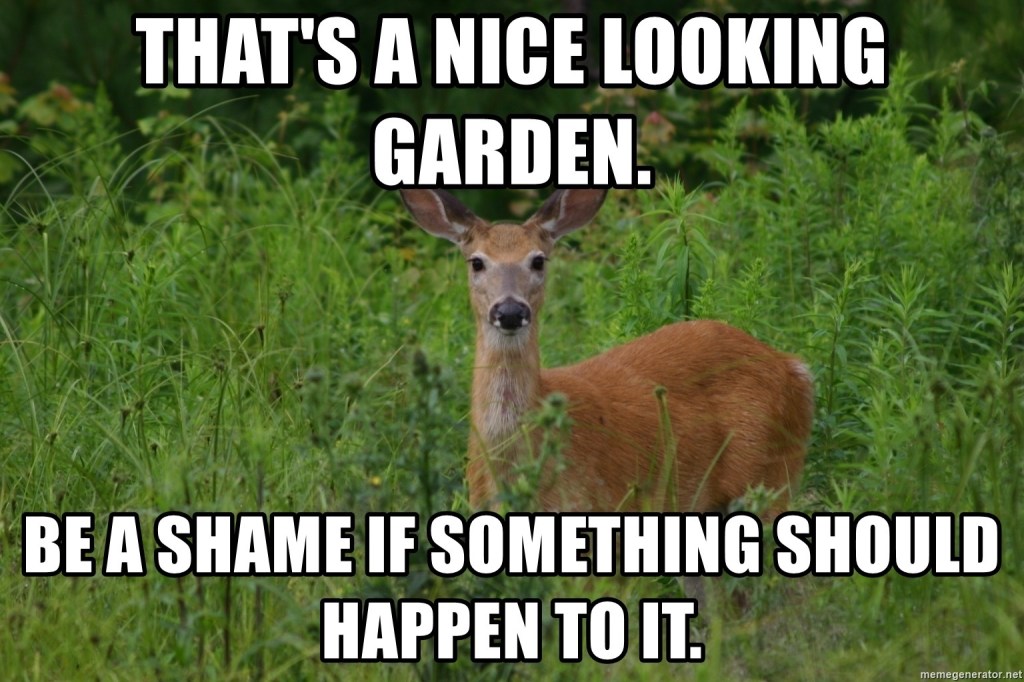
While we never saw them IN the garden, their presence around it was enough.
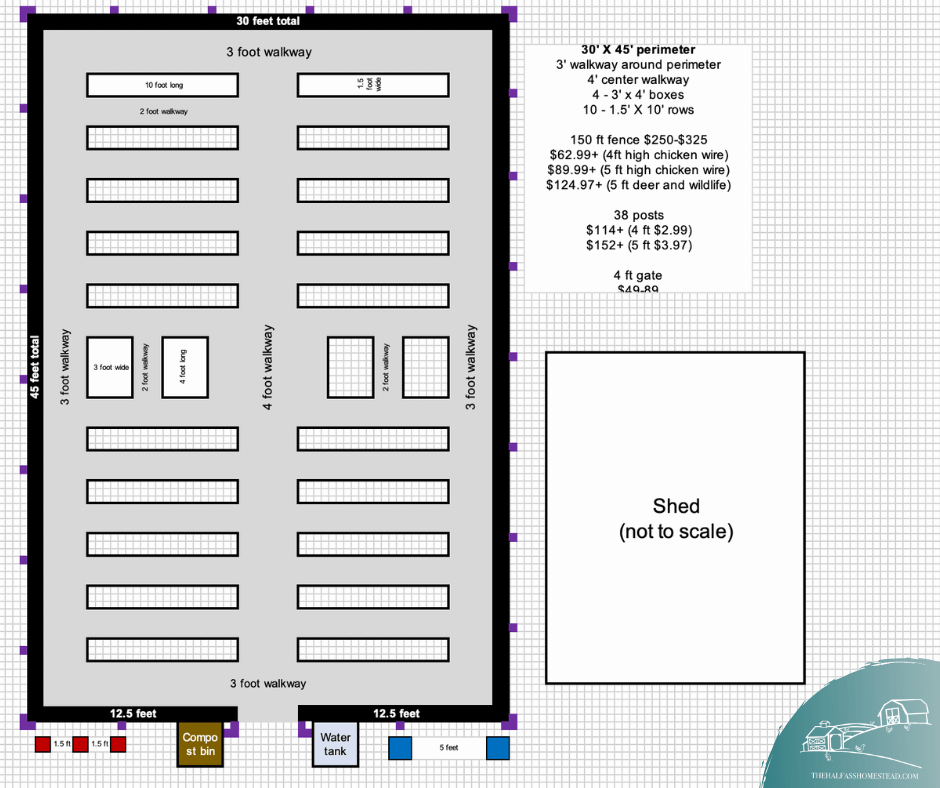
We asked around on some local Facebook groups about the costs to have someone build our fence and the cost of labor alone was way out of our budget. Having mended fences on our old ranch back in Texas, I was pretty confident we could do a simple fence ourselves. After a few conversations with my Dad about how to go about it and the spacing of posts, and pricing our various fencing materials, we decided to got with t-posts and chicken wire as they were the most inexpensive options. Again, the garden plan I created came in super helpful when figuring out our materials list!
I picked up all the materials at Tractor Supply and had Brian Jr. Help hammer the t-posts in place. When Tarin got home she and I tackled the chickenwire, which was a bitch. The wire and posts were the same height… until I put the posts in the ground… because I hadn’t accounted for that 🤦🏻♀️. Chicken wire is also super flimsy and can easily stretch out of shape. So all along the top the wire was loose given we didn’t have supports aside from the posts and we were too lazy to rig up a fence stretcher–which would have made some difference I’m sure.
All in all though, we got the fence up, and the extra fence height I hadn’t accounted for went on to the ground as a skirt on the perimeter, which would be great for keeping small animals from digging in the fence.
By the time we got to the gate our half-assery was in full swing, partly because we were exhausted, partly because we were discouraged but how not-so-great the fence looked, and partly because we had not idea what we were doing. I resorted to a primitive gate method we used on many fences in ranches back in Texas… we just took some chicken wire across the gate opening and used wire to hook it closed. It was by no means sturdy but it closed the gap.

Surprisingly, we had no animals break into the garden last year! Our hopes were to build a new, legit fence this year… more on that later.
The Big Garden, Year One: The Garden is Taking Shape Despite Shitty Soil
In a raised row garden, there is no need for tilling and working the ground soil or building boxes for your garden beds. You simply cover your walkways with a non-producing mulch, straw, or rock material and create raised rows of quality soil about 18 inches wide and 6 inches high in the middle.
Once we had out big garden plot marked off, we decided to cover our walkways first with a weed barrier cloth since we didn’t have it in the budget to spend a lot on materials for the walking paths. This way if we couldn’t get enough mulch to cover the pathways, the cloth would keel the grass and weeds down. I created another diagram to help us determine where and how much cloth we’d need.

With the weed prevention fabric down, we then covered them with straw–our cost-effective “mulch” alternative–and ordered our soil. Unfortunately, we were a little late on the garden soil request. Because we waited until the last possible moment to order our soil, many places were out–something Tarin and I hadn’t considered as a possibility. I finally found a local place that not only had soil, AND would deliver that weekend.
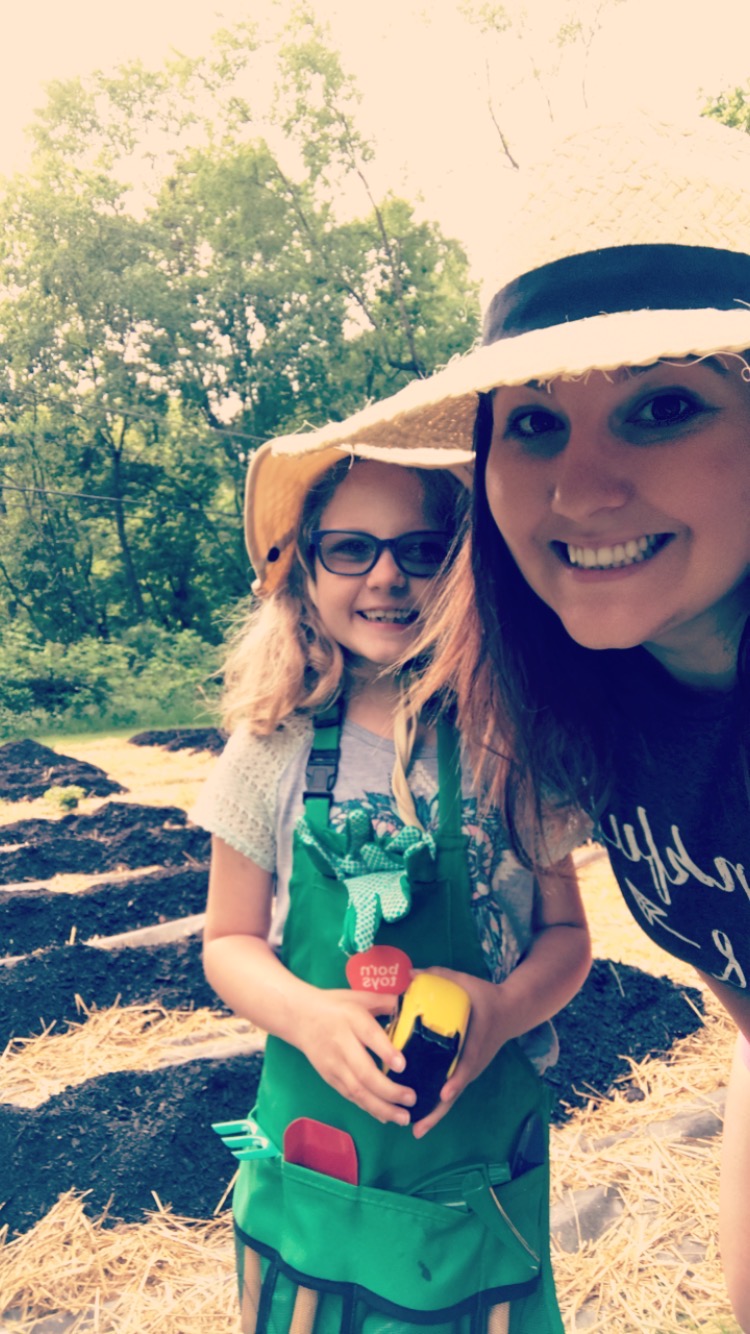
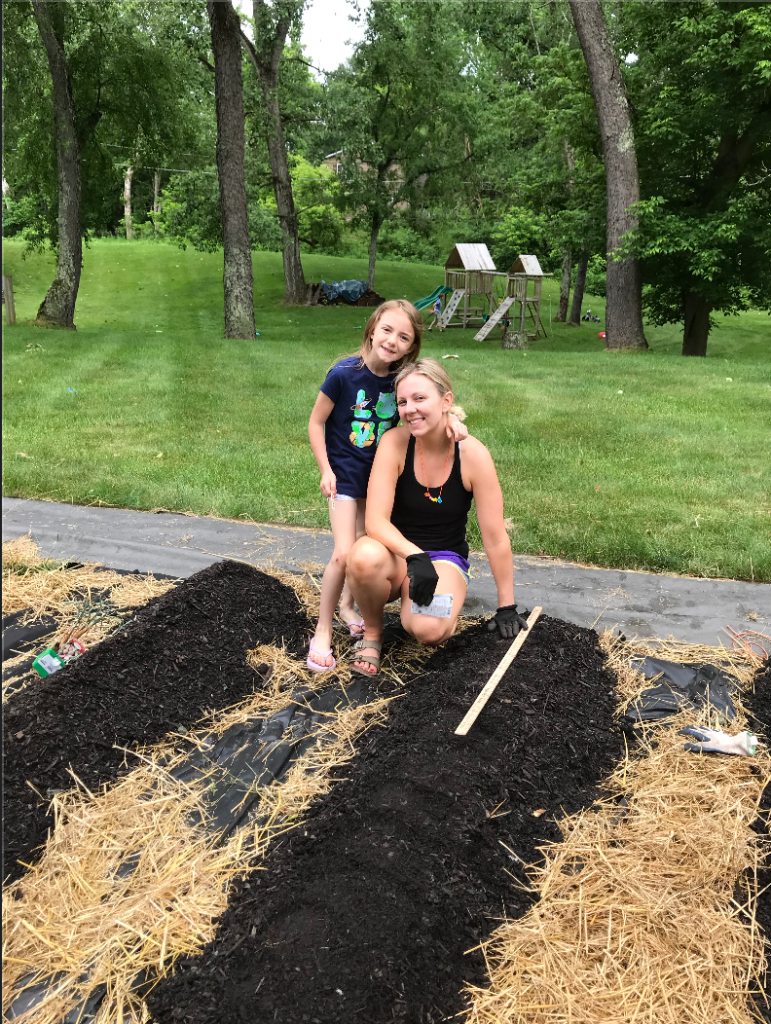
The soil arrived when Tarin and Clint were away so the Camp kids helped me transport all our dirt into rows. Pretty sure this is when Jr. began to hate gardening 🤣 However, I was pretty proud of how hard Grace worked with her kid-sized shovel. We were all pretty proud once it was done.
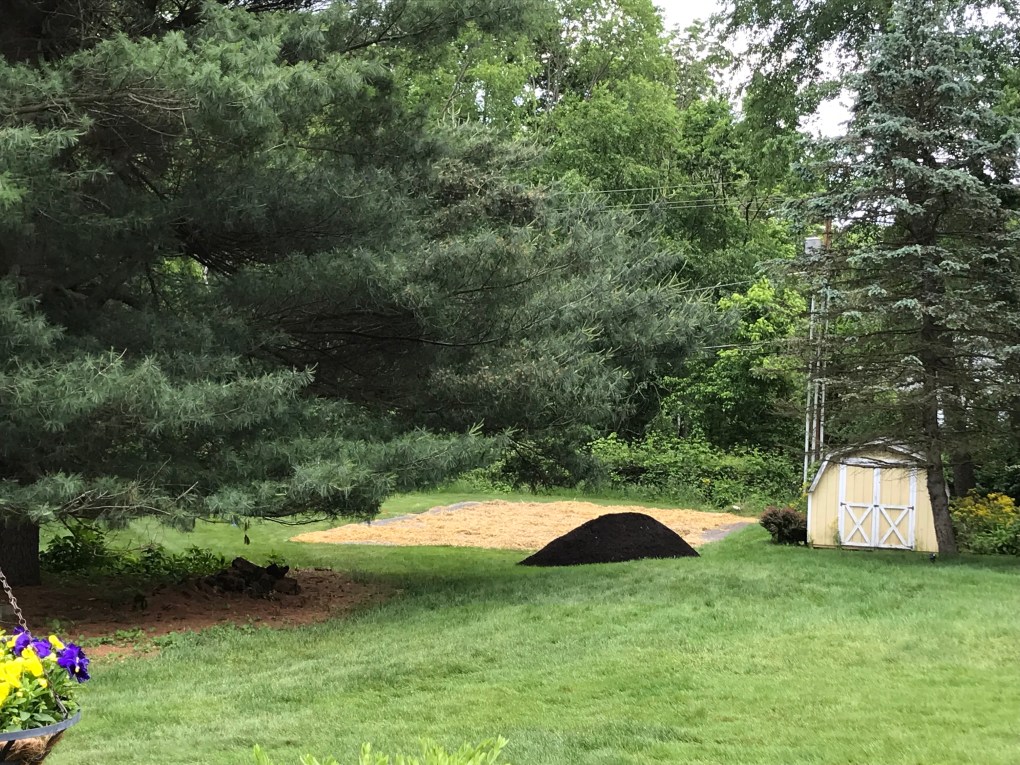

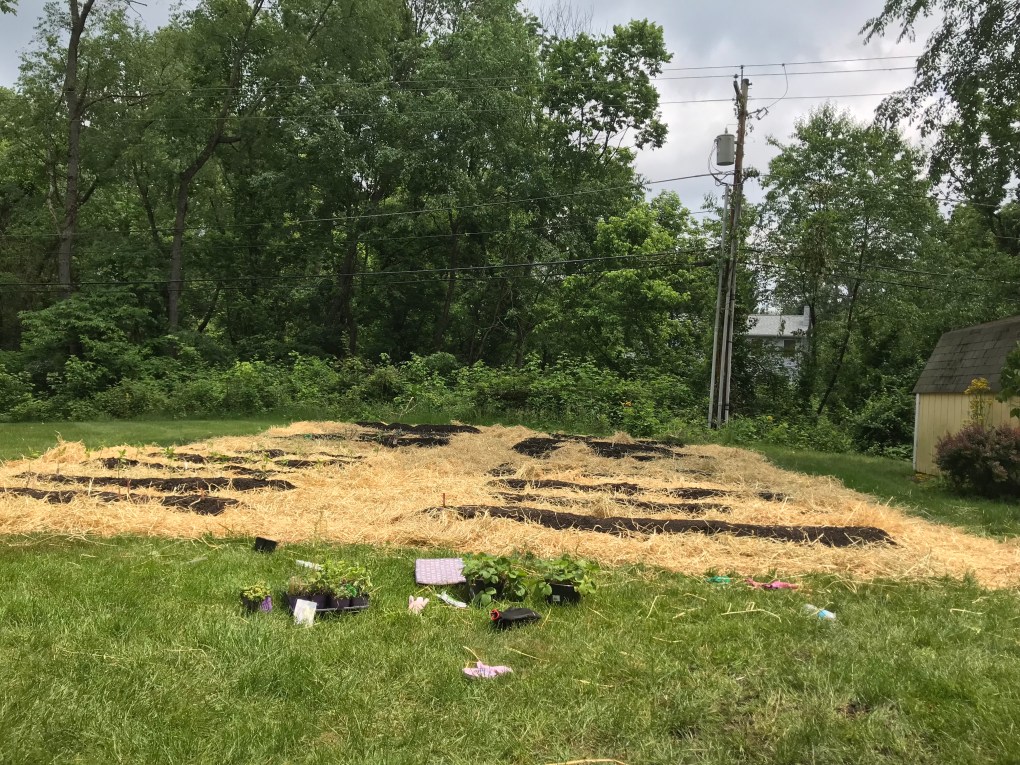
Unfortunately, all that soil, wasn’t as great as we thought it was. When Tarin and Clint got home we went out to the garden to bask in the way everything was coming together. As Tarin looked at the soil in rows, she commented on how much the soil looked like mulch… in fact it looked exactly like mulch. In a panic, I called the place we ordered it from to confirm they had not delivered mulch instead, I mean it was all ready in TWENTY ROWS, how on earth was I going to give it back to them?!
The dirt company had a completely calm response to our freakout. Turns out, it was soil but it hadn’t finished “processing”. We were told to “just water it and it’d look like dirt” and as time went on the particles would finish breaking down. In other words… It was totally mulch, y’all!
Despite mulchy soil, we were ready for planting… or so we thought.
Our first lesson in plants
While we were able to get pricing on dirt (your most expensive purchase in year one), we had no idea what plants or seeds would cost. Tarin and I meandered around the aisles of our local nursery, list in hand, but overwhelmed at the where to start. Luckily we stopped an employee who shared with us which plants we could start by seed–a much cheaper option (cucumbers, squash, zucchini, carrots, green beans, peas, lettuce, spinach and kale) and which we should transplant ( tomatoes, peppers, broccoli, cauliflower, and herbs).
After several questions, I’m sure the gardening specialist, sensed our ignorance so she shared that we needed to “harden” our plants before planting and that we should wait until after the danger of frost has past–which is after Mother’s Day here. While we were bummed we’d have to wait 3 weeks to plant, we were thankful for this extra bit of wisdom as it snowed into mid-April that year.
While we waited for Mother’s Day, and the danger of frost to pass, we followed the instructions from the garden specialist and hardened our plants on the back deck. Our plants sat on the picnic table toughening up, that is until a ground hog decided it was a buffet and ate all our broccoli and cauliflower down to nubs. That groundhog wasn’t the slightest bit phased by the marigolds surrounding the plants, nor my presence in their sunroom Trying to remain professional during a video conference while the groundhog went to town. (This was the first sign we’d need a fence.)
What’s ‘hardening’ mean? Plants from nurseries are started and kept in greenhouses, living the lush life. The shock of transplanting them to new soil combined with sudden and constant exposure to the elements (wind, sun, rain) can kill theses tender little plants. therefore, you need to toughen those babies up by gradually increasing their exposure to the outdoors over a week or so–setting them outside during the day and bringing then indoors in the evenings if cold or daytime if really hot.
Once Mother’s Day passed, and what was left of our plants had sufficient time to harden, we got to planting in our mulchy soil. We had everything except the popcorn seeds (that row remained empty the whole year) and the boxes for our herbs, onions, and potatoes (which we never got around to planting).

This first year of raised row gardening is the most expensive, as you spend you money on not only plants, but dirt, mulch and other essentials supplies you may not have. We decided we’d try to avoid the need for building a fence during the first year since we didn’t have it in the budget. We made plans for using marigolds and Irish Spring soap to deter animals from our garden… more on that later.
The Big Garden, Year One: Big Plans
Early last spring, while watching the kids play in our back yards, Tarin and I began chatting about gardening. I was loving reaping the benefits of well established gardens around the house–thanks to Kay the original owner of our home and her 45 years of love in the garden. Most of the house gardens are floral, with the exception of the one side herb garden and the two rhubarb plants in the back. While I had made great use of the rhubarb, mint, lemon balm and chives, there was more I wanted to grow. Tarin and I talked about wanting a garden with more produce.
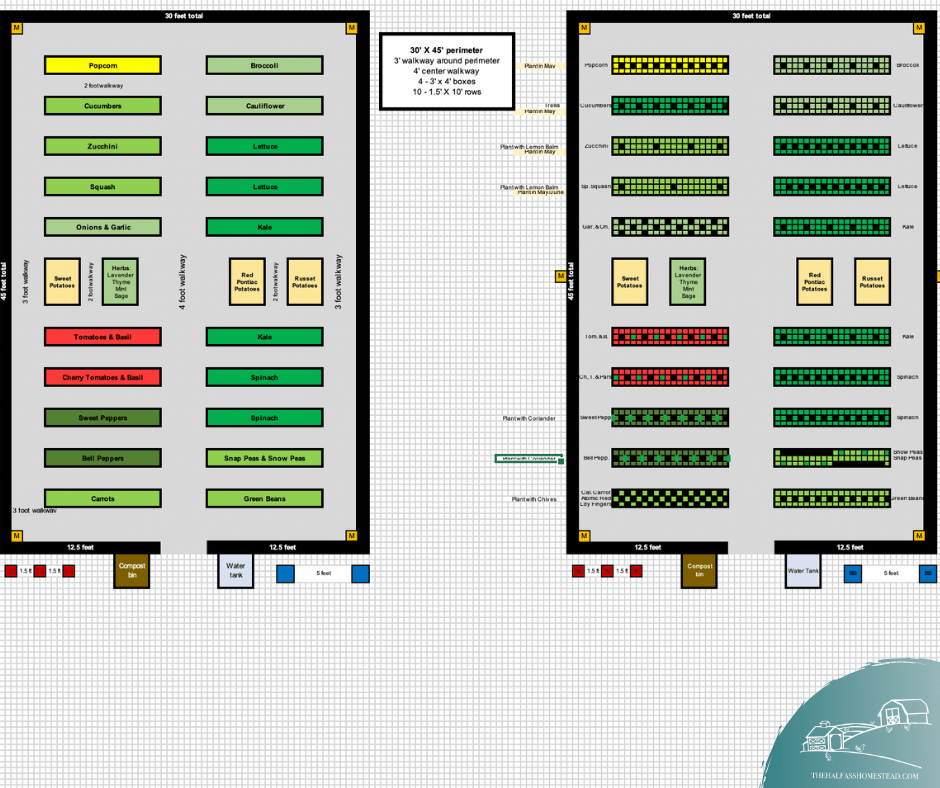
Soon after our chat I found out about a class being offered at a local nursery by Jim and Mary Competti on their raised row gardening technique, which promises a well producing garden with minimal work– and not a lot of tilling, weeding, hoeing, and spraying. (Hallelujah!) I registered but by the time Tarin got around to it, there were no more seats. The plan was I’d go, take copious notes, and we’d start our garden shortly after. I didn’t make it to the class but did find the Jim and Mary’s Old World Farms blog with details on their technique and even complete garden plans!
Big Plans
After a morning of coffee and researching in the blog while sitting on Clint and Tarin’s back deck, we were inspired by this Old World Garden Plan featuring a 45 x 60 foot garden. Tarin and I marked off a spot where our yards meet of the same measurements. When we asked what Clint thought about our initial layout, he gently suggested we might scale it back a little, “because you know, it’s your first year. You may not like gardening.” 🤣
Once we had the spot laid out, I made a detailed, scaled plan using excel, and we made a list of materials. We may have opted for a smaller plot but our garden is not exactly small. With a 30 x 45 perimeter, 20 ten foot growing rows and space for raised boxes for herbs, onions and potatoes it’s plenty big to produce crops for our two families.

It may have been tedious, but this plan made to scale has served us well, from determining the amount of materials we needed for growing rows and fencing to how many plants each row can fit and where we would place them.
This year, I simply copied last year’s plan, rotated where our crops would go in the growing rows and made modifications to the crops we wanted.
But just because we had a plan, doesn’t mean we knew what we were doing. After all, we weren’t looking to invest a lot of time or money into this new garden–we were really banking on the promises of the hassle-free gardening technique of raised row gardening . Also, neither one of use had a great track record with keeping plants alive. In Texas everything I planted burned up in the summer heat or died from neglect when life got busy. We definitely half-assed this first year int he garden. In an upcoming post I’ll share how we made this plan a reality and tell you about our soil mishap.
